background image

8

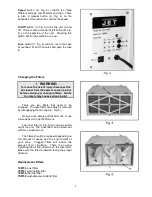
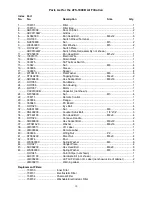
Speed button (B, Fig. 3) controls the three
different settings, Low, Medium and High. There
is also a manual button (A, Fig. 4) on the
backside of this unit which controls the speed.

On/Off button (C, Fig. 3) turns the unit on and
off. There is also a manual on/off button (B, Fig.
4) on the backside of the unit.

Pressing this

button will turn the machine on Low.

Fuse switch (C, Fig. 4) will pop out in the case
of overload. Wait 3-5 minutes and push the fuse
in.

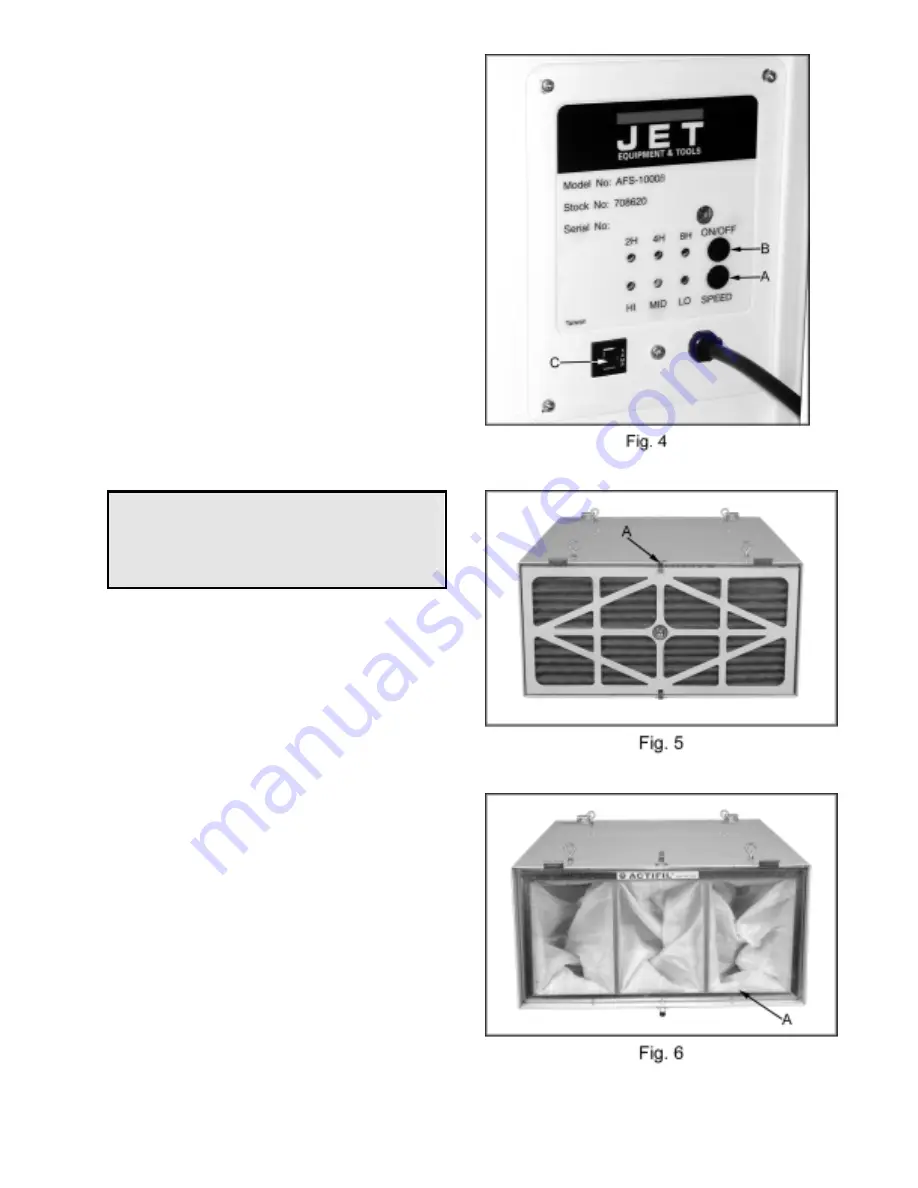
Changing the Filters


WARNING

To reduce the risk of injury disconnect the

air cleaner from the power source (unplug)

before servicing or changing filters. Failure

to comply may cause serious injury!

There are two filters that need to be

changed. The outer filter can easily be removed
by disengaging the two clips (A, Fig. 5).

Now you can simply pull the filter out, or use

a screwdriver to pop the filter out.

The inner filter (A, Fig. 6) can now be pulled

out of the unit. The inner filter can be blown out
with air, or washed out.

The filters should be replaced depending on

the amount of usage and the environment of
your shop.

Clogged filters will reduce the

amount of air circulation.

There is an arrow

indicating the air flow direction on the outer filter.
Make sure the filter is inserted facing the proper
direction.

Replacement Filters

708733 inner filter
708731 electrostatic filter
708734 charcoal filter
708732 washable electrostatic filter

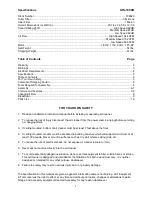
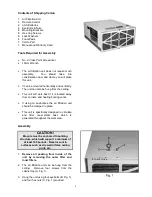
Summary of Contents for AFS-1000B

Page 1: ...OWNER S MANUAL AFS 1000B Air Filtration JET EQUIPMENT TOOLS INC P O BOX 1349 253 351 6000 A WMH Company Auburn WA 98071 1349 Fax 800 274 6840 www jettools com e mail jet jettools com M 708620 5 01...

Page 2: ...accidents normal wear and tear repair or alterations outside our facilities or to a lack of maintenance THE JET GROUP LIMITS ALL IMPLIED WARRANTIES TO THE PERIOD SPECIFIED ABOVE FROM THE DATE THE PRO...

Page 3: ...ep tools sharp and clean for best and safest performance Follow instructions for lubricating and changing accessories 16 DISCONNECT TOOLS before servicing and when filters 17 USE RECOMMENDED ACCESSORI...

Page 4: ...cian or service personnel if the grounding instructions are not completely understood or if in doubt as to whether the tool is properly grounded Use only three wire extension cords that have three pro...

Page 5: ...changing filters 3 If ceiling mounted bottom of air cleaner must be at least 7 feet above the floor 4 If ceiling mounted mounts must be anchored to building structure which will support a minimum of a...

Page 6: ...st if it is located away from corners and heating cooling vents If using on sawhorses the air filtration unit should be clamped in place This unit is specifically designed to circulate and filter non...

Page 7: ...ceiling or wall 2 Place one end of bracket underneath the lip of the cabinet 3 Attach the bracket A Fig 2 with two hex cap screws B Fig 2 and two lock washers C Fig 2 4 Repeat steps for remaining thr...

Page 8: ...lters Failure to comply may cause serious injury There are two filters that need to be changed The outer filter can easily be removed by disengaging the two clips A Fig 5 Now you can simply pull the f...

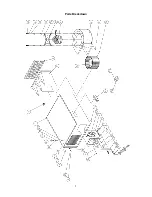
Page 9: ...9 Parts Breakdown...

Page 10: ...g 1 25 OO1057 Motor 1 CA001000B Capacitor not shown 1 26 NF050800 Nut M5 4 28 708711 Remote Control 1 29 330004 Flange 1 30 330043 PC Board 1 31 OO1023 Eye Bolt 4 32 NH061000 Nut M6 4 33 SN490200 Coun...

Reviews: