16
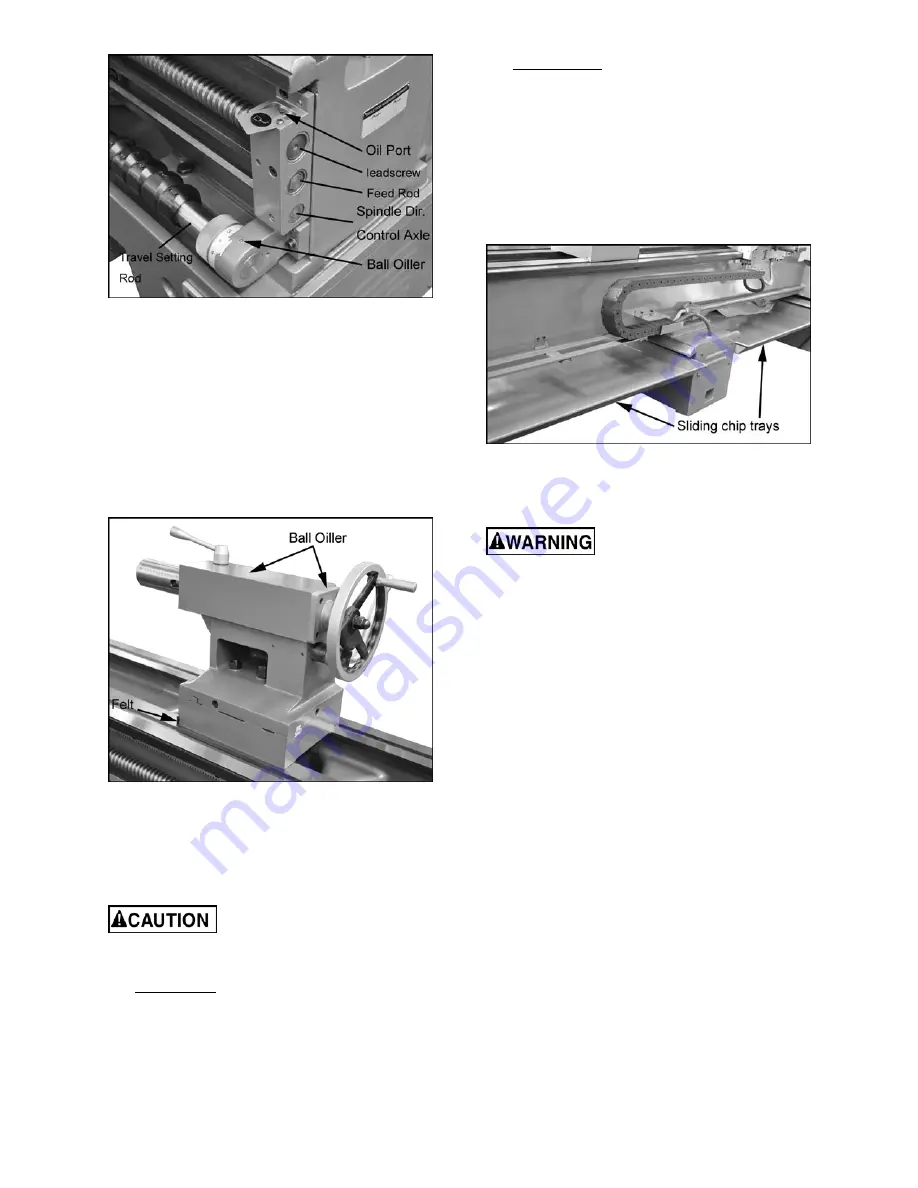
Figure 14 – Lubrication points
14.
Travel Setting Rod
– Periodically insert SAE
20W oil into the ball oiler on each end of the
rod (Figure 9).
15.
Tailstock
– Daily lubricate two ball oilers
(Figure 15) on top of tailstock with SAE 20W
oil.
The anti-dust felt beneath the tailstock that
runs along the ways should be cleaned weekly
with kerosene. If the felts become damaged,
replace them.
Figure 15 – Tailstock lubrication
16.
V-Belts
– Regularly check and adjust the
tightness of the v-belts to prolong their service
life. See
section 13.5
.
9.1
Coolant Preparation
Follow local regulations and/or
coolant manufacturer’s recommend-dations for
use, care and disposal.
1.
GH-2680ZH:
Remove access cover on the
tailstock end of the lathe stand. Make sure
coolant pump has not shifted during transport.
Pour four gallons (approximate) of coolant mix
into the reservoir.
GH-26120ZH:
Pour coolant (approx. four
gallons) into one of the chip trays (Figure 16).
Or, slide out one of the chip trays and pour
directly into the side trough on the center
stand.
2. After machine has been connected to power,
turn on coolant pump and check to see that
coolant is cycling properly. Flow is controlled
by the tap at the base of the nozzle.
3. Reinstall access cover or chip tray.
Figure 16 – GH-26120ZH chip trays
10.0
Electrical Connections
Electrical connections must be
made by a qualified electrician in compliance
with all relevant codes. This machine must be
properly grounded while in use to help protect
the operator from electrical shock and possible
fatal injury.
The main motor is rated for 230/460V and comes
from the factory prewired at 230V. Confirm that
power available at the lathe’s location is the same
rating as the lathe.
A minimum 10-gauge wire should be used for
incoming power leads.
IMPORTANT:
The lathe must be wired properly
and phased correctly.
The spindle must rotate
counterclockwise
(as viewed from the tailstock
end) while the
feed rod must rotate clockwise
(as
viewed from the tailstock end). If the motor runs
and the lathe operates, but the
rapid traverse does
not function
, this signals that the machine has been
incorrectly phased. If this occurs, disconnect lathe
from power source and switch any two of the three
power leads (not the green ground wire).
Main Power Switch
(Figure 17).
Power Source Cable Receiver
(Figure 17).
Make sure the lathe is properly grounded.
Summary of Contents for GH-26120ZH
Page 34: ...34 18 0 Change Gear Diagram Figure 54 ...
Page 35: ...35 This page intentionally left blank ...
Page 40: ...4 1 1 Bed Assembly I Exploded View ...
Page 41: ...5 1 2 Bed Assembly I for 120 ZH only Exploded View ...
Page 44: ...8 2 1 Bed Assembly II Exploded View ...
Page 45: ...9 2 2 Bed Assembly II for 120 ZH only Exploded View ...
Page 48: ...12 3 1 Headstock Assembly I Exploded View Ⅲ Ⅳ Ⅴ Ⅶ Ⅵ Ⅱ Ⅰ Ⅱb Ⅶb ZⅡ ZⅠ ZⅡ ...
Page 51: ...15 4 1 Headstock Assembly II Exploded View ...
Page 54: ...18 5 1 Headstock Assembly III Exploded View ...
Page 56: ...20 6 1 Headstock Assembly IV Exploded View Ⅰ Ⅱb Ⅱ Ⅲ Ⅳ Ⅴ ...
Page 59: ...23 7 1 Headstock Assembly V Exploded View Ⅶ Ⅶb Ⅵ ...
Page 62: ...26 9 1 Gear Box Assembly I Exploded View Ⅱ Ⅲ Ⅰ ...
Page 64: ...28 10 1 Gear Box Assembly II Exploded View ...
Page 67: ...31 11 1 Gear Box Assembly III Exploded View ...
Page 70: ...34 12 1 Brake Assembly Exploded View ...
Page 72: ...36 13 1 Saddle and Cross Slide Assembly Exploded View ...
Page 75: ...39 14 1 Tool Post and Compound Rest Assembly Exploded View ...
Page 77: ...41 15 1 Apron Assembly I Exploded View Ⅱ Ⅹ Ⅱ Ⅲ Ⅷ Ⅹ Ⅸ Ⅹ Ⅳ Ⅰ Ⅹ Ⅰ Ⅵ Ⅲ Ⅴ Ⅶ ...
Page 80: ...44 16 1 Apron Assembly II Exploded View Ⅺ Ⅹ Ⅲ Ⅻ Ⅸ Ⅹ Ⅶ ...
Page 83: ...47 17 1 Apron Assembly III Exploded View Ⅰ Ⅱ Ⅴ Ⅲ Ⅳ Ⅵ ...
Page 85: ...49 18 1 Apron Assembly IV Exploded View ...
Page 87: ...51 19 1 Tailstock Assembly I Exploded View ...
Page 89: ...53 20 1 Tailstock Assembly II Exploded View ...
Page 91: ...55 21 1 Steady Rest Assembly Small and Large Exploded View ...
Page 95: ...59 24 1 Travel Stop Assembly Exploded View ...
Page 100: ...64 27 2 Electrical Diagram ...


