12
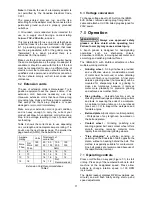
When OFF button is pushed,
the wheels may take a few moments to
completely stop.
The grinder will automatically shut off after 10
minutes of inactivity.
Note: After extended operation, the grinder
housing may be warm to the touch. This is not
abnormal.
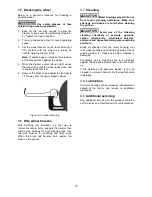
Figure 7-1: keypad
7.2
Precautions
7.2.1
Wheel grinding
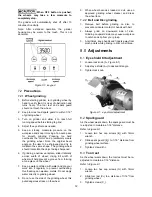
1. Before starting grinder, turn grinding wheel by
hand to verify that it is clear of obstruction and
turns freely. The tool rest and spark guard
should not touch the wheel.
2. Keep tool rest and spark guard to within 1/16"
of grinding wheel.
3. Turn on grinder and allow it to reach full
running speed before starting to grind.
4. Adjust the eye shield as needed.
5. Keep a steady, moderate pressure on the
workpiece and keep it moving at an even pace
for smooth grinding. Pressing too hard
overheats the motor and prematurely wears
the grinding wheel. Note the original bevel
angle on the item to be sharpened and try to
maintain the same shape. The grinding wheel
should rotate into the object being sharpened.
6. If grinding a narrow workpiece, slide it laterally
across width of wheel. Using full width of
wheel will help prevent a groove from forming
at one place on the wheel.
7. Keep a water pot filled with water and dip your
work into it regularly to prevent overheating.
Overheating can weaken metals. Do not apply
water directly to grinding wheel.
8. Do not use the side of the grinding wheel; this
puts dangerous stress on the wheel.
9. When wheel becomes loaded or dull, use an
approved grinding wheel dresser and dress
the wheel face.
7.2.2
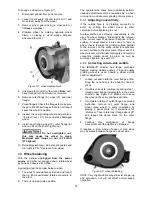
Belt and Disc grinding
1. Remove belt before grinding on disc, to
prevent accidental contact of hands with belt.
2. Always grind on downward side of disc.
Grinding on upward side may cause workpiece
to catch and slip from your grasp.
3. At all times, keep hands and fingers away from
pinch points while grinding in disc or belt area.
8.0
Adjustments
8.1
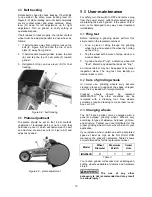
Eye shield tilt adjustment
1. Loosen lock knob (A
1
, Figure 8-1).
2. Adjust eye shield (A
2
) to desired tilt angle.
3. Tighten
lock
knob.
Figure 8-1: eye shield adjustment
8.2
Spark guard
As the wheel wears down, the spark guard must be
re-adjusted to maintain a 1/16" distance.
Refer to Figure 8-1.
1. Loosen two hex cap screws (B
1
) with 14mm
wrench.
2. Slide spark guard (B
2
) to 1/16" distance from
grinding wheel surface.
3. Tighten
screws
(B
1
).
8.3
Tool rest
As the wheel wears down, the tool rest must be re-
adjusted to maintain a 1/16" distance.
Refer to Figure 8-1.
1. Loosen two hex cap screws (C
1
) with 14mm
wrench.
2. Slide tool rest (C
2
) to a distance of 1/16" from
grinding wheel.
3. Tighten
screws
(C
1
).
Summary of Contents for IBGM-8VS
Page 19: ...19 12 1 1 IBGM 8VS Variable Speed Grinder w Multitool Attachment Exploded View ...
Page 21: ...21 13 0 Electrical Connections IBGM 8VS Grinder ...
Page 23: ...23 This page intentionally left blank ...
Page 24: ...24 427 New Sanford Road LaVergne Tennessee 37086 Phone 800 274 6848 www jettools com ...


