8
Assembly
Your bench grinder requires only the assembly of
the eye shields and tool rests. For your safety, do
not plug the grinder into a power source until all
adjustments are complete. An adjustable wrench
and a Phillips screwdriver are the only tools you will
need to make all normal adjustments and wheel
changes on this grinder.
Be sure that the bench grinder
is unplugged and the power switch is in the
OFF position.
Do not plug in the grinder to
power until it is inspected for shipping damage,
fully assembled, and moved to it1s permanent
location! Failure to comply may cause serious
injury!
Do not operate this grinder
without all guards and shields in place and in
working order! Failure to comply may cause
serious injury!
Chipped or cracked wheels can
break up and cause serious damage to the
grinder and/or severe injury to the operator!
Regularly inspect wheels for damage!
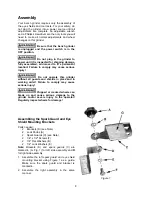
Assembling the Spark Guard and Eye
Shield Mounting Brackets
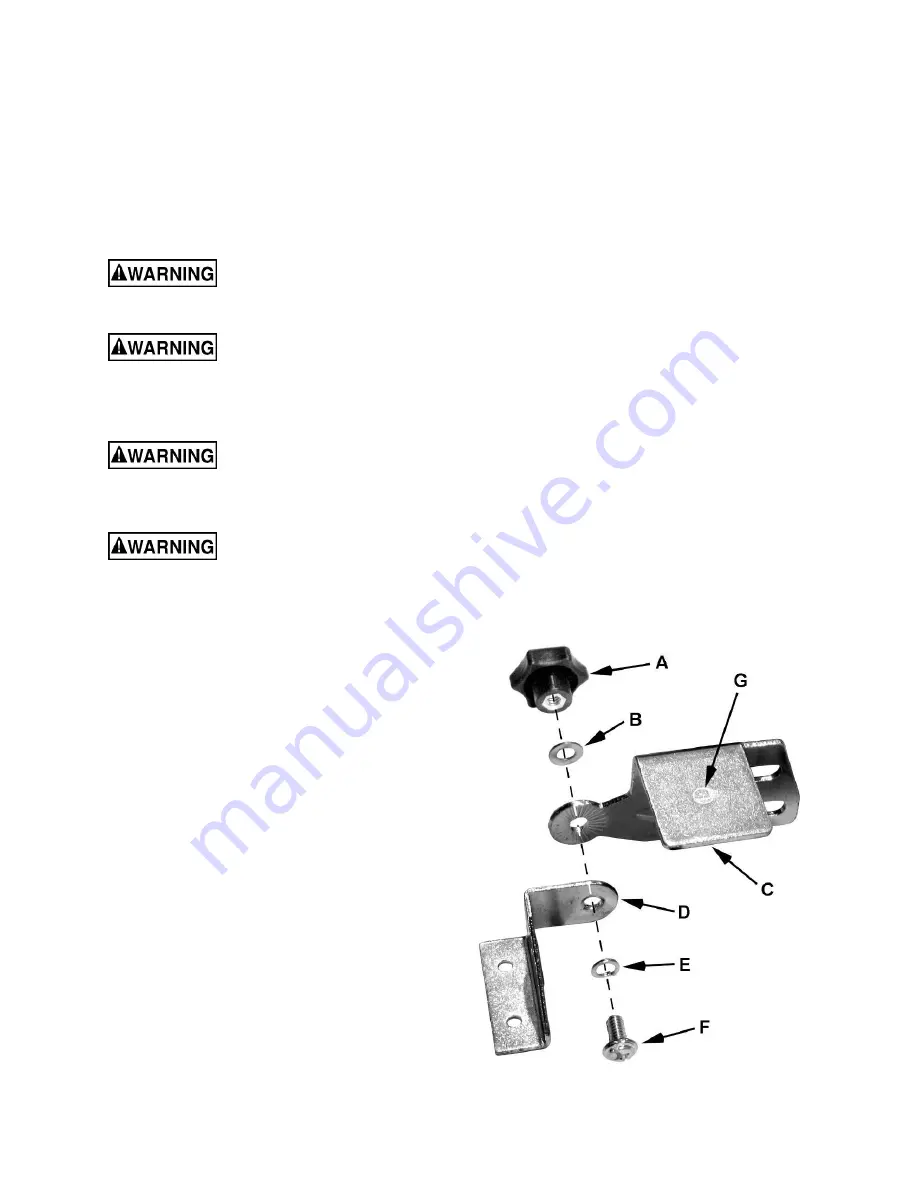
Parts needed:
2 Brackets (D) (see Note)
2 Lock Knobs (A)
2 Spark Guards (C) (see Note)
2 1/4" x 1/2" Screws (F)
2 1/4" Flat Washers (B)
2 1/4" Lock Washers (E)
Note:
Brackets
(D) and
spark guards
(C) are
marked
L
(G, Fig. 1) for left side assembly and
R
for right side assembly.
1. Assemble the left
spark guard and eye shield
mounting bracket
using Figure 1 as a guide.
Make sure the spark guard and bracket is
marked
L
.
2. Assemble the right assembly in the same
manner.
Figure 1
Summary of Contents for JBG-8A
Page 18: ...18 Assembly Drawing...
Page 19: ...19 Wiring Diagram...


