8
You get a better result at high feedrate
and small depth of cut.
Digital Scale:
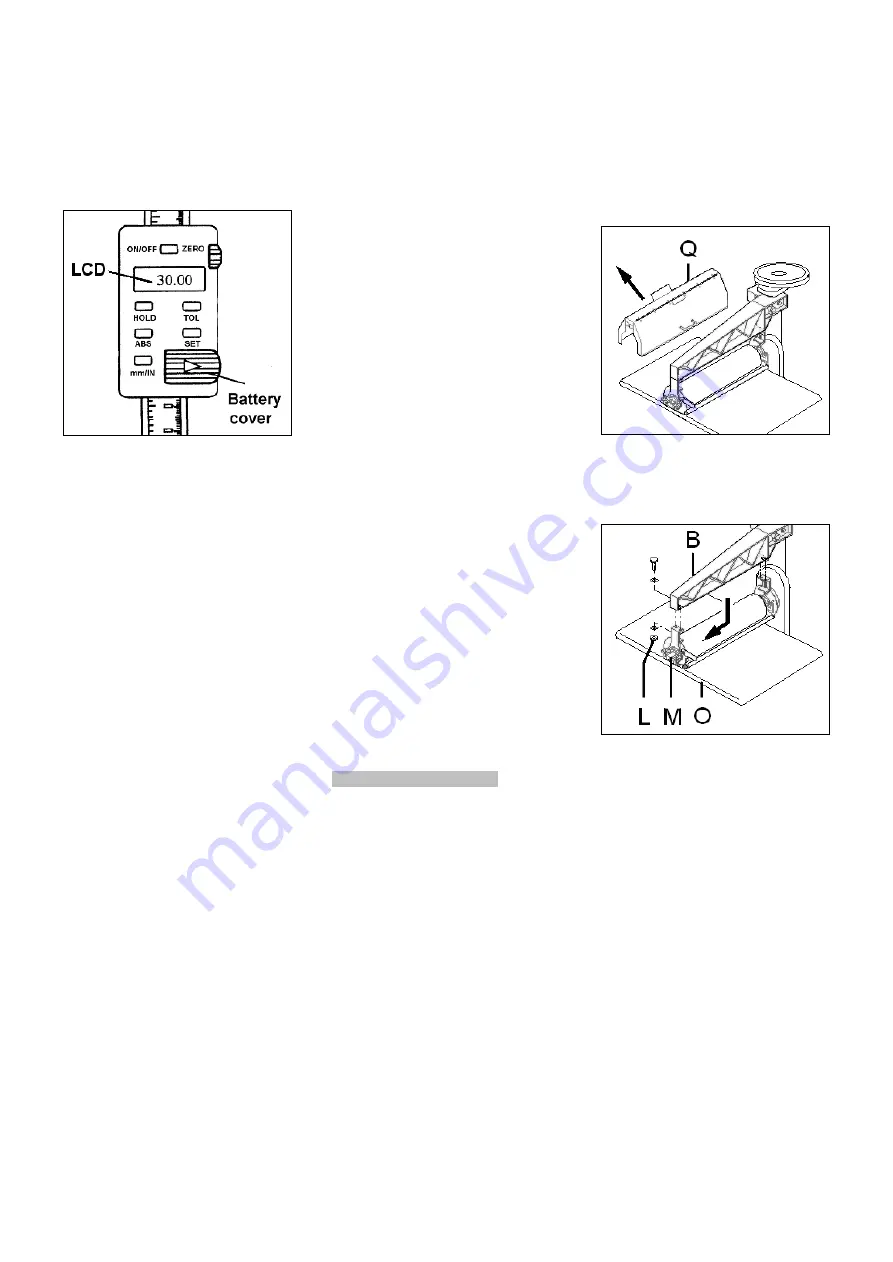
The digital scale (Fig 14) can be used
to display the depth of cut.
Fig 14
This device uses a 1.5-volt battery cell
(SR44 or G-13A).
If it needs replacing, slide off the
battery cover. The +pole of the battery
is facing out.
ON/OFF:
Press ON/OFF button to power on.
Press ON/OFF button 3 seconds for
power off.
Incremental Measurement (INC):
Is used to display the amount of
material to be removed from a
workpiece.
Press ABS until "INC" appears.
Reset to Zero (Zero):
Press the ON/OFF button to reset to
zero.
Absolute Measurement (ABS):
This function is not generally used in
brush-sanding operations.
To calibrate:
Brush a board and measure the
thickness.
Without moving the table, press the
SET button– the indicator will flash
“SET”.
Press and hold the SET button until
the digit you want flashes.
Press SET (no longer than 1 second),
the digit will increase by one each
time SET is pressed.
When finished, press and hold the
SET button until indicator “SET”
flashes.
Press SET again (no longer than 1
second). The indicator “SET”
disappears and the value you just
input is displayed on the LCD.
The setting will be kept in the
memory, even when the digital display
is turned off.
It only needs resetting after battery
replacement.
IMPORTANT:
Always place the digital display in
“INC” mode before turning it off.
If you turn it off while in “ABS” mode,
your absolute setting will default to
zero.
Memory (HOLD):
The Hold button is used to record a
critical setting for reference for the
purpose of later resetting to that same
setting.
For example: In the event that
brushing a board is aborted in the
middle of the operation:
Press the HOLD button
à
The dimension is "frozen" in the
LCD display.
Press HOLD again to return to normal
measurements.
Stroke limit (TOL):
This function is not used on the brush
sander.
7. Setup and adjustments
General note:
Setup and adjustment work may
only be carried out after the
machine is protected against
accidental starting by pulling the
mains plug.
7.1 Selecting brush grit
It is important to select the proper grit
of brush for the type of sanding being
performed to achieve maximum
brushing results.
The machine is equiped with a 80 grit
brush, which works best in most wood
scructure brushing applications.
Brushes with different grit are
available on option.
7.2 Changing the brush-drum
Disconnect the machine from the
power source (pull mains plug).
Remove the dust hood (Q, Fig 15) for
better access (open halve way and
pull back).
Fig 15
Rise the conveyor table (O, Fig 16) to
the highest position, to support the
entire brush assembly (M).
Fig 16
Remove the 4 hex bolts and nuts (L)
Lower the conveyor table approx
30mm, this takes away the V-belt
tension.
Pull the brush assembly to the left and
disengage the V-belt.
Loosen 2 grub screws (P, Fig 17) and
remove the pulley.


