background image


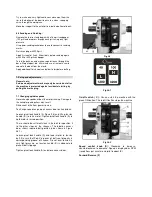
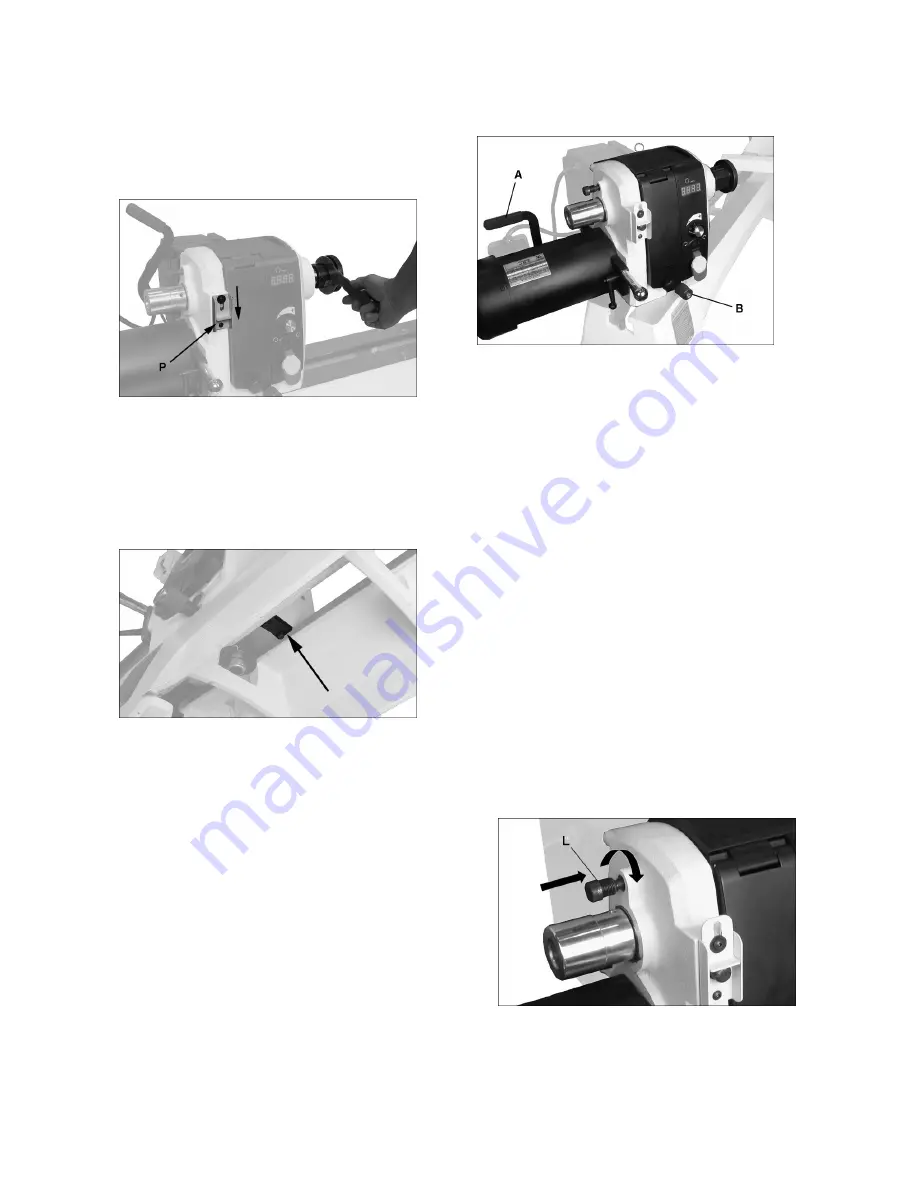
7.2 Headstock spindle lock 

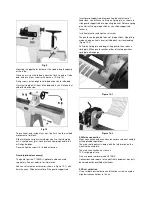
Push  spindle  lock  pin  (P,  Figure  27)  and  rotate  spindle 
slightly until pin engages. Slide plate downward to hold pin 
in locking position. 

Release spindle lock by pushing plate upward. 


Fig 27 

Caution: 

Never press the spindle lock while the spindle is turning! 


7.3 Headstock Rotation 

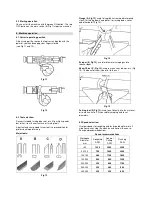
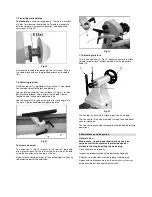
IMPORTANT: Remove anti-rotation block  (Figure 28) with 
4mm hex key before attempting to rotate headstock. 


Figure 28


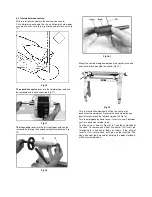
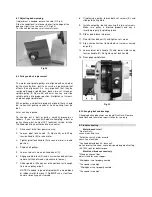
To rotate headstock: 

Loosen lock handle (A, Figure 28-1). 

Unscrew knurled knob (B) counterclockwise until it can be 
pulled outward.  

Pull  knob  (B)  outward  and  rotate  headstock  to  desired 
position.  The  headstock  has  seven  positive  locking 
positions. 

NOTE:

  Be  careful  not  to  pinch  your  fingers 

against the bed as you rotate headstock. 

Release knob (B) and it will seat itself with an audible click 
when the headstock reaches a positive lock position. 

Lift handle (A) to lock headstock. 

Rotate knob (B) clockwise until it engages the threads. 

Unscrew the index plunger (B, Fig 28) counter clockwise. 

Loosen the headstock lock handle (A) and pull the index 
plunger (B) to turn the headstock. 


Fig 28-1


For larger workpieces the head stock will have to be turned 
90°, the extension added to the tool rest. 

Caution:

 always operate lathe with the headstock locked in 

position. 

The headstock can be positioned anywhere along the 
machine bed. 


7.4 Headstock spindle index 

 
Indexing  is  used  to  create  evenly  spaced  features  in  a 
workpiece,  while  keeping  the  lathe  spindle  locked;  for 
example,  when  cutting  flutes  on  a  spindle  blank  with  a 
hand-held  router,  while  the  spindle  blank  is  secured 
between lathe centers. 
The JWL-1640EVS lathe provides 36 indexing positions at 
10-degree increments. 
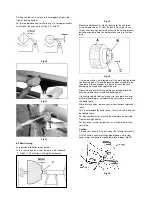
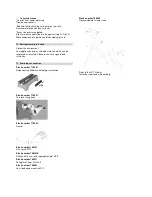
Rotate  spindle  using  handwheel  until  index  pin  (L,  Figure 
29) aligns with desired hole.  
Screw index pin into hole until it engages spindle. 
Perform desired procedure. 
Unscrew index pin until spindle is released. Rotate spindle 
to next desired hole, and repeat.  

Disengage index pin before starting lathe. 

IMPORTANT:

 Do not use index pin  to lock spindle, which 

will  cause  unnecessary  wear  to  the  pin.  Use  spindle  lock 
for this purpose. 


Fig 29 

Summary of Contents for JWL-1640EVS

Page 1: ...esigned in consideration with the standards 2 Warranty The Seller guarantees that the supplied product is free from material defects and manufacturing faults This warranty does not cover any defects w...

Page 2: ...pace for safe operation and workpiece handling Keep work area well lighted The machine is designed to operate in closed rooms and must be placed stable on firm and levelled table surface Make sure tha...

Page 3: ...ng processed due to centrifugal force Only process selected woods without defects Unbalanced workpieces can be hazardous Injuries can occur when feeding tooling if tool supports are not correctly adju...

Page 4: ...75mm Faceplate J installed on lathe Tool rest extension K Faceplate wrench L Levelers M Tool shelf N Hardware 8 Socket hd cap screws 5 16x1 1 4 HP1 8 Lock washers 5 16 HP2 8 Flat washers 5 16 HP3 2 So...

Page 5: ...the help of a second person raise bed and leg assembly right side up Rotate the levellers as needed to establish level for the lathe Tighten the hex nut on each leveller against the leg casting Now he...

Page 6: ...into mounting bracket at rear of headstock You will have to lift up on spring pin as shown to slide guard support rod into mounting bracket Release spring pin and it will snap into position as you sl...

Page 7: ...wood into round stock for turning bowls and plates for turning beds coves and other detail Fig 14 Fig 14 Scraper B Fig 13 used for diameter scraping and to reduce ridges Skew Chisel C Fig 13 used to...

Page 8: ...red workpiece between the spur drive centre and the tailstock mounted live centre Fig 19 Fig 19 Turn the tailstock hand wheel until the live centre well penetrates the workpiece Reverse the hand wheel...

Page 9: ...backing block D and the backing block screwed to the face plate A piece of paper in the glue joint will prevent damaging the wood when separated later Mount the face plate with the workpiece already a...

Page 10: ...plug 7 1 Changing spindle speeds Never change speeds without the motor running Damage to the variable speed pulleys may result Disconnect lathe from power source To change speed range open access door...

Page 11: ...the index plunger B Fig 28 counter clockwise Loosen the headstock lock handle A and pull the index plunger B to turn the headstock Fig 28 1 For larger workpieces the head stock will have to be turned...

Page 12: ...est base and offers greater reach for the tool rest when turning off the bed using the headstock at an angle as shown Make sure the clamp bushings K are pulled apart sufficiently to accept the post of...

Page 13: ...dwheel C 6 Engage spindle lock D and unscrew handwheel from spindle left hand threads clockwise to loosen 7 Slide spindle a little way out of headstock just enough to remove pulley or belt NOTE If nee...

Page 14: ...ns valuable materials which can be recovered or recycled Please leave it at a specialized institution 11 Available accessories Stock number 719401 Bed extension 508mm with tool post extension Stock nu...

Reviews: