background image

9

HOOKS

WARNING
1.   Any hook that requires replacement because of excessive bends, twists, or throat opening indicates abuse or 

overloading of the hoist. Therefore, other load-supporting components of the lever hoist should be inspected for 
possible damage when such conditions are found.

2.   Never repair hooks by welding or reshaping. Heat applied to the hook will alter the original heat treatment of the hook 

material and reduce the strength of the hook.

3.   Never weld handles or other attachments to the hook. Heat applied to the hook will alter the original heat treatment of 

the hook material and reduce the strength of the hook.

HOOKS INSPECTION
Refers to ASME B30.10, Safety Standard for Hooks. Inspect hooks and measure hook throat opening at least once a 
month. Between regular inspections check visually daily for deformation, distortion, twisting, damage, and missing or 
damaged hook latches. Inspect as follows:

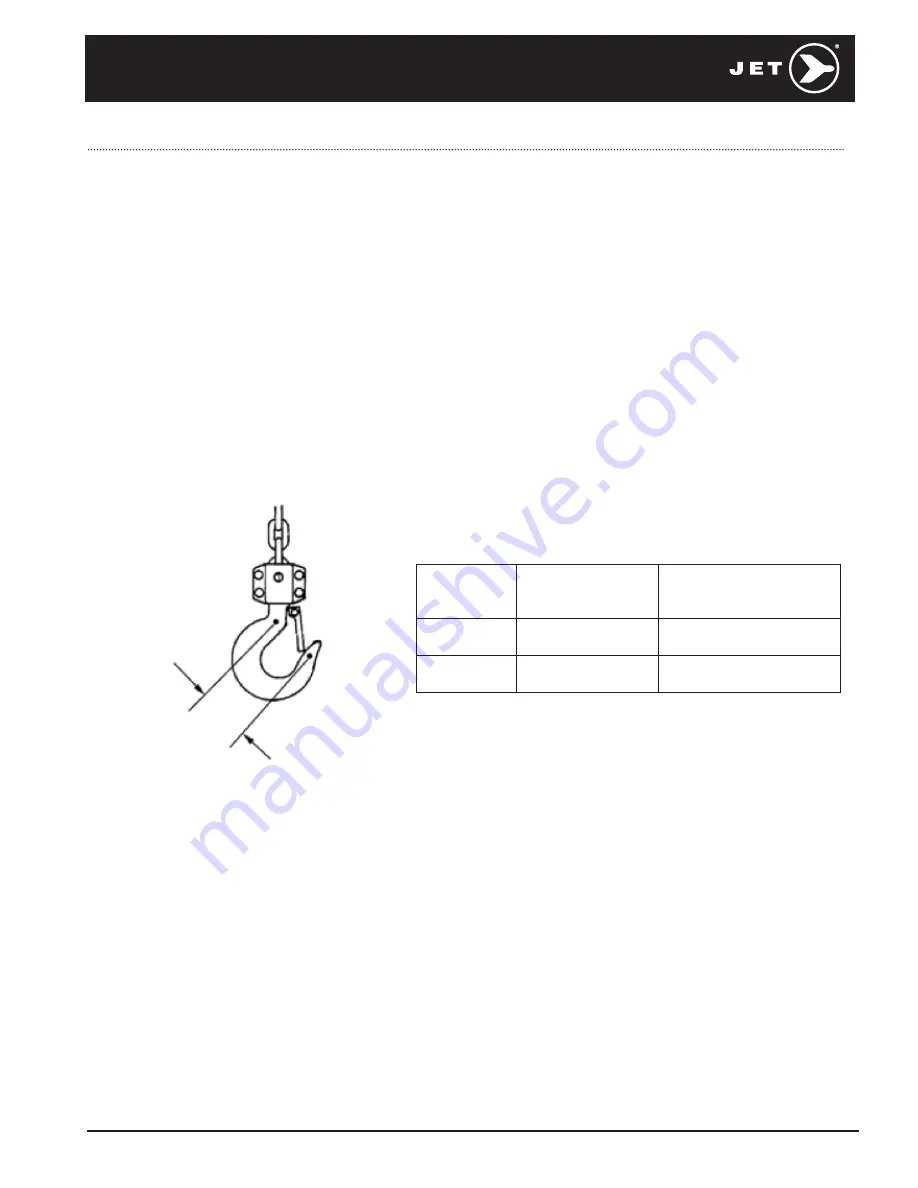
1.   Measure hook opening at raised dots (Figure 7) to check for stretch. Raised dots provide a constant reference point 

and eliminate measurement errors. Replace hook when measurement between dots reaches “Dimension A Replace 
Hook” figures below.

Figure 7

Hoist 
Capacity

"A" Dimension 
Normal (mm)

"A" Dimension 
Replace Hook if ≥ (mm)

0.25 ton

35.5

37.3

0.50 ton

41

43.1

 
2.   A bend or twist of the hook exceeding 10° from the plane of the unbent hook requires replacement of the hook.

3.   A hook latch that is missing shall be replaced.

4.   A hook latch that is inoperative shall be repaired or replaced.

5.   A hook with a hook latch that does not close the throat opening of the hook shall be removed from service until the 

latch is replaced or repaired.

6.   Hooks having damage from chemicals, corrosion, or deformation shall be repaired or replaced.

Due to variations in the manufacturing process, the dimensions of a new hook are variable. For accurate record 
keeping, we recommend users record measurement of Dimension A of the hook before use. Record this information 
in the spaces above and calculate the replacement value by multiplying by 1.05 for Dimension A.

A

Summary of Contents for KLP Series

Page 1: ...M18 MH110603 4 Operator s MANUAL VLP SERIES MINI LEVER PULLERS Prod No 110603 110604 ...

Page 2: ...st be accompanied by proof of purchase and an explanation of the defect or failure It is the customer s responsibility to provide this information JET shall not be held liable for any consequential or incidental damages for breach of any expressed or implied warranty on their products No claims for damages of any type will be considered and all products are sold with this understanding Any costs i...

Page 3: ...s lever hoist in conjunction with other equipment unless necessary and or required safety devices applicable to the system are installed by the user Modifications to upgrade rerate or otherwise alter these lever hoists shall be authorized only by the original equipment manufacturer or qualified professional engineer SAFETY PRECAUTIONS A READ these instructions and ASME B30 21 Safety Standard for M...

Page 4: ...ard Lift Foot 5 5 Minimum Distance Between Hooks Inch H 8 3 10 Number of Falls 1 1 Load Chain Diameter mm 4 4 3 Lbs Pull to Lift Capacity 61 81 Lever Length Inch D 5 9 8 5 Overall Depth Inch B 2 7 16 2 5 8 Overall Width Inch A 3 1 8 3 3 4 Hook Throat Opening Inch C 1 3 8 1 5 8 Net Weight lb 4 4 5 2 A B H D C ...

Page 5: ...e hoist with a twisted kinked or damaged chain Do not splice the chain 2 Check that the chain does not twist along its length from hoist to hook If twist is present on units with multiple falls the hook must be passed back through the chain loop to remove all twist in the chain 3 Replace the chain if links are stretched or seriously worn on the surface especially at the points where links contact ...

Page 6: ...orrect loading is dangerous to the operator the lever hoist and the load Never load the hook in front of the safety latch A Figure 4 Never load the hook tip B Figure 4 Never load the hook off the centerline C Figure 4 Never load the hook sideways D Figure 4 Figure 3 Figure 4 3 Rotate the handwheel clockwise while simultaneously pulling down on the load chain The handwheel will snap back into place...

Page 7: ...ng to a wire rope sling the lever hoist must be applied along a straight line parallel to the surface on which it is resting See Figure 5 Figure 5 When lifting loads hook the load with slings Do not use the lever hoist chain as a sling Figure 6 Both ends of a sling or rope must be completely on the inside of the safety latch before pulling or lifting the load Do not put one end on the inside of th...

Page 8: ...VICE FREQUENT F INSPECTION PERIODIC P INSPECTION Normal Monthly Annually Heavy Weekly to Monthly Semi Annually Severe Daily to Weekly Quarterly TABLE 2 INSPECTION CHART In chart F indicates Frequent Inspection P indicates Periodic Inspection LOCATION CHECK FOR F P LOCATION CHECK FOR F P Braking mechanism Slipping under load Hook Retaining Members Pins Bolts Nuts Not tight or secure Hard to release...

Page 9: ...ok opening at raised dots Figure 7 to check for stretch Raised dots provide a constant reference point and eliminate measurement errors Replace hook when measurement between dots reaches Dimension A Replace Hook figures below Figure 7 Hoist Capacity A Dimension Normal mm A Dimension Replace Hook if mm 0 25 ton 35 5 37 3 0 50 ton 41 43 1 2 A bend or twist of the hook exceeding 10 from the plane of ...

Page 10: ... hoist with load and observe operation of chain over load sheaves Figure 8 Hoist Capacity 5 Links Normal mm 5 Links Limit Replace if mm 0 25 ton 58 59 75 0 50 ton 58 59 75 3 Slacken chain and inspect contact points for excessive wear Refer to Figure 2 4 Using caliper type gauge measure inside length of 5 links under light tension Refer to Figure 8 Replace chain if measurement exceeds maximum allow...

Page 11: ...11 VLP 25 5 1 4 T VLP 50 5 1 2 T LEVEL HOIST PROD NO 110603 110604 ...

Page 12: ...WASHER 2 29 PVI VLP50 29 STAY BOLT 1 10 PVI VLP50 10 COVER NUT SPRING WASHER 2 30 PVI VLP25 30 CHAIN STRIPPER 1 11 PVI VLP25 11 HEX SCREW NUT SPRING WASER 1 30 PVI VLP50 30 CHAIN STRIPPER 1 11 PVI VLP50 11 HEX SCREW NUT SPRING WASER 1 31 PVI VLP25 31 HOOK HOLDER PROTECTION PIN 1 12 PVI VLP25 12 BRAKE COVER 1 31 PVI VLP50 31 HOOK HOLDER PROTECTION PIN 1 12 PVI VLP50 12 BRAKE COVER 1 32 PVI VLP25 32...

Reviews: