


INF
O@jetboards.mx
jetboards.mx
-
USER AND SAFETY MANUAL - kymera
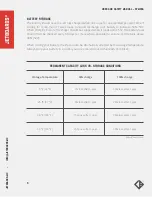
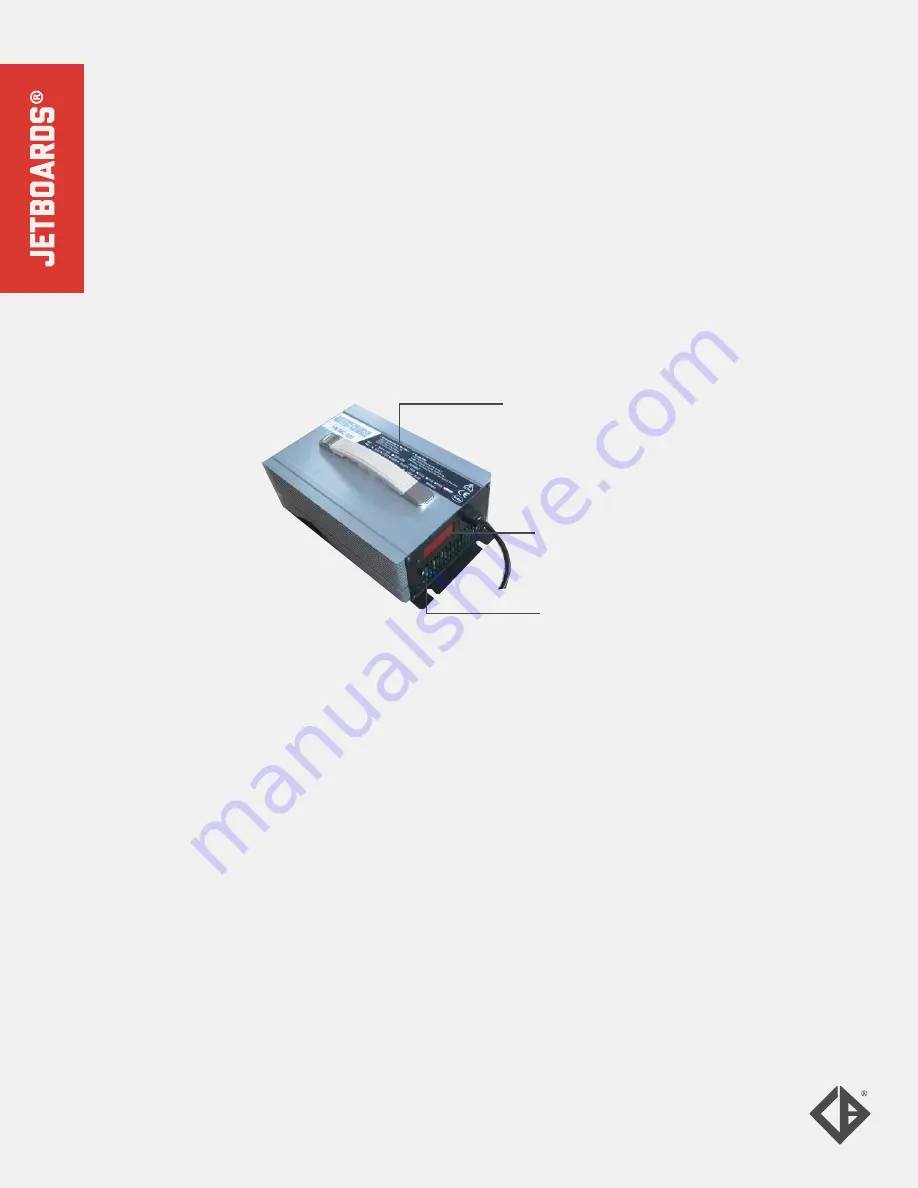
In a secure location away from all flammable materials locate an appropriate power outlet. Verify
charger input voltage located on the top label. The AC voltage will be indicated by a red box next
to either 90~130 or 200-260.
With the charger switch in the OFF position connect the charger to wall. Next with the battery
power switch in the OFF position connect the charger to battery (yellow plug/recpt) make sure
the plug is correctly oriented before connecting.
Next switch the power switch located under the power cable from the wall to the ON position.
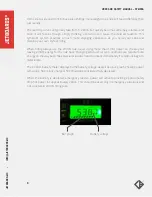
LEDs located on the front should be (left) green and right (red) indicating the charger is not
charging. LCD should display voltage with the front switch in the UP position and charge rate in
the DOWN position. Voltage should indicate approximately 58V and charge rate should be ar or
near 0.00.
With everything fully connected switch the battery power switch to the ON position. The green
light should change to red (both red while charging). The voltage should now have decreased
under load, this will typically vary depending on how depleted the battery is between 50V~58.8V.
Switching the front switch down should indicate the charge rate between 18.0 and 0.5 amps.
Once fully charged the left LED will return to green. Switch the battery power switch to OFF
followed by the charger power switch to OFF. You can now disconnect the battery from the
charger, and then the charger from the wall.
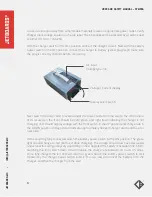
AC input
Voltage type info
Voltage / Current display
Display select switch
4


