B.
VIEWING AND SETTING IMAGES (A)
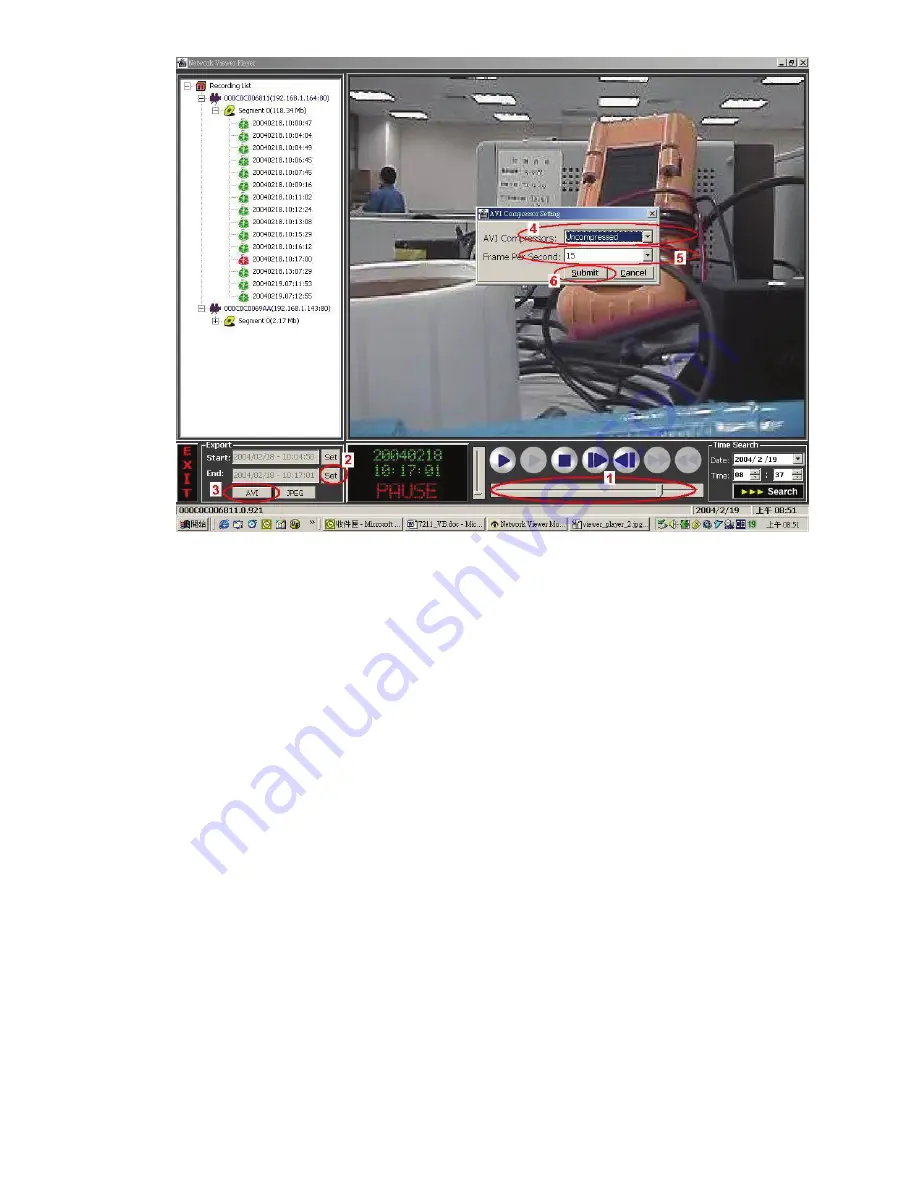
1. Select a specific record.
2. Click the play button.
3. Pause at a desired point.
4. Click "Export :
Start
" at lower left to activate viewing, then the date and time of the period
displayed will appear in the attached blank space.
SAVING IMAGES (B)
1. Use the scroll to designate the ending point of desired images.
2. Click "Set" to insert the date and time of the time period viewed.
3. Select either "
AVI
" or "
JPEG
" to export a file of either format, and select the file path via which
to send viewed records for storage.
4. If you selected "
AVI
" to export a file, please enter the
AVI Compressors
to determine the size
of the file.
5. Enter the
AVI
file
Frame Per Second
(FPS) to determine the speed of the viewing.
6. Click the
Submit
button to submit the setting of the saving.
7. Wait a moment for the selected image file or images to reach your desired storage space.
69


