background image

Merlin 

 Instruction manual V1.4    

Pag: 

6


controlled by varying the speed of the fuel pump through an electronic controller called an ECU 
(electronic control unit), that is connected to the engine trough a 3 wire digital data bus.  


Installation Notes 

1. The engine should be mounted using the strap mount supplied or an approved equivalent. 
 
2. The connection cables from the engine to the ecu should be carefully routed away from the 

engine  intake  so  there  is  no  possibility  of  accidental  ingestion  of  the  wire.  Avoid  placing  the 
cables  close  to  the  internal  magnetic  RPM  sensor  wich  is  located  under  the  black  cover  at 

approximately  2  o’clock  when  looking  the  engine  from  front  with  the  electric  connector  at  12 
o’clock. Cables too close can cause erratic RPM reading during startup. 
 

3. Fuel pipe should be routed similarly clear of the intake. 
 
4. The centre of the fuel tank should be mounted as near to the centre of gravity (CofG) of the 
model as possible. This will minimize the CofG shift as the fuel is used during flight. 

 
5. Any air ducting to the inlet of the engine must have sufficient diameter of at least twice of the 
engine intake diameter.  

 
6. If an extended exhaust duct is required, it should  be of sufficient diameter and strength for 

optimum  engine  performance.  Leave  a  gap  of  25mm  between  end  of  the  engine  exhaust  to 
exhaust tube (excluding bell mouth length) 
 

7. Extreme care should be exercised to ensure that no foreign object, loose parts of the model or 
debris are allowed to enter the compartment where the engine is installed. 

We recommend testing the engine on a test stand prior airframe installation.  
You should have a clear idea of how to arrange the components needed to run the engine inside 
the model. The main issue is the fuel tank, you will need to arrange the CofG in the centre of the 

tank and adjust the receiver and ECU batteries to achieve the correct location. 
 

Electronic Control Unit (ECU) 

 
The ECU is custom designed for the MERLIN engines and must not be 

changed  for  any  other,  as  this  may  result  in  improper  control  of  the 
engine.  Your  engine  has  been  set  up  and  run  with  this  ECU  at  the 

factory and the settings should be left as default. The ECU plugs into 
your  receiver  throttle  channel  and  is  powered  from  the  receiver 
rechargeable  battery.  The  ECU  is  pre-programmed  and  only  requires 

simply setting to your radio.   The ecu is HV tolerant, accept voltages up to 10V in the throttle 
connection. 
 

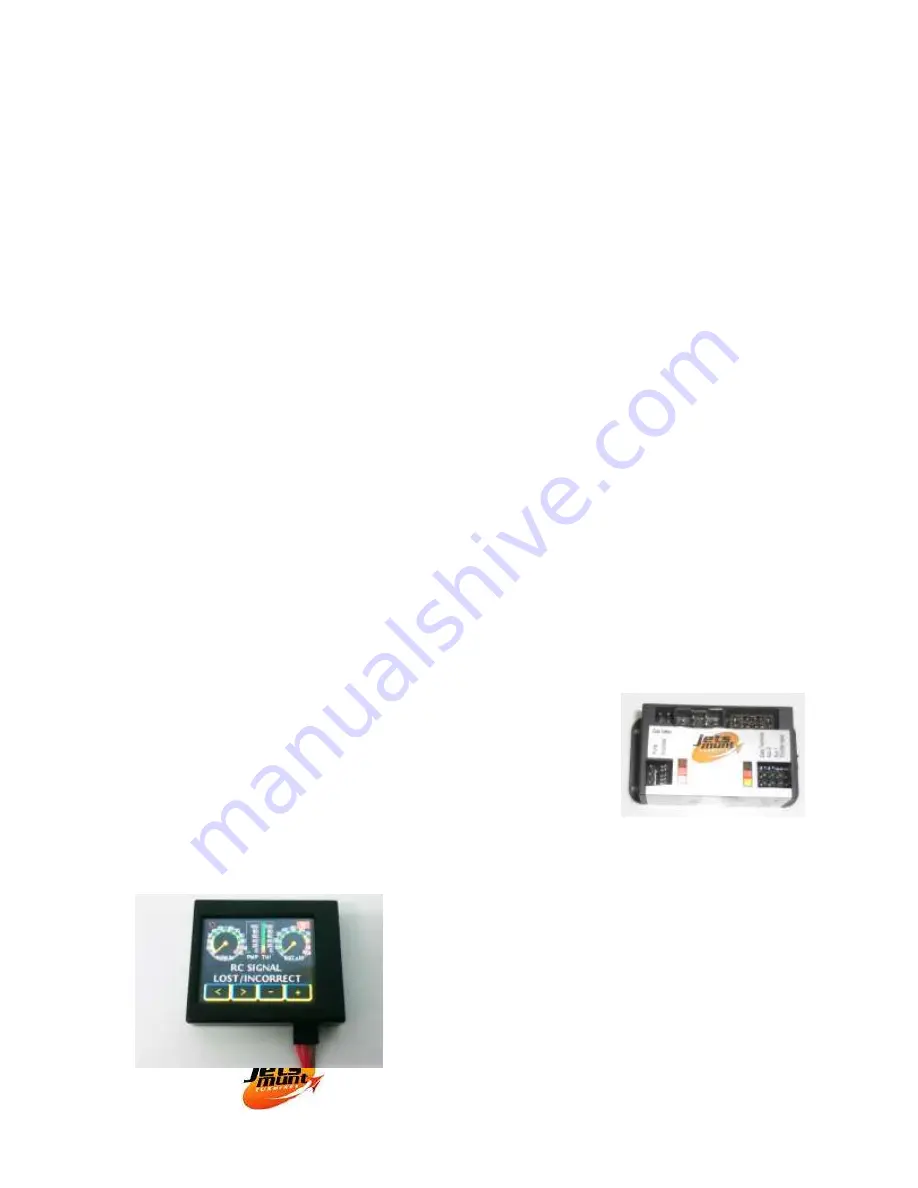
ECU Data Terminal 


The  data  terminal  plugs  into  the  ECU  via  the  lead 
supplied.  The  display  can  be  used  for  starting  and  test 

running. This socket also doubles as digital connection to 
a computer. 

The display can be installed permanently on 

board.  

Summary of Contents for MERLIN 100XBL

Page 1: ...Instruction Manual Version 1 4 2018 Torrent d en Puig 31 08358 Arenys de Munt BARCELONA Spain Tel Fax 34 93 7950113 www jets munt com E mail sales info jets munt com service service jets munt com Copyright 2018 Jets Munt SL All Rights Reserved ...

Page 2: ... local dealer and trough email Jets Munt S L Torrent d en Puig 31 08358 Arenys de Munt Barcelona Spain Web site www jets munt com E mail service jets munt com Fax 34 93 7950113 Legal and Disclaimer The engine design and the contents of this manual are copyright by Jets Munt SL Arenys de Munt Barcelona Spain All rights reserved This manual the pictures and data are property of Jets Munt and cannot ...

Page 3: ...breach your warranty agreement and you will find it is a precision assembly which you will be unlikely to re assemble without considerable difficulty and specialist equipment Simply slackening the spinner nut of the rotor will immediately lose the delicate balance condition without which the engine may not run without damage to its rotating assembly This warranty is void if any one or more of the ...

Page 4: ...the engine exhaust contains gases which can cause asphyxiation and nuisance smells 5 Do not touch the engine whilst it is running Turbines rotate at a very high rpm and the engine casing and exhaust can reach very high temperatures Ensure anything affected by heat is kept well clear of the engine and exhaust during operation 6 Never use the engine near to sources of flammable gases liquids or mate...

Page 5: ...3s Life Reccomended 2s Lipo 2200mAh Optional 3s Life Glow plug voltage typ 6 0V 6 0V 8 0V 5 5V Pump RPM at Ignition typ 75 rpm 100 rpm 75 rpm 100 rpm Minimum ecu soft version 7 41 7 39 7 41 7 39 Restart Yes Yes Yes No Fuel oil Kerosene diesel 4 Oil See page 17 for oil types and percentages Engine Description The engine is a turbojet of a single shaft design specifically designed to power RC aircra...

Page 6: ...th for optimum engine performance Leave a gap of 25mm between end of the engine exhaust to exhaust tube excluding bell mouth length 7 Extreme care should be exercised to ensure that no foreign object loose parts of the model or debris are allowed to enter the compartment where the engine is installed We recommend testing the engine on a test stand prior airframe installation You should have a clea...

Page 7: ...t to engine manufacturer to be studied A detailed description can be found in last page of the present manual The function of the buttons is described later in the ECU setup Engine installation Electrical connections Connect the power lead of the battery to the battery socket PLEASE DOUBLE CHECK THE BATTERY POLARITY BEFORE CONNECTING IT TO THE ENGINE A reverse polarity connection will immediately ...

Page 8: ...ge it Use a suitable length of the clear tubing supplied and keep the tubing on the suction side as short as possible Direction of flow inside the filter is not important but should be always the same after first use Install the filter in vertical position with the exit on top to not leave air trapped inside Do not run the engine without the fuel filter Do not place anything fuel filter flowmeter ...

Page 9: ...en 1100 and 1300uS at IDLE position and between 1800 and 2200uS at Full Power position Please note that these readings on the ecu are measured directly from the signal received from your RC system so you should readjust your transmitter if the values read are outside that the ones suggested The setup assumes the use of a transmitter with manual trims If you use a TX with digital trims is essential...

Page 10: ... in the ecu will light up flashing 2 times in the ECU when the Idle command is received meaning that trim and throttle stick are set to idle positions on the transmitter Lower your throttle trim and the LED will change to a single flash sequence indicating correct reading of the transmitter engine shut off signal by the ecu On some Futaba transmitters it has been found that the throttle channel th...

Page 11: ...and can only be carried out by Jets Munt SL or your authorized dealer Preparing the engine for running A suitable platform table workbench is now required to clamp the test stand onto Make sure this can be easily transported outside and weight enough to ensure it cannot be blown over by the thrust of the engine Select a clear area for running keep clear of areas with loose leaves sand or other deb...

Page 12: ...TARTER Using the starter for long time can destroy the starter motor In the case that the start up procedure has been aborted due at starter failure then it will be necessary to apply the CO2 fire extinguisher A white smoke plume from the engine is a good indication here mean that there is no fire inside First engine runs Confirm your test stand is securely fixed to a bench or heavy table Keep your...

Page 13: ...switched off The fuel flow and starter power will be increased automatically to increase the RPM up to idle RPM Before arriving to idle the Ecu will automatically disconnect power to the starter When the rotor speed reaches idle the screen will change to Run IDLE and the engine speed is adjusted to the IDLE RPM The engine is running Control of engine power rpm is now handed back to the transmitter...

Page 14: ... cause damage to people and property By default this function is disabled in the ecu the user should expressly enable it By enabling this function the user agrees that he she has understood the working principles and understands its limitations Restart options and how to enable them Within the Radio menu a new choice has been added to define the restart operation The ecu offers 3 choices Standard ...

Page 15: ...re is aborted and the normal cooldown initiated What the autorestart function will not do It will not restart the engine if the shutdown was caused by any fault other than a typical flame out caused by air in the fuel system It will not monitor and confirm flight conditions are optimum for a restart Leaving the restart to progress is the pilot responsibility and decision depending on each particul...

Page 16: ...it can do much more harm than good A belly landing or landing gear damage due to a flameout induced heavy landing is more favorable than a similar landing arrival with the engine in start phase that can possibly cause a fire and result in total destruction of the model and or property Please Think twice before enabling the auto restart feature Disclaimer There are no circumstances Jets Munt P L or...

Page 17: ...g intakes will benefit of larger exhaust diameter and larger gap to get the maximum static thrust possible while a fast airframe with small intakes bypass installation will benefit of smaller exhaust diameter and smaller gap to get the maximum efflux speed As a general guideline use an exhaust tube of a diameter equal or larger than the specified in page 5 with a gap between the engine exhaust and...

Page 18: ...ating to cool the engine GlowBad Defective or disconnected glow plug StartBad Defective starter insufficient RPM reached during start RPM sensor damaged too thick oil used on previous run no cooling sequence done in previous run Low RPM Engine had been shutdown because the speed has fallen below the minimum Usually lack of fuel bubble HighTemp Excessive temperature Battery battery voltage out of l...

Page 19: ...ter for the 6mm tube output of the UAT to the 4mm in the inlet side of the fuel pump direction of fuel flow is clearly shown at the top of the pump The clear 4mm tubing is used on the pressure side of the pump Clear tubing helps identify and locate any potential future problems with air leaks The fuel pump and ECU can be mounted simply with a pair of tie wraps and or Velcro When making any fuel li...

Page 20: ... fuel and oil If in doubt take a small piece of tube and submerge it in kerosene for a few days and verify that its characteristics have not changed Maintenance 1 Always keep the engine and its accessories clean and dry 2 Regularly check wires for chafing or insulation breakdown etc 3 Regularly check fuel pipelines for chafing and or leaks at joints 4 Check the engine and mounting for loose fittin...

Page 21: ...e 75 125 rpm Do not use more than 150RPM Acceleration and deceleration time Set to normal but is possible to change to faster or slower upon particular needs see troubleshooting section The use of Diesel fuel is allowed but the acceleration should be set to slow due to the slower burning characteristics of the diesel fuel Telemetry Currently the Jetsmunt engines can be connected to telemetry capab...

Page 22: ...o avoid to shorten the glow plug life There is little increase of RPM when the fuel ignites 1 There is air in the line of fuel 2 The filters are blocked The engine reduces the power or it is stopped during starting 1 The ecu has detected temperatures over 800ºC due to too slow starting 2 There is low battery or air in the tubes Therefore let it cool and retry Engine does not accelerate to maximum ...

Page 23: ...Merlin Instruction manual V1 4 Pag 23 ...

Reviews: