


CHARGER & REMOTE CONTROL
Your electric skateboard comes with an UL
Certified charger. Only use the provided
charger with your electric skateboard, do
not attempt to use another charger. Failure
to use the provided charger will void the
warranty.
To charge the electric skateboard, plug the charger into the charging port,
located on the side of the battery compartment. Plug the other side of the
charger into the outlet. When the LED on the charger is red, the battery is
charging. Once the LED turns green, charging is complete. In order to op-
timize the performance of your electric skateboard, charge the battery fully
before its first use, and be sure to fully charge the battery once a month.
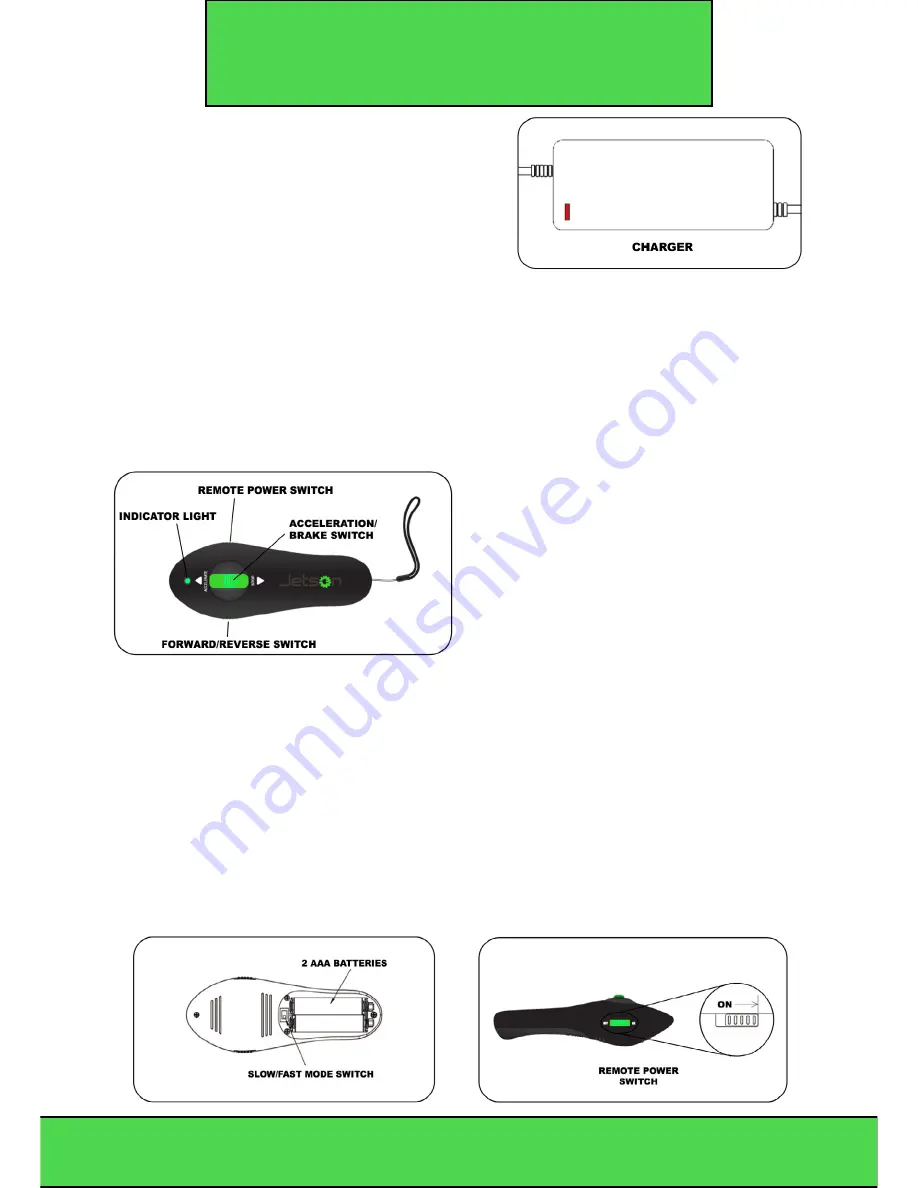
The remote control handles accel-
eration and braking for the electric
skateboard. You can also choose
between forward and reverse driving
by using the switch on the left side of
the remote.
Before starting up your electric skateboard, make sure that the Remote Power
Switch is set to Off, the Forward/Reverse Switch is set to Forward, and the
Slow/Fast Mode Switch is set to Slow. Install two AAA batteries, as shown in
the diagram below.
When you are ready to power on your electric skateboard, push the Remote
Power Switch to On and press the Power Button on the side of the battery.
The Bluetooth Indicator on the battery box will change from a steady light to a
flickering light, indicating that the remote control and electric skateboard have
successfully connected. You are now ready to ride your electric skateboard.
4
MODEL#: JEP400/VERSION#: 1


