background image

5

• When you ride the product along with other riders, always keep a safe distance to avoid a collision.

• When turning, be sure to maintain your balance.

• Riding with improperly adjusted brakes is dangerous and can result in serious injury or death.

• The brake may become hot while operating, do not touch the brake with your bare skin.

• Applying brakes too hard or too suddenly can lock up a wheel, which could cause you to lose control and fall. Sudden or excessive 

application of the brake may result in injury or death.

• If the brake loosens, please adjust with the hexagon wrench, or please contact Jetson Customer Care.

• Replace worn or broken parts immediately.

• Check whether all safety labels are in place and understood before riding.

• The owner shall allow the use and operation of the unit after a demonstration that such operators can understand and operate all 

components of the unit before use.

• Do not ride without proper training. Do not ride at high speeds, on uneven terrain, or on slopes. Do not perform stunts or 

turn abruptly. 

• Recommended for indoor use.

• Prolonged exposure to UV rays, rain and the elements may damage the enclosure materials, store indoors when not in use.

California Proposition 65


WARNING

:


This product can expose you to a chemical such as Cadmium that is known to the state of California to cause cancer or birth 

defects or other reproductive harm. For more information go to www.p65warnings.ca.gov/product

MODIFICATIONS

Do not attempt to disassemble, modify, repair, or replace the unit or any components of the unit without instruction from Jetson Customer 

Care. This will void any warranty, and can lead to malfunctions which may cause injury.

ADDITIONAL OPERATION CAUTIONS

Do not lift the product off the ground while it is on and the wheels are in motion. This can result in freely spinning wheels, which may cause 

injury to yourself or others nearby. Do not jump on or off the product, and do not jump while using it. Always keep your feet firmly planted 

on the foot rest while in operation. Always check the battery charge before using.

NOTICE OF COMPLIANCE

This device complies with Part 15 of the FCC Rules. Operation is subject to the  following two conditions: 

(1) this device may not cause harmful interference, and (2) this device must accept any interference received, including interference 

that may cause undesired operation. Warning: Changes or modifications to this unit not expressly approved by the party responsible for 

compliance could void the user’s authority to operate the equipment.

NOTE: This equipment has been tested and found to comply with the limits for a Class B digital device, pursuant to Part 15 of the FCC 

Rules. These limits are designed to provide reasonable protection against harmful interference in a residential installation.  This equipment 

generates, uses and can radiate radio frequency energy and, if not installed and used in accordance with the instructions, may cause 

harmful interference to radio communications. However, there is no guarantee that interference will not occur in a particular installation.  If 

this equipment does cause harmful interference to radio or television reception, which can be determined by turning the equipment off and 

on, the user is encouraged to try to correct the interference by one or more of the following measures:

• Reorient or relocate the receiving antenna.

• Increase the separation between the equipment and receiver.

• Connect the equipment into an outlet on a circuit different from that to which the receiver is connected.

• Consult the dealer or an experienced radio/ TV technician for help.

Shielded cables must be used with this unit to ensure compliance with the Class B FCC limits.

Summary of Contents for JREMIX-BB

Page 1: ...RemixJetkart All TerrainHoverboard Aguideforyourride IMPORTANT RETAIN FOR FUTURE REFERENCE READ CAREFULLY MODEL JREMIX BLK JREMIX BB Designed in Brooklyn Made in China...

Page 2: ......

Page 3: ...Remembertobesafeand mostimportantly havefun...

Page 4: ......

Page 5: ...nserting the Footrests Adjusting the Footrest Attaching the Hoverboard Charging the Hoverboard Indicator Lights Connecting to Bluetooth Recalibrating the Hoverboard Turning the Lights On Getting on th...

Page 6: ...ator passenger actions or reactions Never use near motor vehicles Avoid sharp bumps drainage grates and sudden surface changes Scooter may suddenly stop Avoid streets and surfaces with water sand grav...

Page 7: ...le it is on and the wheels are in motion This can result in freely spinning wheels which may cause injury to yourself or others nearby Do not jump on or off the product and do not jump while using it...

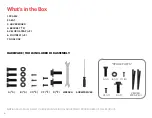
Page 8: ...E INITIAL ADJUSTMENT PROCEDURES OF THE PRODUCT A 4 B 4 C1 3 C2 2 D 2 A 1 B 1 C1 1 C2 1 D 1 WRENCH SCREWDRIVER VELCRO STRAP 4 1 FRAME 2 SEAT 3 HOVERBOARD 4 BRACKET 2 5 VELCRO STRAP 2 6 FOOTREST 2 7 NOS...

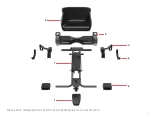
Page 9: ...7 1 7 5 6 4 3 2 PLEASE NOTE IMAGES MAY NOT REFLECT EXACT APPEARANCE OF ACTUAL PRODUCT...

Page 10: ...X HOVERBOARD MAX SPEED UP TO 9 MPH MAX RANGE UP TO 12 MILES BATTERY 25 2V 4 0AH LITHIUM ION MOTOR 500W DUAL HUB MOTOR 250W X 2 SPEAKER 5 0 DYNAMIC BLUETOOTH SPEAKER BLUETOOTH RANGE UP TO 33 FT PRODUCT...

Page 11: ......

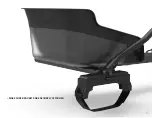
Page 12: ...RFACE ALIGN FRAME TO MATCH BOLT HOLES PLACE WASHER B ONTO BOLT A AND THREAD BOLT INTO THE HOLE UNTIL FAIRLY TIGHT REPEAT USING REMAINING 3 BOLTS AND 3 WASHERS TIGHTEN WITH PROVIDED WRENCH NOTE BE CARE...

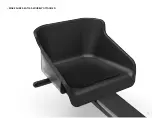
Page 13: ...11 MAKE SURE SEAT IS SECURELY ATTACHED...

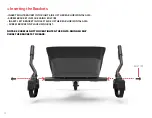
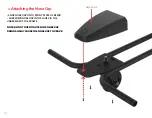
Page 14: ...AL AXIS SCREW BRACKET IN PLACE USING BOLT D INSERT LEFT BRACKET INTO LEFT SIDE OF THE REAR HORIZONTAL AXIS SCREW BRACKET IN PLACE USING BOLT NOTE BE CAREFUL NOT TO OVER TIGHTEN THE BOLTS DOING SO MAY...

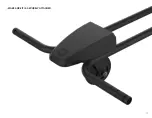
Page 15: ...13 MAKE SURE BRACKETS ARE SECURELY ATTACHED...

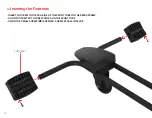
Page 16: ...NOSE CAP ONTO FRONT PLATE OF REMIX SCREW C1 NOSE CAP INTO PLACE VIA THE UNDERSIDE OF THE FRAME NOTE DO NOT OVER TIGHTEN THE NOSE CAP DOING SO MAY CAUSE THE NOSE CAP TO CRACK 1 3 AttachingtheNoseCap N...

Page 17: ...15 MAKE SURE IT IS SECURELY ATTACHED...

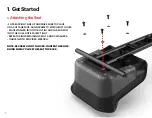
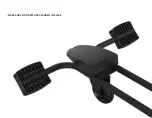
Page 18: ...ERT FOOTREST INTO EACH SIDE OF THE FRONT TUBE ON THE REMIX FRAME ALIGN FOOTREST WITH SCREW HOLES ON THE FRONT TUBE USING THE SMALL SCREW C2 SUPPLIED SCREW PEDALS IN PLACE 1 4 InsertingtheFootrests FOO...

Page 19: ...17 MAKE SURE FOOTREST ARE SECURELY IN PLACE...

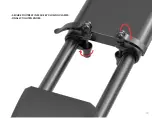
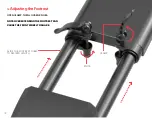
Page 20: ...18 SLIDE THE FOOTREST TUBES TO DESIRED LENGTH OPEN CLAMP THEN LOOSEN KNOBS NOTE OVEREXTENDING THE FOOTREST CAN CAUSE THE FRONT WHEEL TO SHAKE 1 5 AdjustingtheFootrest KNOB CLAMP...

Page 21: ...19 SECURE FOOTREST IN PLACE BY CLOSING CLAMPS FINALLY TIGHTEN KNOBS...

Page 22: ...20 MAKE SURE SIDE OF HOVERBOARD WITH CHARGING PORT IS FACING OUT HOVERBOARD MUST BE TURNED OFF BEFORE PLACING REMIX ON TOP OF IT 1 6 AttachingtheHoverboard HOVERBOARD VELCRO STRAPS...

Page 23: ...21 PULL THE VELCRO STRAPS TIGHT AND FOLD...

Page 24: ...22 MAKE SURE HOVERBOARD IS SECURELY IN PLACE...

Page 25: ...SE THE INCLUDED CHARGER PLUG THE CHARGER INTO THE WALL BEFORE THE CHARGING PORT DON T TURN ON THE REMIX HOVERBOARD WHILE IT S CHARGING CHARGE THE BATTERY UNTIL IT IS FULLY CHARGED UP TO 4 HOURS CHARGI...

Page 26: ...AND TILT UP ONCE THE BATTERY POWER GOES BELOW 10 AS A SAFETY PRECAUTION 1 8 IndicatorLights 20 20 49 50 PERCENTAGE BATTERY INDICATOR LIGHT BATTERY INDICATOR LIGHT STATUS INDICATOR LIGHT LIGHTS UP BLU...

Page 27: ...UR HANDHELD DEVICE S SETTINGS FIND THE HOVERBOARD IN YOUR HANDHELD DEVICE S LIST AND SELECT IT NOW YOU CAN PLAY YOUR MUSIC THROUGH THE HOVERBOARD 1 9 ConnectingtoBluetooth THE BLUETOOTH WORD MARK AND...

Page 28: ...IS COMPLETED LET GO OF POWER BUTTON AND THEN PRESS IT AGAIN TO TURN HOVERBOARD OFF TURN HOVERBOARD BACK ON RECALIBRATION IS NOW COMPLETE 1 10 RecalibratingtheHoverboard HOLD POWER BUTTON FOR 5 SECOND...

Page 29: ...HARGING PORT POWER ON THE HOVERBOARD THE LIGHTS WILL TURN ON ONCE THE HOVERBOARD AND THE SEAT WIRE ARE PLUGGED IN THE DEFAULT LIGHTING MODE WILL DISPLAY WHEN THE REMIX AND HOVERBOARD ARE BOTH CONNECTE...

Page 30: ......

Page 31: ...EMIX PLACING YOUR FEET ON THE FOOTREST MAKE SURE THE HOVERBOARD IS LEVELED TURN ON HOVERBOARD 2 1 GettingontheRemix 2 MakeMoves NOTE DO NOT TURN ON THE HOVERBOARD BEFORE YOU SIT DOWN IF THE HOVERBOARD...

Page 32: ...ONING THE FOREHEAD IS COVERED BY THE HELMET WEAR A HELMET APPROPRIATE CLOTHING SHOES AND SAFETY GEAR AVOID CLOTHING THAT CAN GET CAUGHT INTO OR UNDER THE WHEELS CLOSED TOE FLAT SHOES ARE RECOMMENDED W...

Page 33: ...ALL SCREWS AND LOCKING NUTS BEFORE EACH RIDE TO GO FORWARD PUSH DOWN BOTH HANDLES TO BRAKE REVERSE PULL UP BOTH HANDLES TO TURN RIGHT PUSH DOWN LEFT HANDLE PULL UP RIGHT HANDLE TO TURN LEFT PULL UP L...

Page 34: ...32 NOTE DON T PULL UP OR DOWN ON THE HANDLES TOO HARD AS IT MAY CAUSE DAMAGE TO LOCK THE HANDLES WILL LOCK IN PLACE WHEN PULLED 22 UP AND 22 DOWN BASED ON NETURAL POSITION OF BRACKETS 22 22...

Page 35: ...33 2 4 RidingtheHoverboard NEUTRAL TURN RIGHT TURN LEFT...

Page 36: ......

Page 37: ...TOMER CARE FOR ASSISTANCE BATTERY KEEP AWAY FROM FIRE AND EXCESSIVE HEAT AVOID INTENSE PHYSICAL SHOCK SEVERE VIBRATION OR IMPACT PROTECT FROM WATER OR MOISTURE DO NOT DISASSEMBLE THE REMIX OR ITS BATT...

Page 38: ...sure to leave a review at ridejetson com reviews We can t wait to hear from you Stayconnected Be sure to follow ridejetson on social media to learn about fantastic offers giveaways and all the latest...

Page 39: ......
Page 40: ...ct s 1 year limited warranty or inquire about warranty coverage contact us directly US CANADA 1 888 976 9904 UK 44 0 33 0838 2551 Mex 001 888 976 9904 Hours of Operation 7 Days a Week 10am 6pm Importe...

Reviews: