© 2018 Jetta Corporation. All rights reserved. REV 03/2018
1(800) 288-7771
INSTALLATION INSTRUCTIONS | JETTA CORPORATION
PAGE | 9
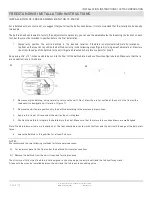
FREESTANDING INSTALLATION INSTRUCTIONS
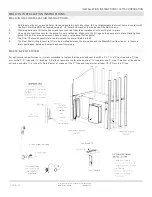
INSTALLATION OF FREESTANDING BATHTUBS (1-PIECE) AND DRAIN
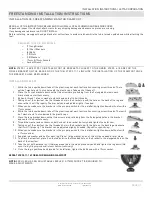
1. Temporarily position the bathtub in the desired location, ensuring that the drain hole is aligned to the floor drain and then
draw the contour of the bathtub on the ground. If the floor drain is not installed yet, trace its location through the hole of the
bathtub, then move the bathtub to a safe place, so as to install floor drain according to guidelines. Reposition the bathtub and
ensure that the trace lines are followed.
2. Check the level and adjust if necessary by screwing or unscrewing the feet beneath the bathtub (maximum adjustment of 1
¾”) and ensuring that the bathtub is always resting on all four feet while minimizing the space between the skirt and the floor
(the skirt can touch the floor but shall in no way support the weight of the bathtub).
3. Lock the bathtub feet into position by tightening the adjoining nut once an accurate, acceptable level is confirmed.
4. Lay the bathtub on its side, having previously laid cardboard packaging on the ground to protect the surface of the bathtub. Be
sure to use a piece of cardboard without staples to avoid damaging the surface of the bathtub.
5. Temporarily install the drain assembly of the bathtub.
6. Place the bathtub back into position on the previously traced outline while ensuring that the drain end fits into the floor drain
and is held in place for the next step.
7. Unscrew the rings of the overflow valve and then lift the bathtub and lay it on its side making sure not to move the drain,
specifically the floor drain.
8. Tighten the seal ring of the floor drain to the end of the drain.
9. Apply a bead of silicone to the entire circumference of the skirt and the bathtub feet. We also recommend setting a circle of
silicone to seal the drain and overflow.
10. Place four pieces of wood ¾” thick inside the footprint on which to temporarily rest the bathtub.
11. Raise the bathtub and then put it back down again, ensuring alignment over the vertical drain, without moving the drain and
making sure the bathtub rests on the wooden blocks.
12. Remove the wooden blocks one by one to correctly place the bathtub in its resting place aligned to the drain.
13. Tighten all drain and overflow connections properly.
14. If necessary, add silicone to the location of the pieces of wood, clean
surplus and erase the trace marks on the ground.
15. Leave the bathtub in this position for at least 24 hours before use.
16. Water test the bathtub for leaks.
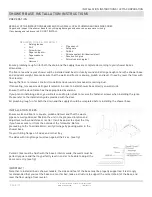
1- Plug
2- Cap Seal
3- Opening Mechanism
4- Strainer
5a- Baque putty
5b- Seal
6- Mounting Nut
7a- Drain Pipe (1.5”)
7b- Gasket
7c- Tightening nut
Summary of Contents for RAIN SHOWER BASES
Page 2: ......


