© 2018 Jetta Corporation. All rights reserved. REV 03/2018
1(800) 288-7771
INSTALLATION INSTRUCTIONS | JETTA CORPORATION
PAGE | 10
B)
FREESTANDING INSTALLATION INSTRUCTIONS
INSTALLATION OF FREESTANDING BATHTUB (2-PIECE)
For a bathtub with a contour skirt, we suggest that you follow the instructions below. It is recommended that the installation be done by
two people.
The bathtub has been leveled in factory. If an adjustment is necessary, you can use the adjustable feet by loosening the locknut on each
foot, but they must be relocked in position before the final installation.
1.
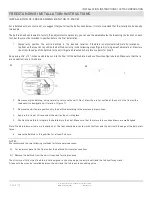
Temporarily position the entire bathtub in the desired location. If the drain is not preinstalled, mark its location on
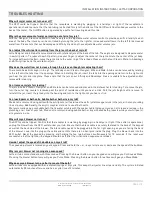
the floor so that you can reposition the bathtub correctly in the following steps (Figure A). Using a washable marker, draw two
lines from the edge of the bathtub to the skirt (Figure B) to establish a reference point for Step 5.
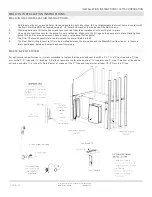
An opening of 6” x 12” inches needs to be cut into the floor for the bathtub drain and overflow (see figure below). Make sure that there
are no obstructions in this space.
A)
2.
Remove only the bathtub, being careful to not move the skirt. Next, draw the interior outline of the skirt on the floor with a
lead pencil to designate skirt location. (Figure 7)
3.
Remove the skirt and reposition only the bathtub according to the previously drawn lines.
4.
Apply a thin line of silicone under the skirt and put it into place.
5.
Position the bathtub, integrate the bathtub into the skirt. Make sure that the two reference lines drawn are well aligned.
Note: The bathtub must rest on is feet and skirt. The feet should be in contact with the floor and the skirt with the edge of the bath at all
times.
6. Leave the bathtub in this position for at least 24 hours.
NOTES:
We recommend the two following methods for future service access:
A) Cut an access panel in the floor under the bathtub if circumstances allow.
B) Remove the bathtub from the skirt if required for maintenance.
The structure of this style of bathtub is not designed to sit on the edge, the acrylic skirt and the tub itself may crack.
A tape with foam can be installed between the skirt and the tub to avoid squeaking noise.
Summary of Contents for RAIN SHOWER BASES
Page 2: ......


