© 2018 Jetta Corporation. All rights reserved. REV 03/2018
1(800) 288-7771
INSTALLATION INSTRUCTIONS | JETTA CORPORATION
PAGE | 6
SKIRTED TUB INSTALLATION INSTRUCTIONS
PREPARATIONS
Before installing a new Jetta bathtub, we strongly recommend following the installation check list and hiring a certified plumber to
handle the installation.
REQUIRED TOOLS
o
Levels
o
Goggles
o
Tape Measure
o
Caulking Gun
o
Conventional woodworking tools and materials
o
Drop cloth
o
1/8” Spacers
o
Plastic film (optional)
REQUIRED MATERIALS
o
Silicone bathroom caulking (mildew resistant)
o
Mortar cement
o
Visually inspect the bathtub to make sure it has not been damaged during transport. In case of damage, do not proceed with the
installation.
ROUGH-IN:
o
Make sure the bathtub is the model that you ordered, that its dimensions are correct, and that the location of the drain
corresponds to the plans.
o
Your Jetta bath should be installed in a bedding compound of mortar mix or thin set which should be distributed under the base to
provide maximum support and even weight distribution. Do not use foam, sand, or drywall mud.
INSTALLATION STEPS
1.
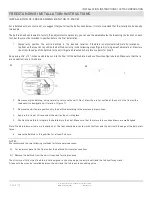
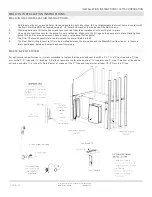
Refer to the specification sheet for tub measurements, Construct a plumb alcove out of studs.
2.
Install the rough plumbing.
3.
Install the drain to the bath.
4.
To prevent water absorption, lay plastic film on wooded subfloors. (Optional)
5.
Your Jetta bath should be installed in a bedding compound, preferably a mortar mix or thin set, which should be distributed
under the base to provide maximum support and even weight distribution. Do not use foam, sand or drywall mud. When
leveling, prepare a bed of moist mortar in the area where bath is to be installed. Place equally spaced mounds of bedding
compound, about one foot apart, 2” to 4” tall - this should be about the diameter of a three-pound coffee tin (8”-10”). When the
bottom of the tub comes in contact with the bedding compound, it should compress the mounds to a 1” to 3” layer while the
tub should lightly rest on to
p.
Summary of Contents for RAIN SHOWER BASES
Page 2: ......


