background image

7.The 

MENU 


button is used to enter the configuration menus. 


8.The 

OK 


button is to confirm and select the current menu option within the 

configuration menus. 


9.The 

UP

RIGHT

DOWN


and 

LEFT 

buttons are used to navigate the 

settings and stored image menus of the DVR.   


10.After finish setup, Press 

MENU 


button or select 

EXIT

 item can exit the 

configuration menus. 


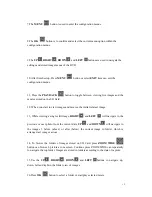
11, Press the 

PLAYBACK 

  button to toggle between viewing live images and the 

movies stored on the SD Card. 


12, When you start to view images and movies, the initial is latest image. 


13, While viewing a single still image, 

RIGHT

 and 

LEFT 

  will navigate to the 

previous or next photo from the current date. 

UP

 and 

DOWN


will navigate to 

the images 3 before (above) or after (below) the current image in folder, which is 

arranged as 3 images across 


14, To browse the folders of images stored on SD Card, press 

ZOOM WIDE


button can browse 6 picture at one screen. Continue press ZOOM WIDE can repeatedly 

to navigate the top folder. Images are stored in folders according to the date of capture. 


15,Use the 

UP

RIGHT

DOWN


and 

LEFT 

buttons to navigate up, 

down, left and right in the folder view of images. 


16,Press 

OK 


button to select a folder or start play selected movie. 

12 

Summary of Contents for GDV-101SD

Page 1: ...JETVIEW GDV 101SD 2 Channel SD Card Mini DVR Instruction Manual Ver 1 0 1...

Page 2: ...tandard 14 Power On Channel 15 Motion Dection 15 Motion Dection Sensitivity 16 Motion Source 16 Motion Dection Time Slot 17 Motion Dection Record Type 17 Record Clip 18 Prerecord 18 Photo Quality 19 R...

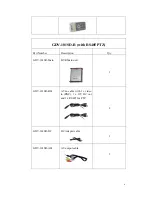
Page 3: ...o Part Number Description Qty GDV 101SD Main DVRainunit 1 GDV 101SD A01 AV in cable with 1 x video in 1 x audio in and 1 x 12V DC out 2 GDV 101SD DC DC Adapter cable 1 GDV 101SD A02 AV output cable 1...

Page 4: ...485 PTZ Part Number Description Qty GDV 101SD Main DVR Main unit 1 GDV 101SD R01 AV in cable with 1 x video in BNC 1 x 12V DC out and 1 x RS485 for PTZ 2 GDV 101SD DC DC Adapter cable 1 GDV 101SD A02...

Page 5: ...101SD V record video only Part Number Description Qty GDV 101SD Main DVR Main unit 1 GDV 101SD R01 AV in cable with 1 x video in BNC 1 x 12V DC out and 1 x RS485 for PTZ 2 GDV 101SD DC DC Adapter cabl...

Page 6: ...485 control is required Mini SD DVR Features Connect up to two cameras or video sources Record or view one channel at a time Small pocket size design easy to carry or use Support CIF or D1 resolution...

Page 7: ...30fps NTSC Recording Mode Manual or Motion trigger Recording clip length 5 min to unlimited Motion triggered recording video clip length Max 10 sec Storage media SD flash memory card upto 32G PTZ con...

Page 8: ...Front Panel of 2 Channel DVR Back Panel of 2 Channel DVR Fig 1 Front Back panel of DVR 8...

Page 9: ...a photo Press this capture a photo like a camera Record a AVI file Press this can start record a AVI file You clip movie every 1 min Navigate the menu settings And select target at playback mode This...

Page 10: ...A 12V DC power out male RS485 out two wire AV output cable Video yellow male RCA Audio white male RCA alarm out red male RCA This feature is currently not available DC Adapter split cable 1in and 2 ou...

Page 11: ...y the camera on Channel 1 or Channel 2 This will be based MENU configuration Pressing the CH button on the DVR s remote control will cycle the display between Channel 1 and Channel 2 4 Pressing the PL...

Page 12: ...s the initial is latest image 13 While viewing a single still image RIGHT and LEFT will navigate to the previous or next photo from the current date UP and DOWN will navigate to the images 3 before ab...

Page 13: ...d Configuring Your DVR After powering on the unit press MENU button to enter the system menu to configure the DVR Please notice that this unit can hold the setting for about 2 3 hours after the power...

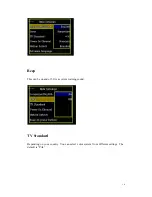
Page 14: ...Beep This can be on and off It is a system warning sound TV Standard Depending on your country You can select color system from different settings The default is PAL 14...

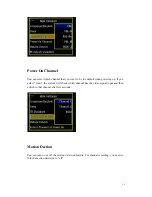
Page 15: ...n powering on If you select Auto the system will check which channel has the video signal input and then switch to that channel after few seconds Motion Dection You can turn on or off the motion detec...

Page 16: ...o not purchase the Alarm Camera from us you can only use DVR motion which is triggered by the camera connected to the DVR This is most popular feature that you can find on most of the DVR systems Alar...

Page 17: ...motion detection recording there will be time gap to fit different applications You can set the time gap from 1 second to 5 seconds Motion Dection Record Type This allows you to set the record type fr...

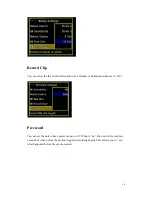
Page 18: ...minutes or unlimited when set to off Prerecord You can set the unit to have prerecord on or off When is on the unit will record few seconds of video before the motion triggered recording begins This...

Page 19: ...record video in CIF 320 x 240 or D1 704 x 576 resolution At D1 resolution setting each channel will take approximately 1GB storage space per channel per hour so a 4GB card can be used for continuos r...

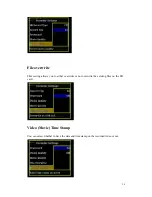
Page 20: ...rite This seeting allows you to either overwrite or not overwrite the existing files on the SD card Video Movie Time Stamp You can select whether to have the date and time stamp on the recorded video...

Page 21: ...r DVR Please check with the dealer or contact us for the latest firmware available Set the Date and Time This setting allows you to set the correct date and time to the DVR Display Setting This settin...

Page 22: ...Set to default You can set all parameters back to the factory default setting by using this feature Save and Exit Menu Make sure that you will save the settings before exit the menu 22...

Reviews: