background image


51 


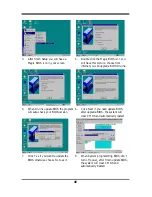
5.  Click OK and If You Have Proxy Server,      

Enter Your Setting 

6.  Click NEXT when Start Copy Files, Start to 

install the software 


7.  If you want to make a rescue disc, insert a 

1.44 MB disc  

8.  Setup Complete and click Finish 


9.  Enter Your name and E-mail address 

Register PC-cillin 2000 or Click Cancel 
Register Later 

10.  After install PC-cillin 2000 complete we 

recommend select update item to download 
newest virus code and setting Auto refresh 
virus code 

Summary of Contents for 635CSR1A

Page 1: ...gistered trademark and MMX is a trademark of Intel Corporation the other names and brands are the property of their respective owners Specifications and Information contained in this documentation are...

Page 2: ...L CPU 12 2 3 4 OVERCLOCK RUNNING 13 2 4 INSTALL MEMORY 14 2 5 EXPANSION CARD 15 2 5 1 PROCEDURE FOR EXPANSION CARD INSTALLATION 15 2 5 2 ASSIGNING IRQ FOR EXPANSION CARD 15 2 5 3 INTERRUPT REQUEST TAB...

Page 3: ...INSTALLATION MAGIC INSTALL SUPPORTS WINDOWS 95 98 98SE NT4 0 2000 42 4 1 AGPVXD INSTALL SIS AGPVXD DRIVER 43 4 2 SOUND AC97 SOUND DRIVER AND THE PROGRAM INSTALL FOR EDITING PLAYBACK 44 4 3 LAN Only fo...

Page 4: ...MEETS USER S REQUIREMENT BUT WILL CHANGE CORRECT ANY TIME WITHOUT NOTICE MANUFACTURER PROVIDES THIS MANUAL AS IS WITHOUT WARRANTY OF ANY KIND AND WILL NOT BE LIABLE FOR ANY INDIRECT SPECIAL INCIDENTIA...

Page 5: ...case temperature Heatsinks induce improved processor heat dissipation through increased surface area and concentrated airflow from attached fans In addition interface materials allow effective transf...

Page 6: ...2100 PC1600 DDR SDRAM Module for increase system performance Do not using DIMM DDR Module in combination at same time System memory size expandable to 1 0G Bytes This motherboard provides 10 100Mb Fas...

Page 7: ...x2 support PC2100 PC1600 DDR SDRAM Expandable to 1GB Support 3 3V SDRAM Module 2 5V DDR DRAM Module Expansion Slot 32 bit PCI slot x3 2 2 Specification Compliant CNR slot x1 for Communication Riser ca...

Page 8: ...866MHz DDR 133 133 Tualatin 933MHz DDR 133 133 3D Mark 99 5923 5911 5957 3D Mark 2000 4714 4712 4806 3D Mark 2001 1934 1949 1967 3D Winbench 99 V1 2 897 899 900 3D Winbench 2000 94 94 1 94 8 Final Rea...

Page 9: ...M FAN CD Audio PCI Slot Front Panel Connector 2M Flash ROM BIOS JP5 CPU F S B Clock PS 2 MOUSE PS 2 Keyboard USB COM1 COM2 LINE OUT LINE IN MIC PRINT GAME MIDI PORT LAN Only for 635CS Keyboard Power O...

Page 10: ...Primary Secondary IDE Connector 40 pin Block p 18 Headers Header Name Description Page USB2 USB Port Headers 10 pin Block p 19 IDE LED IDE activity LED 2 pin Block p 19 TURBO LED Turbo LED switch 2 pi...

Page 11: ...and power supply 6 Setup BIOS 7 Install software driver utility 2 2 Checking Motherboard s Jumper Setting 1 CPU SDRAM Clock Setting JP1 JP2 JP5 The motherboard s CPU SDRAM memory clock adjusted throu...

Page 12: ...wish to use your keyboard by pressing to power on your computer This feature requires an ATX power supply that can supply at least 300mA on the 5VSB lead The default is set to disable Keyboard Power...

Page 13: ...Hz or 4X 266MHz PCI Peripheral Component Interconnect a high speed interface for video cards sound cards network interface cards and modems runs at 33MHz ISA Industry Standard Architecture a relativel...

Page 14: ...CPU Internal Frequency CPU L2 Cache The flash memory inside the CPU normally Pentium III CPU has 256K or above while Celeron CPU will have 128K Recognize of CPU The way to recognize the specification...

Page 15: ...socket 370 The CPU that comes with the motherboard should have a cooling FAN attached to prevent overheating If this is not the case then purchase a correct cooling FAN before you turn on your system...

Page 16: ...you entered CMOS SETUP UTILITY choose Miscellaneous Control you will see the screen as below then 1 You can choose the situation you want to try JP5 JP1 JP2 CPU SDRAM MHz 1 2 3 4 5 6 7 8 AUTO OFF OFF...

Page 17: ...e Socket for memory expansion available from minimum memory size of 32MB to maximum memory size of 1GB SDRAM and only can install either 168 pin SDRAM Module or 184 pin DDR Module at the same time Val...

Page 18: ...re system stability 2 5 Expansion Cards WARNING Turn off your power when adding or removing expansion cards or other system components Failure to do so may cause severe damage to both your motherboard...

Page 19: ...ed 10 5 IRQ Holder for PCI Steering 11 6 IRQ Holder for PCI Steering 12 7 PS 2 Compatible Mouse Port 13 8 Numeric Data Processor 14 9 Primary IDE Channel 15 10 Secondary IDE Channel These IRQs are usu...

Page 20: ...pply turned on the full power will not come into the system board until the front panel switch is momentarily pressed Press this switch again will turn off the power to the system board PIN ROW2 ROW1...

Page 21: ...ature mail connector The On board serial port can be disabled through BIOS SETUP Please refer to Chapter 3 INTEGRATED PERIPHERALS SETUP section for more detail information 9 Floppy drive Connector 34...

Page 22: ...connector and another ribbon cable on the secondary IDE connector Secondary IDE Connector Pin 1 Two hard disks can be connected to each connector The first HDD is referred to as the Master and the se...

Page 23: ...eset switch for rebooting your computer without having to turn off your power switch This is a preferred method of rebooting in order to prolong the lift of the system s power supply See the figure be...

Page 24: ...on the fan manufacturer the wire and plug may be different The red wire should be positive while the black should be ground Connect the fan s plug to the board taking into consideration the polarity o...

Page 25: ...puter 1 After all connection are made close your computer case cover 2 Be sure all the switch are off and check that the power supply input voltage is set to proper position usually in put voltage is...

Page 26: ...frequency beeps when system is working CPU overheated System running at a lower frequency 6 During power on press Delete key to enter BIOS setup Follow the instructions in BIOS SETUP 7 Power off your...

Page 27: ...1 Entering Setup Power on the computer and by pressing Del immediately allows you to enter Setup If the message disappears before your respond and you still wish to enter Setup restart the system to t...

Page 28: ...zed Defaults Load Standard Defaults Set Supervisor Password Set User Password Save Exit Setup Exit Without Saving Esc Quit Select Item F10 Save Exit Setup Time Date Hard Disk Type Figure 3 1 Standard...

Page 29: ...r Password Use this menu to set User and Supervisor Passwords Save Exit Setup Save CMOS value changes to CMOS and exit setup Exit Without Saving Abandon all CMOS value changes and exit setup 3 4 Stand...

Page 30: ...r Primary Slave Secondary Master Secondary Slave Press PgUp or PgDn to select Manual None Auto type Note that the specifications of your drive must match with the drive table The hard disk will not wo...

Page 31: ...otection If this function is enabled and someone attempt to write data into this area BIOS will show a warning message on screen and alarm beep Move Enter Select PU PD Value F10 Save ESC Exit F1 Gener...

Page 32: ...HDD 1 HDD 3 SCSI CDROM LAN and Disabled Swap Floppy Drive Switches the floppy disk drives between being designated as A and B Default is Disabled Boot Up Floppy Seek During POST BIOS will determine i...

Page 33: ...S 2 if using more than 64MB and running OS 2 Report No FDD For Win 95 Whether report no FDD for Win 95 or not The settings are Yes No 3 6 Advanced Chipset Features The Advanced Chipset Features Setup...

Page 34: ...an reserve this area of system memory for ISA adapter ROM When this area is reserved it cannot be cached The user information of peripherals that need to use this area of system memory usually discuss...

Page 35: ...F7 Standard Defaults 3 7 Integrated Peripherals CMOS Setup Utility Copyright C 1984 2001 Award Software Integrated Peripherals Item Help OnChip IDE Function Press Enter OnChip Device Function Press E...

Page 36: ...eripheral controller contains an IDE interface with support for two IDE channels Select Both to activate each channel separately The settings are Both IDE0 IDE1 Primary Secondary Master Slave PIO The...

Page 37: ...1 General Help F5 Previous Values F6 Optimized Defaults F7 Standard Defaults AC97 Audio Device This item allows you to decide to enable disable the chipset family to support AC97 Audio The settings ar...

Page 38: ...board and you wish to use it If you install add on FDC or the system has no floppy drive select Disabled in this field The settings are Enabled and Disabled Onboard Serial Port 1 Port 2 Select an addr...

Page 39: ...n be chosen 3 8 Power Management Setup The Power Management Setup allows you to configure your system to most effectively save energy saving while operating in a manner consistent with your own style...

Page 40: ...Software PM Wake Up Events Item Help IRQ 3 7 9 15 NMI Enabled IRQ 8 Break Suspend Disabled Ring Power Up Control Disabled MACPME Power Up Control Disabled PCIPME Power Up Control Disabled KB Power ON...

Page 41: ...up This section describes configuring the PCI bus system PCI or Personal Computer Interconnect is a system which allows I O devices to operate at speeds nearing the speed the CPU itself uses when comm...

Page 42: ...n resources are controlled manually assign each system interrupt a type depending on the type of device using the interrupt Please refer to section 3 9 1 PCI VGA Palette Snoop Leave this field at Disa...

Page 43: ...rent CPU Temperature 29 C 84 F Current CPUFAN Speed 4687 RPM Current SYSFAN Speed 0 RPM Vcore 1 69V Vcc3 3 3 31V 5V 5 00V 12V 12 02V 12V 12 16V 5VSB V 5 45V Menu Level Move Enter Select PU PD Value F1...

Page 44: ...his item allows you to set the CPU Host DRAM PCI Clock The choice are Default 66 66 33Mhz 66 100 33Mhz 100 100 33MHz 101 101 34MHz 103 103 34MHz 110 110 33MHz 112 112 34MHz 115 115 34MHz 100 133 33MHz...

Page 45: ...and not enter a password To disable a password just press Enter when you are prompted to enter the password A message will confirm that the password will be disabled Once the password is disabled the...

Page 46: ...enu should appear as below If the menu does not appear double click MY COMPUTER double click CD ROM drive or click START click RUN type X SETUP EXE assuming X is your CD ROM drive From MAGIC INSTALL M...

Page 47: ...5 AGPVXD WIN9X SETUP EXE including WIN95 98 98SE ME for WINDOWS 2000 is X SIS635 AGPVXD WIN2000 SETUP EXE For WINDOWS 95 98 98SE ME 2000 1 Click AGPVXD when Magic Install MENU appears 2 Click Next whe...

Page 48: ...IC INSTALL MENU appears 2 Then auto detect operation system language edition click OK start to install DRIVER 3 When ask Remove old device driver Click OK 4 Click Finish and Restart Windows NOTE MAGIC...

Page 49: ...0 WINDOWS 95 98 98SE 98ME 2000 Setup 1 Click LAN when Magic Install Menu appears 2 Click NEXT when SiS PCI LAN Driver Setup appears 3 Choice restart my computer now to finish setting up LAN Card click...

Page 50: ...Monitoring Software needs some system files to copy in Utility that s why it needs install PC HEALTH twice to complete setup 1 Click PC Health when Magic Install Menu appears 2 Click OK when Winbond H...

Page 51: ...nd Hardware Doctor it supports system voltage Fan speed and CPU SYSTEM Temperature Because this is a On time Monitoring program therefore the value will change after it detected if the value is over d...

Page 52: ...5 When On line update BIOS the program will auto check your BIOS version 6 Click Next if you need update BIOS after upgrade BIOS the system will clear CMOS and automatically restart 7 Click Yes if you...

Page 53: ...N 2000 Anti virus program 1 Click PC CILLIN when MAGIC INSTALL MENU Appears 2 Click NEXT when PC CILIN 2000 SETUP APPEARS Then click YES when the announcement of copywrite appears Software is starting...

Page 54: ...e 7 If you want to make a rescue disc insert a 1 44 MB disc 8 Setup Complete and click Finish 9 Enter Your name and E mail address Register PC cillin 2000 or Click Cancel Register Later 10 After insta...

Page 55: ...ram to your boot disc You may copy from DRIVER CD X FLASH AWDFLASH EXE or download from our web site STEP 3 Copy latest BIOS for 635CS 635CN from our web site to your boot disc STEP 4 Insert your boot...

Reviews: