background image


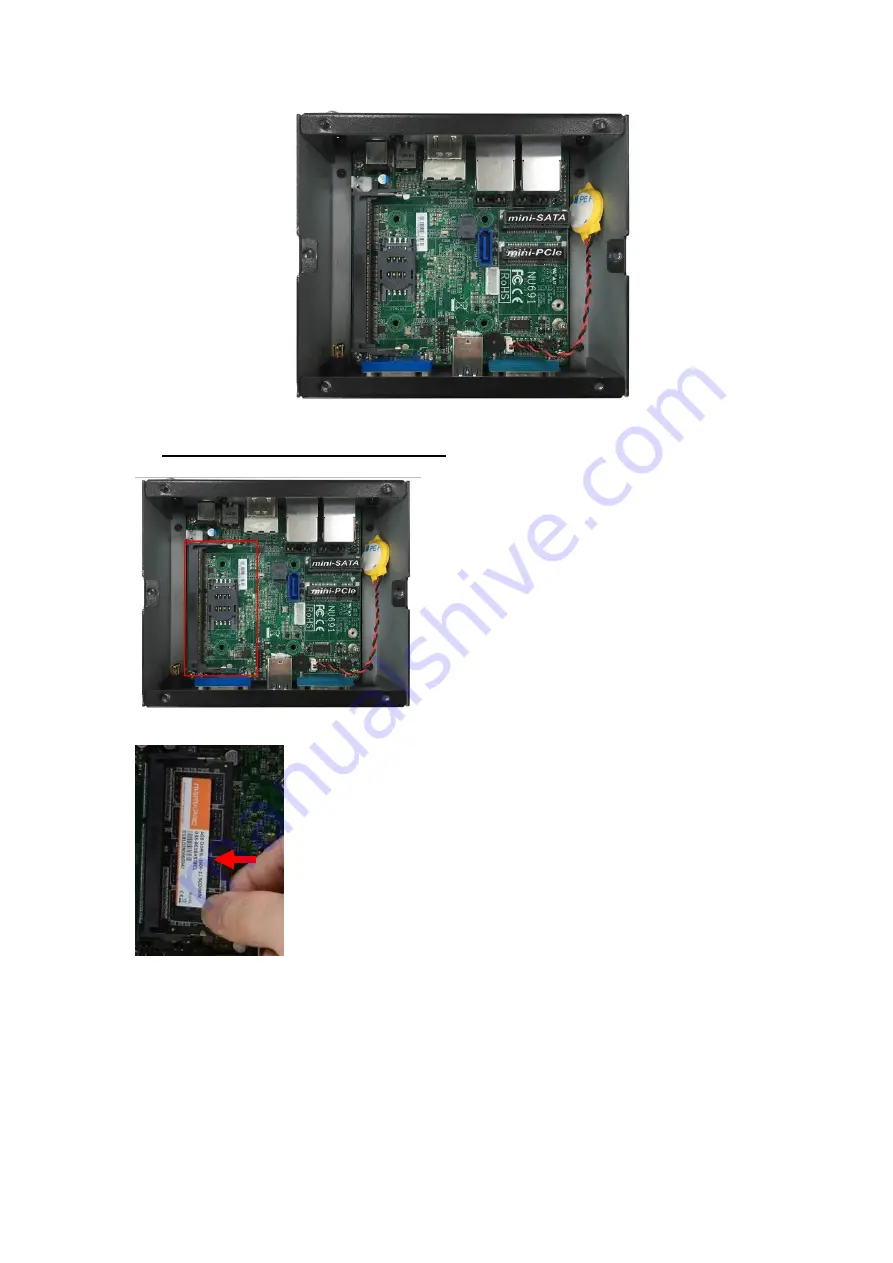
4.The internal structural view of the system for further intallation. 


II.


To Install SO-DIMM to the Board


1. 

Locate the SO-DIMM slot on the board.


2.

 Insert the gold-figure side of the compatible SO-DIMM into the slot at a 30 degree.


Summary of Contents for HBFBU691 Series

Page 1: ...hassis 1 Put the system upon a stable platform with this side up as the photo shows 2 Locate the screws at the spots marked on the cover and both sides of the system and unscrew them one by one 3 Lift...

Page 2: ...structural view of the system for further intallation II To Install SO DIMM to the Board 1 Locate the SO DIMM slot on the board 2 Insert the gold figure side of the compatible SO DIMM into the slot a...

Page 3: ...ically if installing direction is correct III To Install Wi Fi Card 1 Locate Mini PCIe slot on the board Remove the marked screw and use it to lock compatible card to the slot in later installation 2...

Page 4: ...s on the rear panel Remove the dust proof plugs on the marked spots from the panel to install the antenna as the following details show 5 Push this antenna head into antenna hole of the rear panel fro...

Page 5: ...the front side of the rear panel with the hexagonal screwnut and tighten it up 7 Press the metal hat on the end of the antenna string to corresponding antenna slot on the card as shown 8 The rear pane...

Page 6: ...l Wi Fi receiver antenna to the antenna screw head on the rear panel IV To Install MSATA Card 1 Locate Mini SATA slot on the board 2 Remove the marked screw and use it to lock MSATA card to the slot i...

Page 7: ...3 Insert the gold figure side of compatible MSATA card into the slot and press down 4 Lock the card to the board by tightening up the screw to the marked spot...

Reviews: