
Baby Lock Jewel Service Manual
© Baby Lock, all rights reserved
7
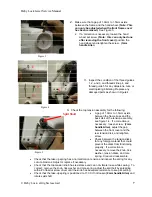
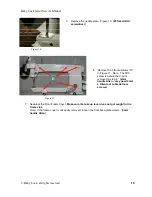
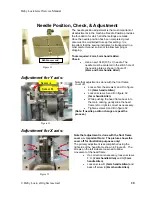
Figure 3
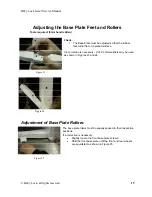
4
5
1
2
3
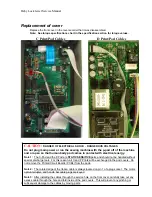
Figure 4
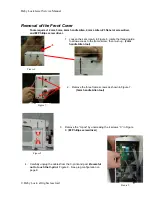
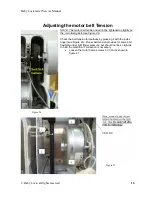
Figure 5
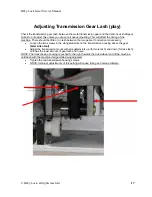
Split Shaft
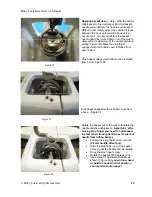
2.
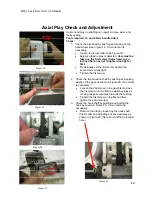
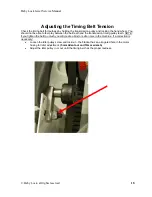
Make sure that a gap of 1.0mm to 1.5mm exists
between the frame and the hand wheel.
(Note: This
can only be adjusted when the front frame cover
has been removed.)
See Figure 3.
•
If a correction is necessary, loosen the hand
wheel set screw,
(Note: this can only be done
after removing the front cover)
position the
hand wheel and retighten the screw.
(3mm
handle Allen
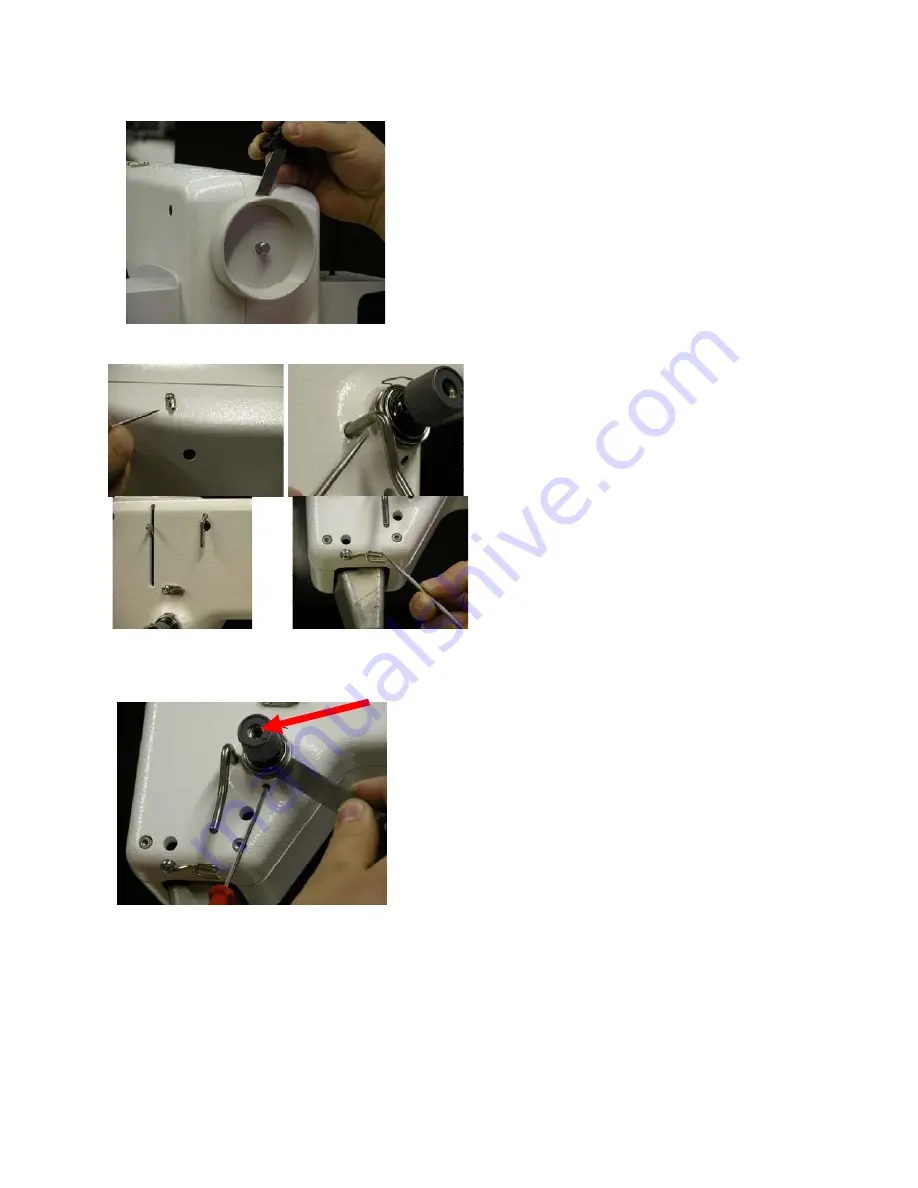
3.
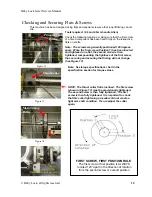
Inspect the condition of the thread guides
1, 2, and 3, and thread stirrup 4, and
thread guide 5 for any abrasions, cuts, or
electroplating blistering. Replace any
damaged parts as shown in Figure 4.
4.
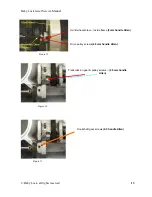
Check the top tension assembly for the following:
•
A gap of 1.0mm to 1.5mm exists
between the frame boss and the
back disk of the tension assembly,
see figure 1.4. If a correction is
necessary: loosen screw.
(2mm
handle Allen)
, adjust the gap
between the front cover and the
rear tension disk, and retighten
screw.
•
Check between the tension disks
for any foreign material that could
prevent the disks from functioning
properly. If a correction is
necessary, remove the knob, tick
washer, tension disks, and core
spring. Clear and reassemble.
•
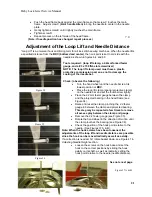
Check that the take up spring has a normal torsion tension and inspect the spring for any
cut or abrasions. Adjust or replace if necessary.
•
Check that the top tension knob has resistance and can not vibrate loose while sewing. To
correct: remove the knob, tick washer and core spring, adjust the split bolt by spreading
with a #3 flat-slot screw driver until the knob has adequate resistance to keep its setting.
•
Check that the take-up spring is positioned to 11:00. if not loosen
(2mm handle Allen)
and
rotate split shaft.


