


----3D Printer User Guide
3
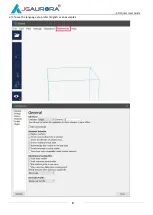
2. About A8S
2.1 Basic reference
Model number: A8S
Device size: 620*450*600mm
Layer thickness: 0.05- 0.3mm
(
suggest 0.1mm
)
Device weight: 34.8kg
Printing speed: 10 - 150mm/s (suggest 30 to 60mm/s)
Package size: 740*560*720mm
Nozzle temperature: Room temperature to 250ºC
Package weight: 42.8kg
Nozzle diameter: 0.4mm
Build size: 350*250*300 mm
Hot bed temperature: Room temperature to 110ºC
Platform material: Black Diamond Glass heated plate
Support material: PLA /ABS/WOOD/PETG/TPU
LCD display: 4.3” Touch Screen
Filament diameter: 1.75mm
Connectivity: USB cable/ USB stick
Language: English/German/French/Spanish/Japanese
Support Formats: STL/OBJ/G-Code
Environmental requirements:
Temperature 5 to 40ºC, Humidity 20% to 50%
OS: Windows, Linux, Mac
AC Input: AC115 OR 230V, manually switchable
Software: Cura/Simplify 3d/JGcreat(Win 7 64 bit)
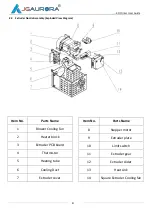
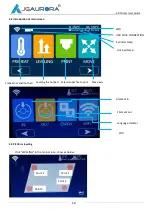
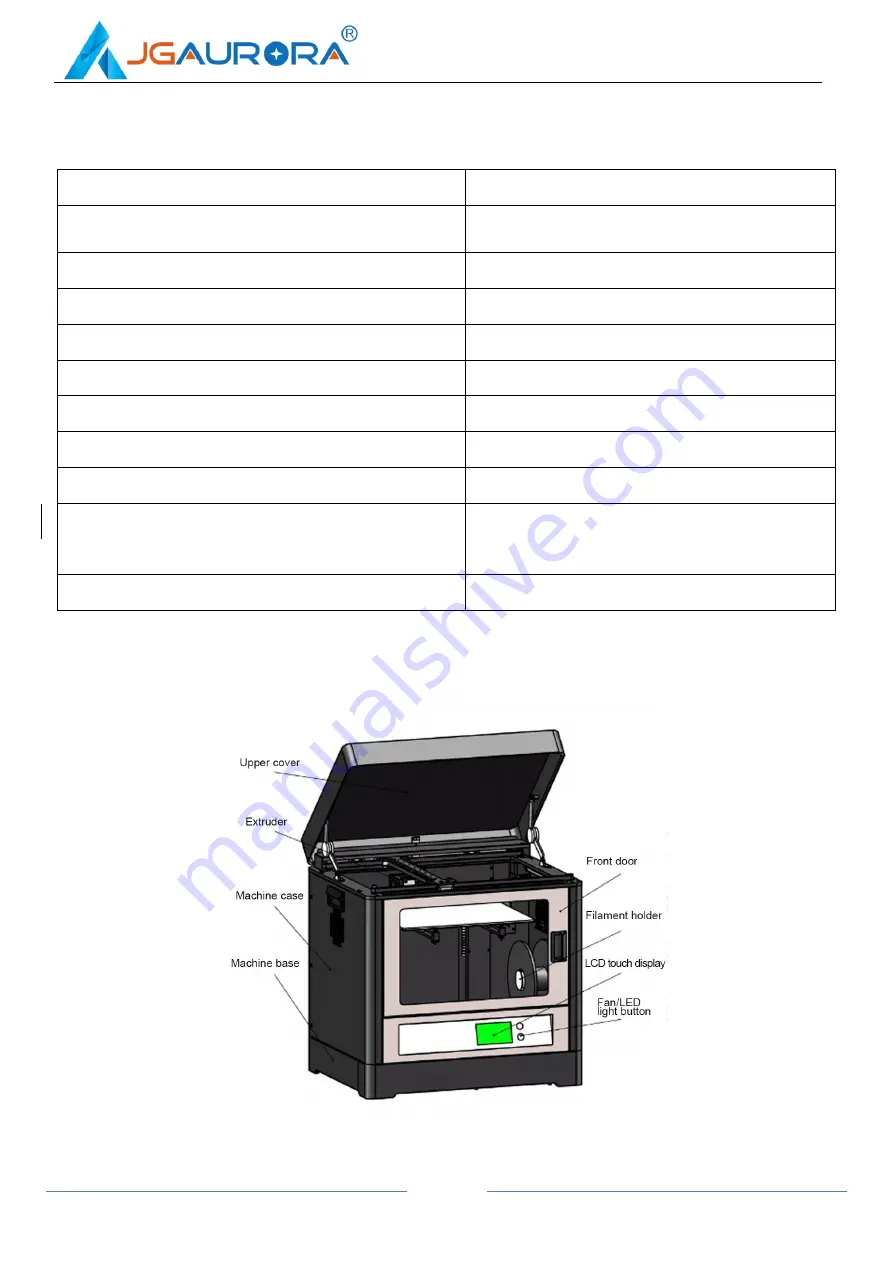
2.2 Views of A8S


