


With User to Create Better Product
10
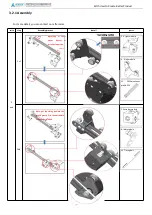
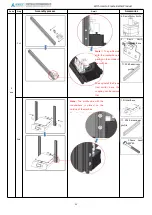
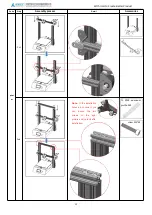
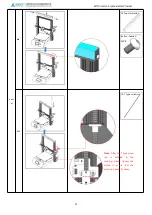
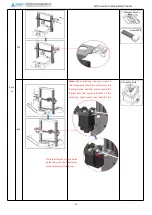
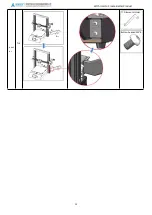
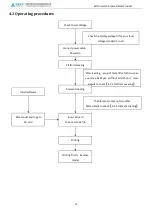
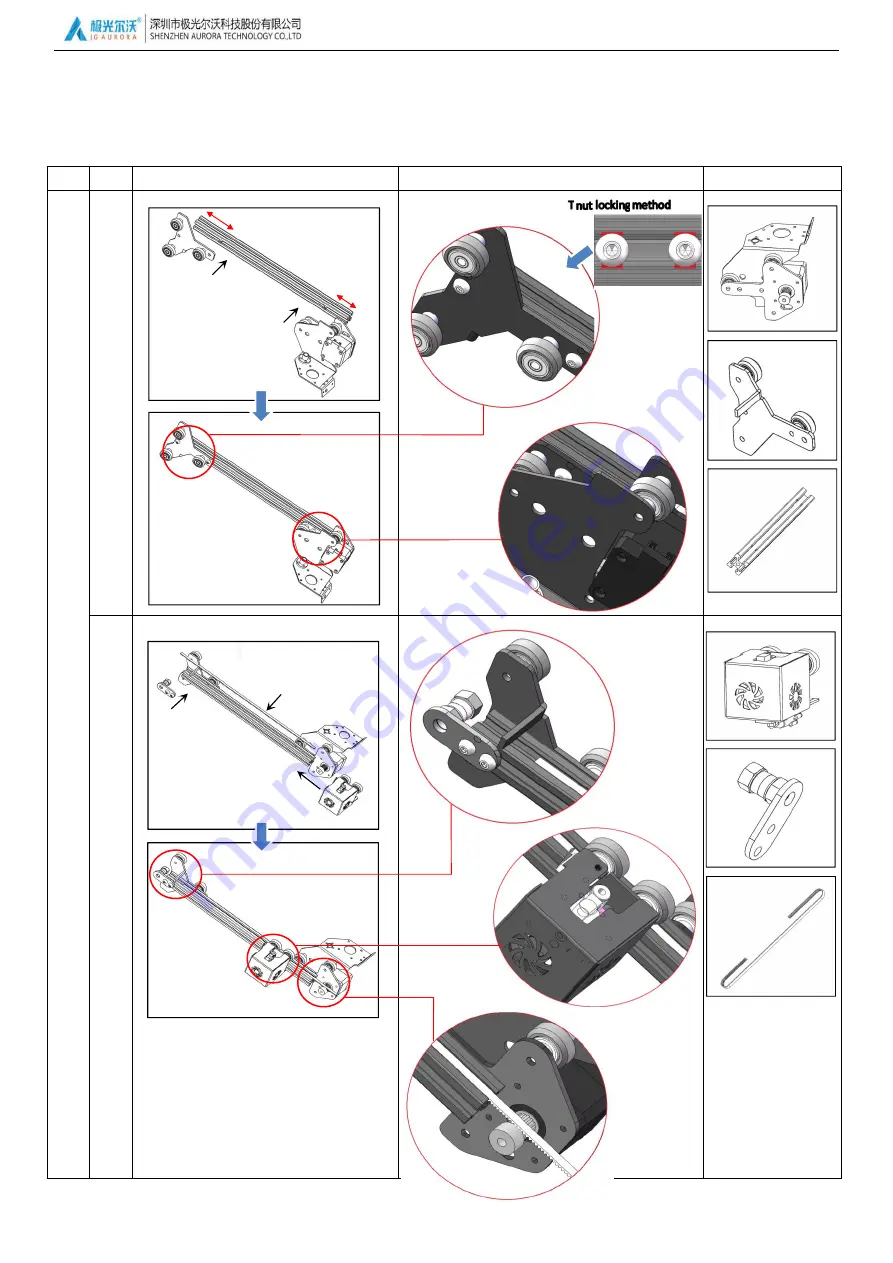
3.2.1 Assembly
For more detail, you can contact our after sales.
suite
step
Assembly process
detail
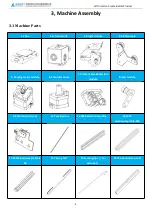
parts
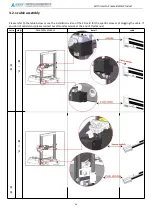
X
axis
1st
2nd
long
short
4. X left module
3. X right module
13.
2020aluminum
profile-350
2. Extruder module
14. Timing belt
8. Idler module
Note: put the timing belt into the
profile groove first, then,assemble
the extruder module
Note:long or short
means
distant of
install hole position
。


