


Audio Zones continued...
Access the Audio Zone Setup menu to configure the functionality of each zone.
1. Press and hold
SETTINGS
to access the
System Settings: Main Menu
.
2. Press
to select
Audio Zone Setup
.
3. Use
to make selections.
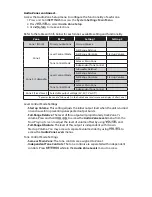
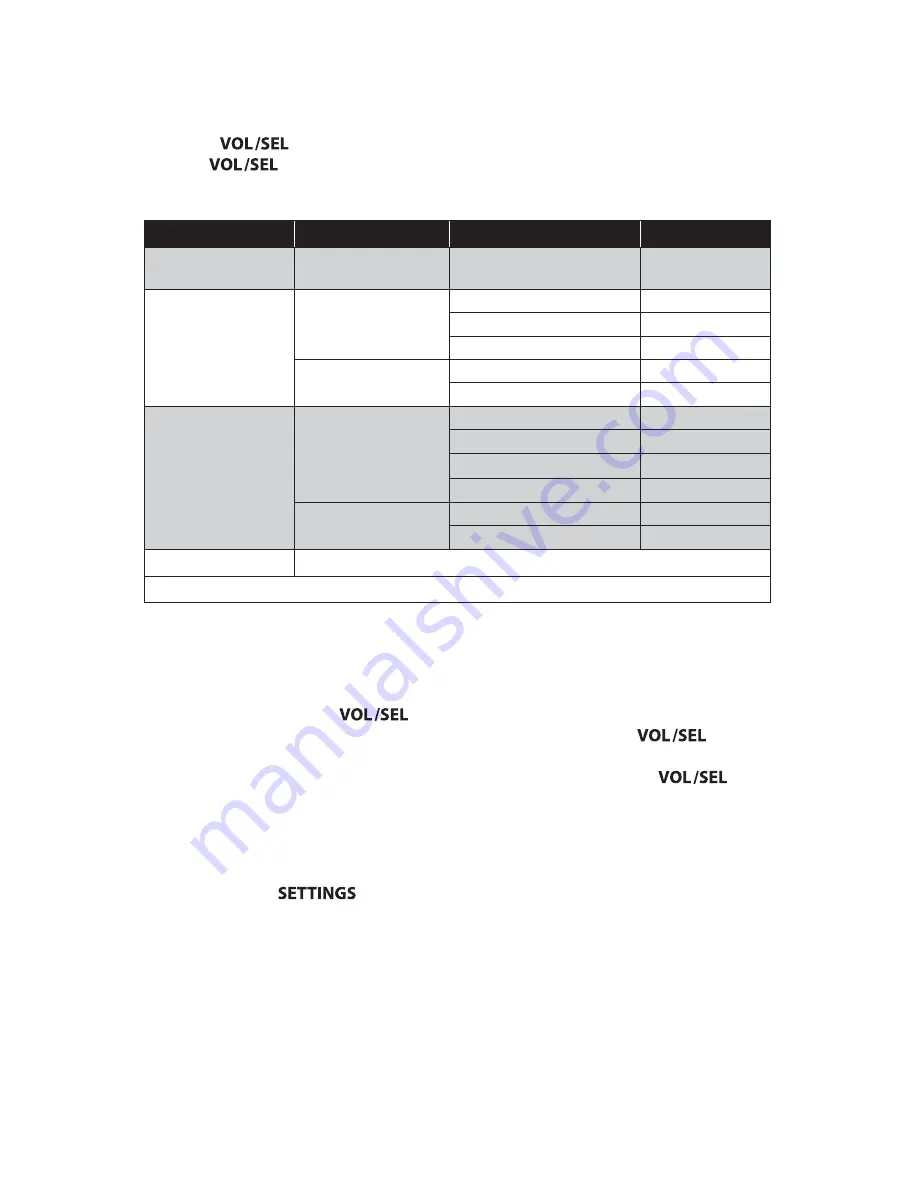
Refer to the table and info below for each zone’s available setting and functionality.
Zone
Menu
Setting 1
Setting 2
Zone 1 (MAIN)
Primary Audio Zone
Start up Volume
Zone 2
Level Control Mode
Full-Range Relative
Full-Range Absolute
Start up Volume
Off
Tone Control Mode
Same as Main Zone
Independent Tone Control
Zone 3 / Subwoofer
Level Control Mode
Subwoofer Relative*
Full-Range Relative
Full-Range Absolute
Start up Volume
Off
Tone Control Mode
Same as Main Zone
Independent Tone Control
Zone 4 (Fixed Level)
Selectable output voltage (4V, 2V, 1V or Off )
* Renames the zone to “Subwoofer” in the Audio Zone Levels menu and displays it after Zone 1.
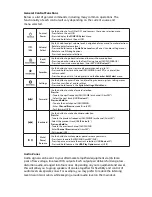
Level Control Mode Settings
•
Start up Volume:
This setting adjusts the initial output level when the unit is turned
on and is useful in preventing unexpected output bursts.
•
Full-Range Relative:
The level of this output will proportionally track Zone 1’s
volume. Press and hold
to access the
Audio Zone Levels
menu
from the
Now Playing Screen to
adjust the level of volume offset by using
and.
•
Full-Range Absolute:
The level of this output is independent with its own
Start up Volume. You may access its separate volume slider by using
to
access the
Audio Zone Levels
menus.
Tone Control Mode Settings
• Same as Main Zone:
The tone controls are assigned to Zone 1.
•
Independent Tone Controls:
The tone controls are separated with independent
controls. Press
while in the
Audio Zone Levels
menu to access.
Summary of Contents for MediaMaster 100s
Page 6: ...0 0 UHFHLYHU RQO 17...


