S T E P 9
Once the hardware is started on BOTH the front, and rear
Allen Head Studs, you can tighten the hardware down.
Continued on Next Page
SB-J-UNLTD4DR/13TW5 INSTR_SKU# 011276
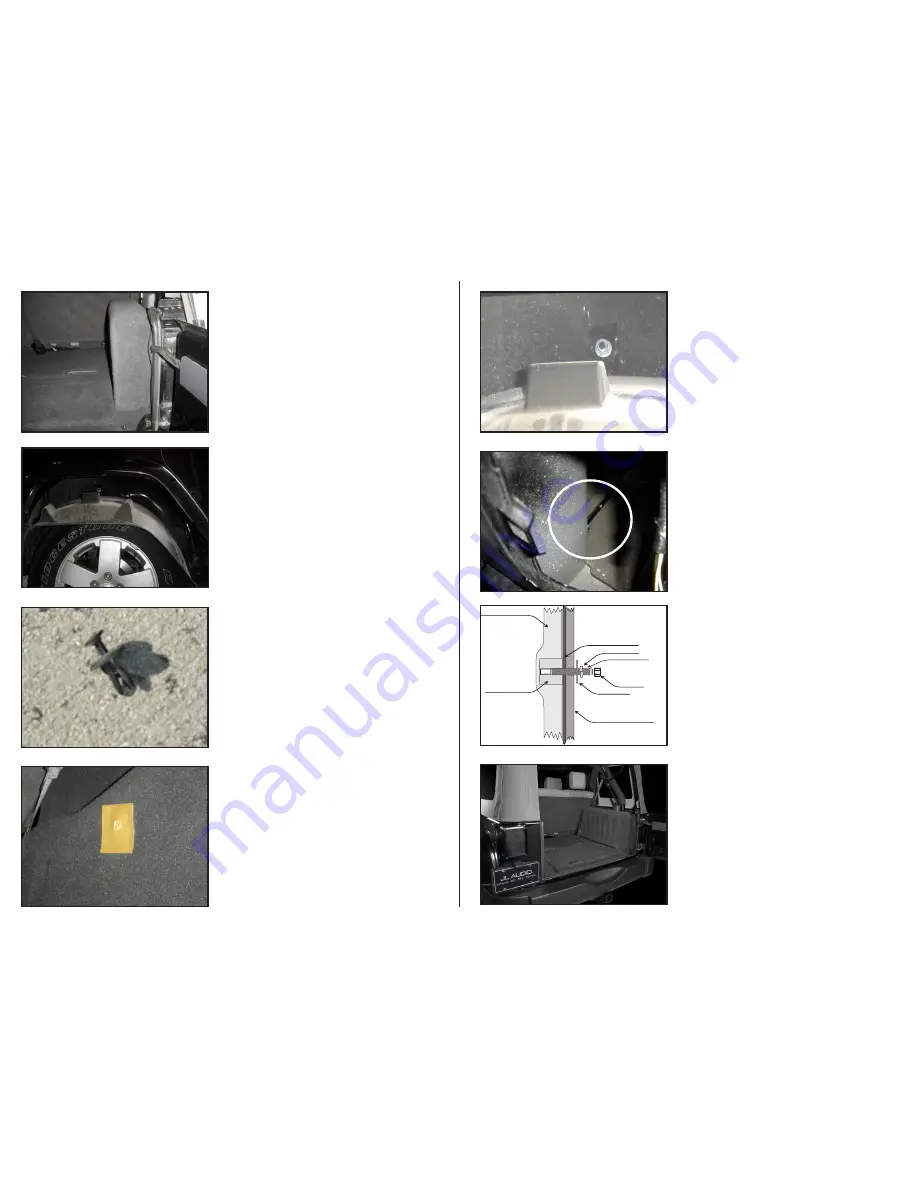
s t e P 6
At each mark in the wax squares, drill a 3/8” hole through the
carpeting and inner fender. Back out the Allen Head Studs in
the Stealthbox® so that Approximately 1” is exposed.
*CAUTION*
Before drilling, always make sure that you are not
going to be drilling into any gas lines, brake lines,
transmission lines, electrical wiring, exhaust systems
or anything else that might cause a reduction in
your weekly pay. always wear eye protection when
drilling.
d e t a I l
Pulling on the center head of the inner fender body fasteners
will allow the fastener to be removed.
Re-installation is the
reverse process, push the body of the fastener through the
holes then, push the center head in to expand the body.
s t e P 5
Notice the Inner Fender Liner Fasteners, all 12 of these fasten-
ers need to be removed so that the Inner Fender Liner can
be dropped down on the rear tire. This needs to be done so
that you can gain access to the Hole where the Allen Head
Stud will come through the Inner Fender.
s t e P 4
Slide enclosure into place and press against the inner fender,
producing indentations in the wax squares where the studs
hit. Remove the enclosure.
Page 2 • JL Audio, Inc 2008
S T E P 7
Start the included hardware on the 3/8-16 Allen Head Stud.
There should be a 3/8x 1-1/2” Fender Washer, Split lock
Washer and Hex Nut on the Allen Head Stud. (see
illustration at
steP 9
for details).
S T E P 1 0
C o n G R a t u l a t I o n s !
You have completed the installation for this model!
Enjoy your new Stealthbox®!
Please refer to the Power Recommendation section for an
amplifier recommendation and basic set-up help.
S T E P 8
Reaching down and around through the hole where the
taillight mounts, you will find the rear Allen Head Stud.
Install included hardware as illustrated above. Re-install
the previously removed Taillight, test the operation of the
taillights.
THREADED INSERT
CARPETING
LOCK WASHER
FLAT WASHER
STEALTHBOX WALL
HEX NUT
VEHICLE SHEET METAL
ALLEN HEAD STUD


