background image

Installation Detail 

Scanner Installation


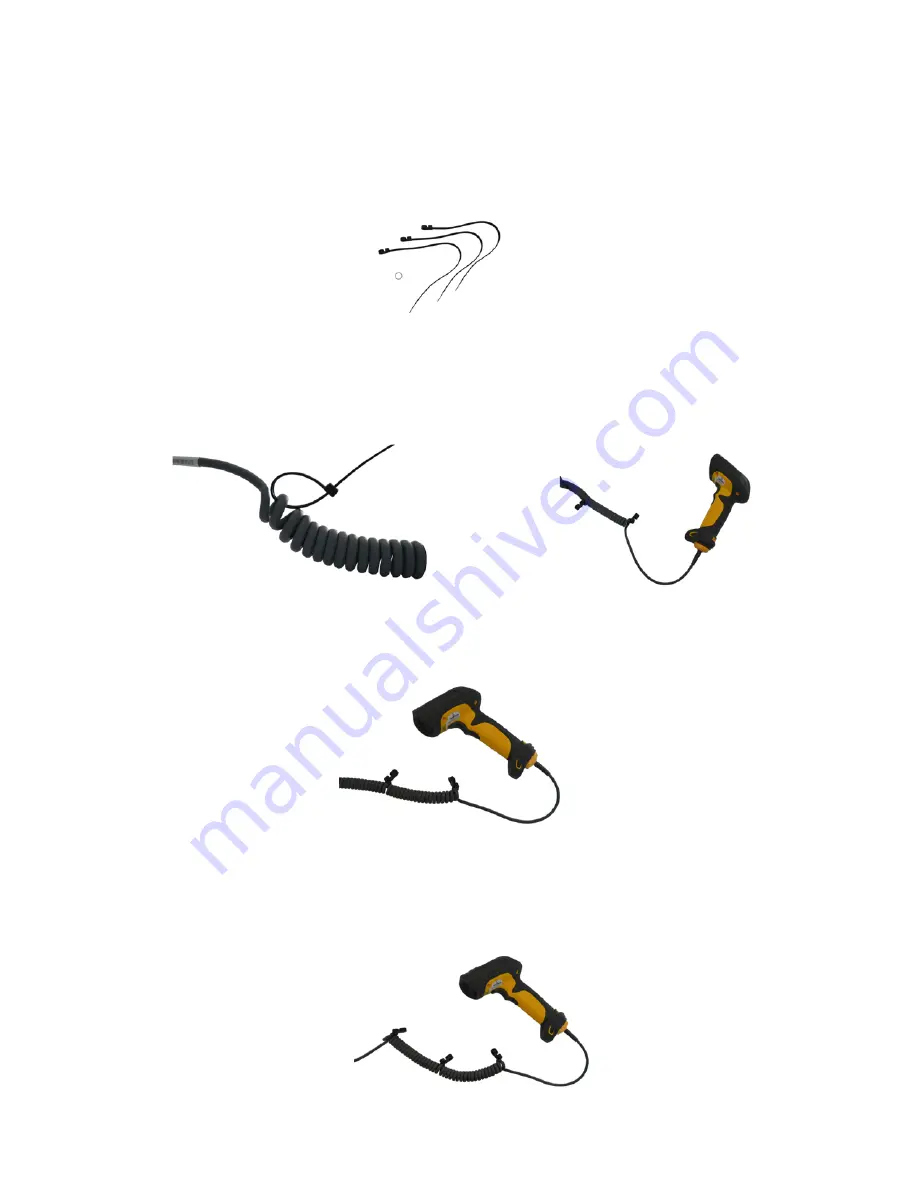
1.    Locate 1 cable tie on the 

Thermotrax

 and 3 cable ties in the package as seen in Figure 1. 


Figure 1  

2. Secure 1 cable tie to the scanner cable at the end near laser scanner.  (Figures 2 & 3).    
 

      Figure 2   


Figure 3 

3.Secure the second cable tie to the approximate mid-point of scanner cable. (Figure 4) 


Figure 4 


4.Determine where the 

Thermotrax

 is going to be placed in relation to the terminal.  After leaving  

   enough of the scanner’s cable to go between the terminal and the 

Thermotrax

 secure the third    

cable tie to scanner’s cable as shown in Figure 5. 


          Figure 5 

JLC 520S v.215.1 


!

3

Summary of Contents for Thermotrax

Page 1: ...JLC Solutions Installation Manual Thermotrax Scanner Heater JLC 520 S v215 1 1...

Page 2: ...NSTRUCTIONS WARRANTY AND SAFETY INFORMATION PRIOR TO PROCEEDING WITH YOUR INSTALLATION VERFIY THAT THE PARTS RECEIVED ARE COMPLETE AS DETAILED WITHIN THE PARTS LIST FOUND IN THIS MANUAL If you have an...

Page 3: ...er scanner Figures 2 3 Figure 2 Figure 3 3 Secure the second cable tie to the approximate mid point of scanner cable Figure 4 Figure 4 4 Determine where the Thermotrax is going to be placed in relatio...

Page 4: ...ve the scanner cable retention clip with the screw Figure 7 6a Remove the black scanner cable retention clip from the screw Figure 7 7 Place the stainless steel retractor cable connector on the screw...

Page 5: ...hown in figure 9 Figure 9 9 Draw the cable tie around the base of the scanner as shown Figure 10 10 Tighten the cable tie as shown in figure 11 This method will allow for the screws at the bottom of t...

Page 6: ...ottom of the laser scanner Secure the Thermotrax cable to the ring on the scanner Figure 13 Figure 13 13 Secure the remaining cable tie permanently fastened to Thermotrax around the portion of the sca...

Page 7: ...tage affixed to the bottom of the Thermotrax Be sure that the voltage label matches the lift truck before installation The green LED in the Thermotrax will light when power is being supplied to the Th...

Page 8: ...Installation Detail Electrical Power Connection JLC 520S v 215 1 8...

Page 9: ...ty in mounting options By removing the 3 screws on each side of the heated holder and relocating the bracket as shown in the photos below the Thermotrax can be mounted in the deck mount or in a wall s...

Page 10: ...lation issues In order to provide some guidance in regards to these and other installation and safety issues please contact the appropriate organization association government agency or committee that...

Reviews: