SECTION 3 - TROUBLESHOOTING
3-8
31215808
3.6
OUTRIGGER INTERLOCK CONTACTS
Outrigger Socket and Outrigger Beam - Interlock
Contacts
It is very important that the outrigger interlock contacts
located on the bottom surface inside the outrigger sockets of
the base frame, and the contactor plate on the bottom of each
outrigger beam are installed correctly. These parts when
installed properly will be insulated from (–) negative ground.
Read the following steps and see Figure 3-5. for correct instal-
lation. Also see Troubleshooting Tables 3-1 & 3-2. for any refer-
ence to possible problems with interlock contacts.
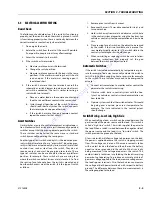
Outrigger Socket - Contactor Screw Mounting
Instructions
1.
Install an insulating bushing into the holes (on the
socket floor) inside of outrigger sockets in base frame.
2.
Place one (1) #8-32UNC x 5/8 in. long contactor screw
through each insulating grommet as shown in Figure 3-
5.
3.
Install two (2) #8 nylon washers onto contactor screw
threads against insulating grommet, on the underside of
the outrigger socket.
4.
Apply Medium Strength Threadlocking Compound to
screw threads.
5.
Install one (1) standard #8 brass nut and thread in
against nylon washer until insulating grommet just
starts to compress.
6.
Install wire end eyelet onto threaded end against previ-
ously installed brass nut.
7.
Install second standard brass nut and thread tight
against wire end eyelet.
8.
While holding first brass nut, jam
(tighten)
second brass
nut against wire end eyelet.
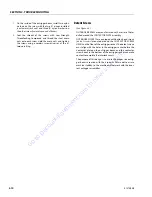
Outrigger Beam - Interlock Contactor Plate
Mounting Instructions
1.
Assemble an insulating bushing into each of the screw
holes in the floor of the outrigger beam.
2.
Locate the contactor plate and insert two (2) brass #8 -
32UNC x 3/4 in. long countersunk flathead screws
through the contactor plate.
3.
Install one (1) o-ring on one screw and stack two (2) on
the other screw, slide o-rings in against contactor plate.
4.
On the bottom of the outrigger beam slide the threads
of brass screws
(with o-rings and contactor plate assem-
bly)
through the insulating bushings. Install the screw
with two (2) o-rings towards jack end of outrigger beam.
Hold in place if necessary.
Go
to
Discount-Equipment.com
to
order
your
parts


