SECTION 3 - CHASSIS & SCISSOR ARMS
3121788
3-5
Battery Maintenance and Safety Practices
Non-Sealed - Refillable Lead Acid Batteries Only
CAUTION
ENSURE THAT BATTERY ACID DOES NOT COME INTO CONTACT WITH
SKIN OR CLOTHING. WEAR PROTECTIVE CLOTHING AND EYEWEAR
WHEN WORKING WITH BATTERIES. NEUTRALIZE ANY BATTERY ACID
SPILLS WITH BAKING SODA AND WATER.
BATTERY ACID RELEASES AN EXPLOSIVE GAS WHILE CHARGING,
ALLOW NO OPEN FLAMES, SPARKS OR LIGHTED TOBACCO PRODUCTS
IN THE AREA WHILE CHARGING BATTERIES. CHARGE BATTERIES ONLY
IN A WELL VENTILATED AREA.
ADD ONLY DISTILLED WATER TO BATTERIES. WHEN ADDING DISTILLED
WATER TO THE BATTERIES, A NON-METALLIC CONTAINER AND/OR
FUNNEL MUST BE USED.
DO NOT REPLACE ITEMS CRITICAL TO STABILITY, SUCH AS BATTERIES,
WITH ITEMS OF DIFFERENT WEIGHT OR SPECIFICATION. DO NOT MOD-
IFY UNIT IN ANY WAY TO AFFECT STABILITY.
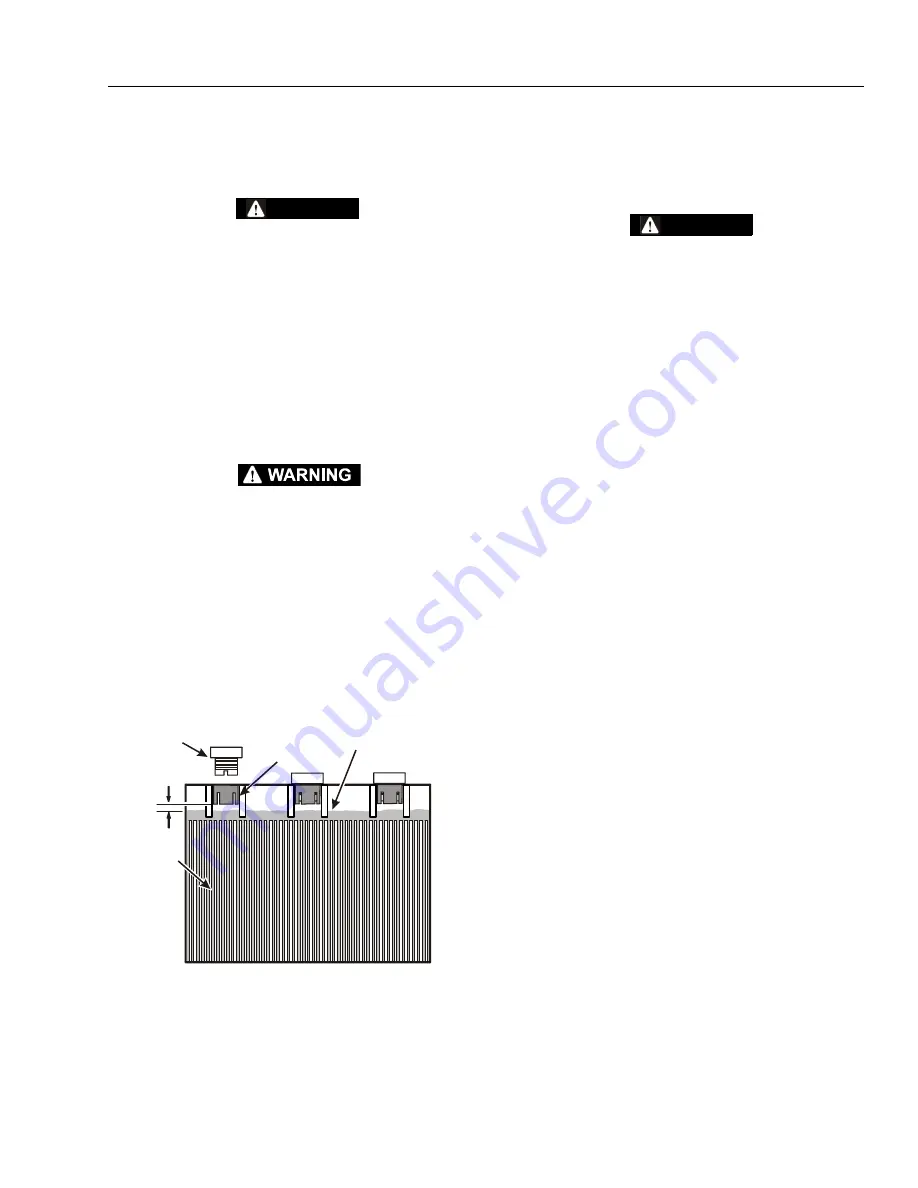
Check the electrolyte level of the batteries often, adding
only distilled water when required. When fully charged,
battery fluid level should be 1/8" below vent tubes.
(See
.
•
DO NOT fill to bottom of vent tubes.
•
DO NOT allow fluid level to go below the top of the
plates when charging or operating.
3.3
BATTERY CHARGING
NOTE:
Be sure that machine is parked in a well ventilated
area before charging begins.
CAUTION
ONLY PLUG THE CHARGER INTO A PROPER LY INSTALLED AND
GROUNDED OUTLET. DO NOT USE GROUND ADAPTORS OR MODIFY
PLUG. DO NOT TOUCH NON-INSULATED PORTION OF OUTPUT CONNEC-
TOR OR NON-INSULATED BATTERY TERMINAL.
DO NOT OPERATE CHARGER IF THE AC SUPPLY CORD IS DAMAGED OR
IF THE CHARGER HAS RECEIVED A SHARP BLOW, BEEN DROPPED, OR
OTHERWISE DAMAGED IN ANY WAY.
ALWAYS DISCONNECT THE CHARGER AC SUPPLY BEFORE MAKING OR
BREAKING THE (POSITIVE/NEGATIVE) CONNECTIONS TO THE BATTERY.
DO NOT OPEN OR DISASSEMBLE CHARGER.
1.
The battery charger AC input plug is located
inside the frame at the left rear of the machine
next to the battery charger.
2.
Connect the charger AC input plug to a
grounded outlet using a 3 wire heavy duty
extension cord (See Table 1-5, Battery Charger
Specifications, for battery charger AC input spec-
ifications).
3.
After connecting the charger to an AC outlet at
the start of the charging cycle, check the LED
indicators on the charger for normal operation
or if a fault has occurred.
4.
Current battery charge state can also be seen on
the platform control station panel LEDs, or the
MDI indicator (if equipped) on the ground con-
trol station, when machine is powered up.
5.
The batteries are fully charged when all three
GREEN LED indicators on the platform control
station or MDI battery charger status panel are
illuminated.
NOTE:
If the charger is left plugged in, the charger will
automatically restart a complete charge cycle if the
batteries voltage drops below a minimum voltage
or 30 days has elapsed.
BATTERY
FILLER CAP
FLUID LEVEL OF FULLY
CHARGED BATTERY
VENT TUBE
PLATES
1/8 "
Figure 3-6. Battery Fluid Level
Go to
Discount-Equipment.com
to
order your
parts


