SECTION 3 - CHASSIS, PLATFORM, & SCISSOR ARMS
3-24
31215079
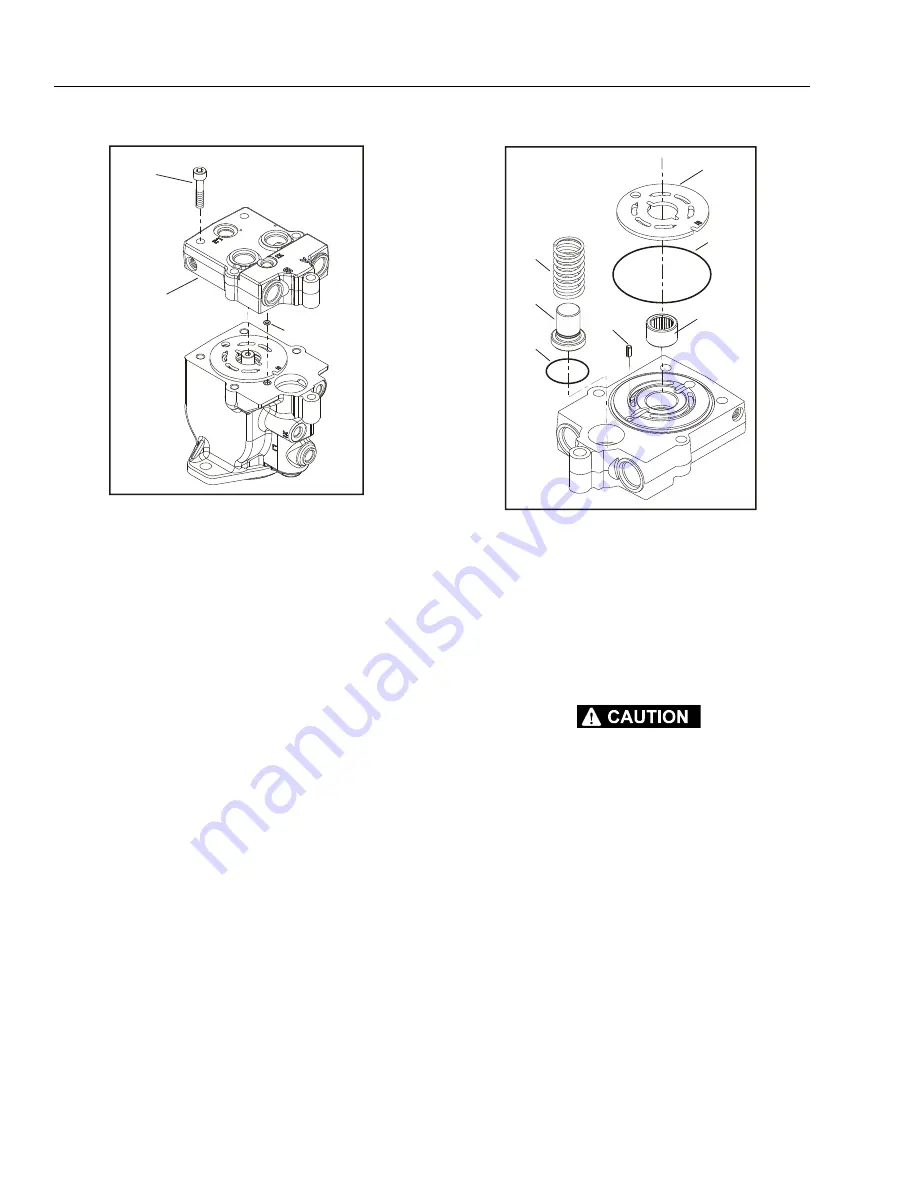
13. Using an 8 mm internal hex wrench, remove the end-
cap screws (22).
14. Remove the endcap (23). Remove O-ring (24) from
the housing or endcap.
When the endcap screws are removed, pressure from
the servo spring will cause the endcap to bind on the
shaft. Press down on the portion of the endcap cov-
ering the servo piston and hold the endcap level
while removing.
TAKE CARE NOT TO SCRATCH THE SURFACE OF THE VALVE PLATE.
15. Remove the valve plate (25) and timing pin (26) from
the endcap.
Each displacement has a unique valve plate. For
identification, the last two digits of the valve plate
part number are stamped on its surface.
16. Remove and discard the O-rings (27).
17. Remove the rear shaft bearing (28) from the endcap
with a bearing puller.
The bearing may be difficult to remove with a puller.
Try this as an alternative: Pack the bearing cavity with
heavy grease. After the shaft is removed, insert it into
the bearing cavity and tap lightly with a soft mallet
on the splined end. The grease will force the bearing
out. Use caution not to drive the bearing past the
rear shaft journal as the bearing may become
trapped on the shaft and damaged.
18. Remove minimum angle stop (29) and servo spring
(30) from the housing.
24
22
23
22. Screw
23. End Cap
24. O-ring
Figure 3-10. End Cap
26
27
29
30
28
27
25
25. Valve Plate
26. End Cap
27. O-ring
28. Rear Shaft Bearing
29. Minimum Angle Stop
30. Servo Spring
Figure 3-11. Valve Plate & Rear Shaft Bearing
Go
to
Discount-Equipment.com
to
order
your
parts


