SECTION 4 - HYDRAULICS
4-12
– JLG Lift –
3121133
NOTE:
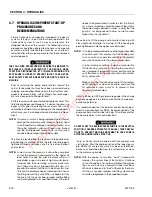
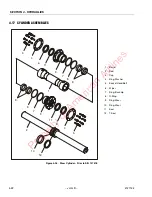
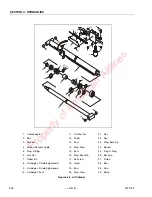
During disassembly, take special note of the wear
patterns on the bearing blocks (2) and body (13).
Relate these patterns to the inlet and outlet sides of
the pump. The large port whether in the body (13) or
the rear cover (6) corresponds to the inlet side of the
pump. The inlet side of the body can be identified by
the gear contact pattern in the gear bore. The bear-
ing block will have somewhat heavier wear patterns
on the inlet side.
Parts Inspection
1.
Wash all part and dry thoroughly.
2.
Inspect front and rear bearing block. replace if scor-
ing or uneven wear is observed.
NOTE:
A somewhat heavier wear pattern is normal on the
low pressure (inlet) side of the bearing blocks (2).
However, there should be no heavy scoring in this
area.
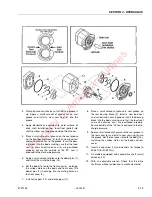
3.
Remove anti extrusion seal (4) and pressure loading
seal (3) from each bearing block and discard.
4.
Inspect bushings in each bearing block (2). replace
bearing block if bushings are heavily scored or
burned.
5.
Inspect gear journals and faces. Replace if faces or
journals are scored or worn.
6.
Inspect body for wear and scoring. If gear contact
wear on low pressure side (inlet) exceeds 0.005 in.
(.127mm) depth, replace body. If the body is usable,
lightly wipe and remove burr’s with suitable de-burr-
ing tool.
Pump Reassembly
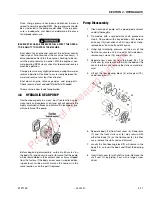
1.
Place the front cover (5) on a flat plate with the steal
shaft seal bore up. Install new shaft seal (1). Press
seal until it is 0.157 in (4.0mm) below front surface.
Pack the area between the double lip of the seal with
Lubriplate or and equivalent grease.
Property of American Airlines

