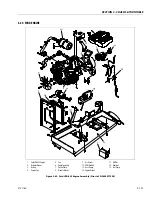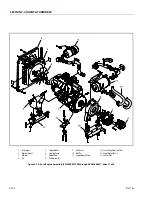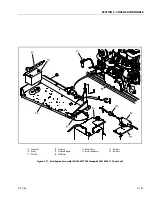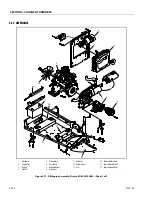
SECTION 3 - CHASSIS & TURNTABLE
3-140
3121160
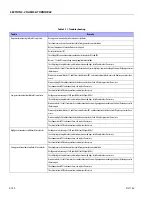
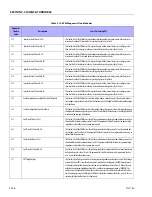
Table 3-11. Troubleshooting
Trouble
Remedy
No generator output at platform AC receptacles.
Be sure generator control switch is turned on at platform.
Check and secure electrical connections at platform, generator, and control box.
Be sure all equipment is turned off when starting unit.
Reset circuit breaker CB1.
Check plug PLG3 connection and/or connections at receptacles RC3 and RC5.
Be sure + 12 volts DC input voltage is being supplied to control box.
Check slip rings, wiring to brushes, and brush position on slip rings. Install new brushes if necessary.
Disconnect leads 12 and 13 from brushes, and check continuity across slip rings (nominal reading is 26 ohms). Replace generator
if rotor is open.
Disconnect stator weld leads 1, 2, and 3 from circuit breaker CB1 , and check continuity between leads. Replace generator if nec-
essary.
Disconnect plug PLG4 and check continuity between exciter leads 5 and 6. Replace generator if necessary.
Check power board PC1 and connections, and replace if necessary.
Check control board PC2 and connections, and replace if necessary.
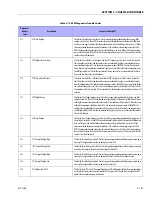
Low generator output at platform AC receptacles.
Verify generator is running at 3600 rpm (60 Hz) or 3000 rpm (50 Hz).
Check slip rings, wiring to brushes, and brush position on slip rings. Install new brushes if necessary.
Disconnect leads 12 and 13 from brushes, and check continuity across slip rings nominal reading is 26 ohms). Replace generator
if rotor is open.
Disconnect stator weld leads 1, 2, and 3 from circuit breaker CB1, and check continuity between leads. Replace generator if nec-
essary.
Disconnect plug PLG4 and check continuity between exciter leads 5 and 6. Replace generator if necessary.
Check power board PC1 and connections, and replace if necessary.
Check control board PC2 and connections, and replace if necessary.
High generator output at platform AC receptacles.
Verify generator is running at 3600 rpm (60 Hz) or 3000 rpm (50 Hz).
Check slip rings, wiring to brushes, and brush position on slip rings. Install new brushes if necessary.
Check power board PC1 and connections, and replace if necessary.
Check control board PC2 and connections, and replace if necessary.
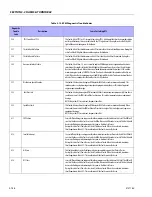
Erratic generator output at platform AC receptacles.
Check and secure electrical connections at platform, generator, and control box.
Verify generator is running at 3600 rpm (60 Hz) or 3000 rpm (50 Hz).
Check slip rings, wiring to brushes, and brush position on slip rings. Install new brushes n necessary.
Disconnect leads 12 and 13 from brushes, and check continuity across slip rings nominal reading is 26 ohms). Replace generator
if rotor is open.
Check power board PC1 and connections, and replace if necessary
Check control board PC2 and connections, and replace if necessary
Summary of Contents for 740AJ
Page 2: ......
Page 55: ...SECTION 3 CHASSIS TURNTABLE 3121160 3 3 This page left blank intentionally...
Page 116: ...SECTION 3 CHASSIS TURNTABLE 3 64 3121160 Figure 3 44 Swing Hub Prior to SN 0300074383...
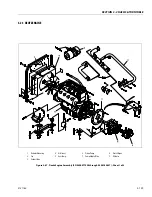
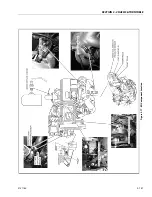
Page 203: ...SECTION 3 CHASSIS TURNTABLE 3121160 3 151 Figure 3 77 EFI Component Location...
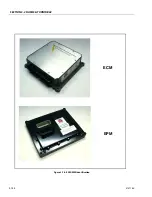
Page 206: ...SECTION 3 CHASSIS TURNTABLE 3 154 3121160 Figure 3 78 ECM EPM Identification ECM EPM...
Page 224: ...SECTION 3 CHASSIS TURNTABLE 3 172 3121160 Figure 3 83 Deutz EMR 2 Troubleshooting Flow Chart...
Page 228: ...SECTION 3 CHASSIS TURNTABLE 3 176 3121160 Figure 3 87 EMR 2 Engine Plug Pin Identification...
Page 229: ...SECTION 3 CHASSIS TURNTABLE 3121160 3 177 Figure 3 88 EMR 2 Vehicle Plug Pin Identification...
Page 230: ...SECTION 3 CHASSIS TURNTABLE 3 178 3121160 Figure 3 89 EMR2 Fault Codes Sheet 1 of 5...
Page 231: ...SECTION 3 CHASSIS TURNTABLE 3121160 3 179 Figure 3 90 EMR2 Fault Codes Sheet 2 of 5...
Page 232: ...SECTION 3 CHASSIS TURNTABLE 3 180 3121160 Figure 3 91 EMR2 Fault Codes Sheet 3 of 5...
Page 233: ...SECTION 3 CHASSIS TURNTABLE 3121160 3 181 Figure 3 92 EMR2 Fault Codes Sheet 4 of 5...
Page 234: ...SECTION 3 CHASSIS TURNTABLE 3 182 3121160 Figure 3 93 EMR2 Fault Codes Sheet 5 of 5...
Page 303: ...SECTION 4 BOOM PLATFORM 3121160 4 31 Figure 4 20 Rotator Assembly HELAC...
Page 460: ...SECTION 5 BASIC HYDRAULIC INFORMATION AND SCHEMATICS 5 116 3121160 NOTES...
Page 467: ...SECTION 6 JLG CONTROL SYSTEM 3121160 6 7 Figure 6 2 ADE Block Diagram...
Page 534: ...SECTION 6 JLG CONTROL SYSTEM 6 74 3121160 NOTES...
Page 580: ...SECTION 7 BASIC ELECTRICAL INFORMATION SCHEMATICS 7 46 3121160 NOTES...
Page 581: ......

