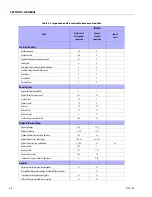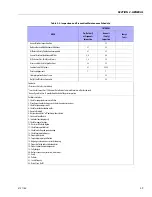
SECTION 1 - SPECIFICATIONS
1-12
3121160
1.10
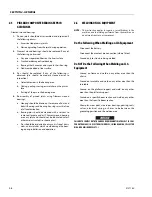
PROPANE FUEL FILTER REPLACEMENT
REMOVAL
1.
Relieve the propane fuel system pressure. Refer to
Propane Fuel System Pressure Relief.
2.
Disconnect the negative battery cable.
3.
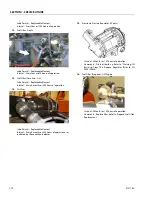
Slowly loosen the Filter housing and remove it.
4.
Pull the filter housing from the Electric lock off assembly.
5.
Remove the filter from the housing.
6.
Locate Filter magnet and remove it.
7.
Remove and discard the housing seal.
8.
If equipped, remove and discard the retaining bolt seal.
9.
Remove and discard mounting plate to lock off O-ring
seal.
INSTALLATION
BE SURE TO REINSTALL THE FILTER MAGNET INTO THE HOUSING BEFORE
INSTALLING NEW SEAL.
1.
Install the mounting plate to lock off O-ring seal.
2.
If equipped, install the retaining bolt seal.
3.
Install the housing seal.
4.
Drop the magnet into the bottom of the filter housing.
5.
Install the filter into the housing.
6.
If equipped, install the retaining bolt into the filter hous-
ing.
7.
Install the filter up to the bottom of the electric lock off.
8.
Tighten the filter bowl retainer to 106 in. lb. (12 Nm).
9.
Open manual shut-off valve. Start the vehicle and leak
check the propane fuel system at each serviced fitting.
Refer to Propane Fuel System Leak Test.
1
1
2
13
3
3
4
4
5
5
6
7
7
8
8
9
9
OR
10
10
11
11
12
1.
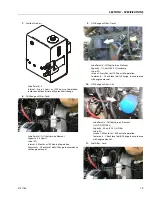
Electric Lock Off Solenoid
2.
Mounting Plate
3.
Housing Seal
4.
Filter Magnet
5.
Filter Housing
6.
Seal
7. Electrical Connector
8.
Fuel Outlet
9.
O-ring
10. Filter
11. Fuel Inlet
12. Retaining Bolt
13. Ring
Figure 1-2. Filter Lock Assembly
Summary of Contents for 740AJ
Page 2: ......
Page 55: ...SECTION 3 CHASSIS TURNTABLE 3121160 3 3 This page left blank intentionally...
Page 116: ...SECTION 3 CHASSIS TURNTABLE 3 64 3121160 Figure 3 44 Swing Hub Prior to SN 0300074383...
Page 203: ...SECTION 3 CHASSIS TURNTABLE 3121160 3 151 Figure 3 77 EFI Component Location...
Page 206: ...SECTION 3 CHASSIS TURNTABLE 3 154 3121160 Figure 3 78 ECM EPM Identification ECM EPM...
Page 224: ...SECTION 3 CHASSIS TURNTABLE 3 172 3121160 Figure 3 83 Deutz EMR 2 Troubleshooting Flow Chart...
Page 228: ...SECTION 3 CHASSIS TURNTABLE 3 176 3121160 Figure 3 87 EMR 2 Engine Plug Pin Identification...
Page 229: ...SECTION 3 CHASSIS TURNTABLE 3121160 3 177 Figure 3 88 EMR 2 Vehicle Plug Pin Identification...
Page 230: ...SECTION 3 CHASSIS TURNTABLE 3 178 3121160 Figure 3 89 EMR2 Fault Codes Sheet 1 of 5...
Page 231: ...SECTION 3 CHASSIS TURNTABLE 3121160 3 179 Figure 3 90 EMR2 Fault Codes Sheet 2 of 5...
Page 232: ...SECTION 3 CHASSIS TURNTABLE 3 180 3121160 Figure 3 91 EMR2 Fault Codes Sheet 3 of 5...
Page 233: ...SECTION 3 CHASSIS TURNTABLE 3121160 3 181 Figure 3 92 EMR2 Fault Codes Sheet 4 of 5...
Page 234: ...SECTION 3 CHASSIS TURNTABLE 3 182 3121160 Figure 3 93 EMR2 Fault Codes Sheet 5 of 5...
Page 303: ...SECTION 4 BOOM PLATFORM 3121160 4 31 Figure 4 20 Rotator Assembly HELAC...
Page 460: ...SECTION 5 BASIC HYDRAULIC INFORMATION AND SCHEMATICS 5 116 3121160 NOTES...
Page 467: ...SECTION 6 JLG CONTROL SYSTEM 3121160 6 7 Figure 6 2 ADE Block Diagram...
Page 534: ...SECTION 6 JLG CONTROL SYSTEM 6 74 3121160 NOTES...
Page 580: ...SECTION 7 BASIC ELECTRICAL INFORMATION SCHEMATICS 7 46 3121160 NOTES...
Page 581: ......

