Updated 06-2015
TOUCAN Duo
models
66
REMOVAL - INSTALLATION PROCEDURES
VI-1
VI-1
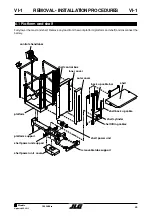
6.1.1 Shelf removal / installation
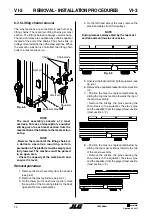
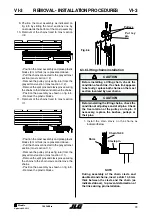
1- Remove the inner cover (secured by 16
screws). The shelf control box remains attached
to the cover: unplug the 9-pin connector from
the control box to remove the platform cover.
2- Remove the shelf back up cable (1 nut to
remove on the shelf) and remove the pulley fixed
on the back up cable bar.
3- Remove the back up cable bar (fixed by 2 bolts
+ nuts). To make the removal of both bolts
easier, turn the shelf cylinder rod by hand.
4- Remove the shelf lifting cables (2 nuts to
unscrew on the shelf).
Ensure the shelf cylinder rod is fully retracted
and that the shelf is fully lowered before
removing the shelf lifting cables.
5- Secure the shelf to an appropriate lifting
equipment (fork lift truck, overhead crane).
6- Slide the shelf up in the guide rails (using the
fork lift truck or the overhead crane).
When the shelf reaches its highest position, remove
the outer cover at the same time as the shelf.
Ensure the electrical cable to the shelf sensor
does not get pinched or crushed during
removal of the shelf and of the outer cover.
Disconnect this cable before proceeding.
Inspect the condition of the shelf lifting and
back up cables before installing them. If one
of them is faulty, replace it by a new cable.
Check the condition of all pulleys and pins
before installing the shelf lifting and back up
cables. Check they turn freely on the pins and
replace them if necessary.
DANGER
The shelf may fall if not correctly supported.
The shelf must be empty during this
operation.
NOTE
During shelf installation, the tension of the
lifting and back up cables (see § 4.3), the shelf
sensor (see § 4.12) as well as the shelf
alignment setting (see § 4.4), must be
adjusted.
! CAUTION
! CAUTION
! CAUTION
! CAUTION
Summary of Contents for TOUCAN DUO
Page 2: ......
Page 3: ...3 TOUCAN Duo Updated 06 2015 Models MA0323 05 Models N ________________...
Page 4: ......
Page 8: ...Updated 06 2015 TOUCAN Duo models 8 This page has been left blank intentionally...
Page 9: ...CHAPTER 1 INTRODUCTION...
Page 14: ...Updated 06 2015 TOUCAN Duo models 14 This page has been left blank intentionally...
Page 15: ...CHAPTER 2 WORK PLATFORM CHARACTERISTICS...
Page 19: ...CHAPTER 3 GENERAL...
Page 34: ...Updated 06 2015 TOUCAN Duo models 34 This page has been intentionnally left blank...
Page 35: ...CHAPTER 4 ADJUSTMENTS...
Page 48: ...Updated 06 2015 TOUCAN Duo models 48 This page has been intentionnally left blank...
Page 49: ...CHAPTER 5 SCHEMATICS...
Page 50: ...Updated 06 2015 TOUCAN Duo models 50 This page has been intentionnally left blank...
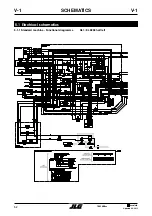
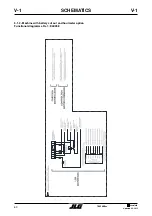
Page 53: ...53 TOUCAN Duo Updated 06 2015 Models R f ELE258 half right SCHEMATICS V 1 V 1...
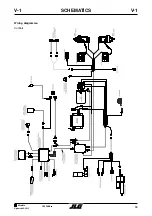
Page 54: ...Updated 06 2015 TOUCAN Duo models 54 Wiring diagramme Power SCHEMATICS V 1 V 1...
Page 55: ...55 TOUCAN Duo Updated 06 2015 Models Wiring diagramme Controls SCHEMATICS V 1 V 1...
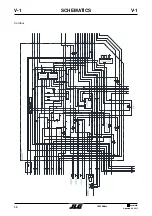
Page 56: ...Updated 06 2015 TOUCAN Duo models 56 Upper control box SCHEMATICS V 1 V 1...
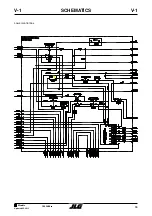
Page 57: ...57 TOUCAN Duo Updated 06 2015 Models Shelf box SCHEMATICS V 1 V 1...
Page 58: ...Updated 06 2015 TOUCAN Duo models 58 Cardbox SCHEMATICS V 1 V 1...
Page 59: ...59 TOUCAN Duo Updated 06 2015 Models Lower control box SCHEMATICS V 1 V 1...
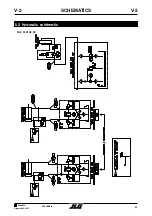
Page 61: ...61 TOUCAN Duo Updated 06 2015 Models SCHEMATICS V 2 V 2 5 2 Hydraulic sch matic Ref FL0148_04...
Page 62: ...Updated 06 2015 TOUCAN Duo models 62 This page has been intentionnally left blank...
Page 63: ...CHAPTER 6 REMOVAL INSTALLATION PROCEDURES...
Page 84: ...Updated 06 2015 TOUCAN Duo models 84 NOTES...
Page 85: ...85 TOUCAN Duo Updated 06 2015 Models CHAPTER 7 ECO SMART DISPLAY...
Page 86: ...Updated 06 2015 TOUCAN Duo models 86 This page has been intentionnally left blank...
Page 90: ...Updated 06 2015 TOUCAN Duo models 90 ECO SMART DISPLAY VII 4 VII 4 7 4 2 Slave Controller...
Page 91: ...91 TOUCAN Duo Updated 06 2015 Models ECO SMART DISPLAY VII 4 VII 4...
Page 92: ...Updated 06 2015 TOUCAN Duo models 92 ECO SMART DISPLAY VII 4 VII 4...
Page 93: ...93 TOUCAN Duo Updated 06 2015 Models 7 4 3 Master Controller ECO SMART DISPLAY VII 4 VII 4...
Page 94: ...Updated 06 2015 TOUCAN Duo models 94 ECO SMART DISPLAY VII 4 VII 4...
Page 95: ...95 TOUCAN Duo Updated 06 2015 Models ECO SMART DISPLAY VII 4 VII 4...
Page 96: ...Updated 06 2015 TOUCAN Duo models 96 ECO SMART DISPLAY VII 4 VII 4...
Page 99: ...99 TOUCAN Duo Updated 06 2015 Models CHAPTER 8 ALARMS AND WARNINGS...
Page 100: ...Updated 06 2015 TOUCAN Duo models 100 This page has been intentionnally left blank...
Page 102: ...Updated 06 2015 TOUCAN Duo models 102 8 3 Alarms ALARMS AND WARNINGS VIII 3 VIII 3...
Page 103: ...103 TOUCAN Duo Updated 06 2015 Models ALARMS AND WARNINGS VIII 3 VIII 3...
Page 104: ...Updated 06 2015 TOUCAN Duo models 104 ALARMS AND WARNINGS VIII 3 VIII 3...
Page 105: ...105 TOUCAN Duo Updated 06 2015 Models ALARMS AND WARNINGS VIII 4 VIII 4 8 4 Warnings...
Page 106: ...Updated 06 2015 TOUCAN Duo models 106 ALARMS AND WARNINGS VIII 4 VIII 4...
Page 107: ...107 TOUCAN Duo Updated 06 2015 Models ALARMS AND WARNINGS VIII 4 VIII 4...
Page 108: ...Updated 06 2015 TOUCAN Duo models 108 This page has been intentionnaly left blank...

