10
English
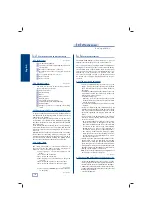
2.5.2 Electrical circuit
See figure 4
The main components of the electrical and elec-
tronic circuits are as follows:
Current collector
Circuit breaker
Motor
Motor-reducer
Microswitches
Front push-button (copying)
Left-hand side push-button (brush)
Red pilot light
Emergency switch for stopping the milling
cutter
Effectiveness
and operation
3
Components and functional parts
2.5
Machine adjustment
3.1
18-size fixed spanners
Spanners for lateral and depth adjustment of
the machine
Wedges for the tip stop of the key
Wedges with notches for copying cruciform
keys
Set of Allen keys (2, 2.5, 3, 4, 5).
Rods of Δ1.20
Rods of Δ1.70
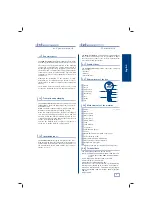
2.5.1 Accessories
See figure 3
4
5
1
2
3
1
2
3
4
3.1.1 Side control and adjustment
•
Secure the adjustment keys (2) on face no. 1 of the
clamps, going as far as the tip stop plates (3) (with
these inserted into the groove located further to
the right).
•
Unblock the slide and bring the clamps near to the
copying index (I) and the cutter (F). To do this, the
steps below must be followed:
- Start the cutting cycle.
- When the feeler touches the bit of the key, turn
off the machine by activating the general switch
located at the back.
- At this point, unplug the power cable as a safety
measure.
•
Bring the clamps with the adjustment keys (2)
towards the copying index (I) and the cutter (F), in
such a way that the adjustment keys are correctly
positioned regarding the copying index and the
cutter.
•
If the notches of the adjustment keys do not duly
coincide with the copying index and the cutter,
proceed as follows:
- By loosening slightly the studs (T) of the axis we
can move the cutter to the right or to the left.
The cutter should be moved to a position in which
it coincides on the notch of the corresponding
adjustment key. To carry out this operation it is
necessary to release the motor guard in advance.
- The distance is thus adjusted, with the copying
index (I) and the cutter (F) coinciding in the res-
pective rebates of the adjustment keys. Secure
the studs (T) of the axis.
•
Finally, move the slide manually towards the fur-
thest position on the left, and block it by pressing
downwards. Activate the general machine switch
again. Take great care, as when this switch is activa-
ted again the machine will start up instantaneously
until the cutting cycle that had been started before
turning off the machine is completed.
NOTE: After a lateral adjustment, an adjustment of
the positioners is always carried out.
See figure 8
6
7
5
6
7
8
9
The ECCO-AUTOMATIC copying machine has 3 types of
adjustment (Lateral, Depth of cut, and Positioners).
The copying machine is supplied with three adjustments
having been carried out, as these are determined during
the assembly stage of the machine. Only in exceptional
cases will the machine need a lateral adjustment or an
adjustment of the positioners. In contrast, each time
the cutter is changed a depth of cut adjustment must
be carried out if optimum copying quality is to be gua-
ranteed.
3.1.2 Control and adjustment of the depth of cut
•
Secure the adjustment keys (2) on face no. 1 of the
clamps, going as far as the tip stop plates (3) (with these
inserted into the groove located furthest to the right).
•
Unblock the slide and bring the clamps nearer to the
copying index (I) and the cutter (F). To do this, the steps
below must be followed:
- Start the cutting cycle.
2.5.3 Emergency switch for stopping the milling cutter
See figure 5
To prevent accidents, this automatic key-cutting machine is
equipped with an emergency switch, located on the front
right part of the machine.
In case of emergency, block this switch to stop the cutter
from turning. The cutter will stop immediately, although
the slide will continue to move forward until it has finished
the coding cycle.
If the slide should hit an obstacle, the motor controlling it
will require extra power to move the slide, and the slide
will stop. It will continue working when the obstacle is
removed.
NOTE: While the emergency switch is blocked, the milling
cutter cannot be turned (by starting a coding cycle or by
pressing the button that works the plane). If you wish to
continue using the machine (turning the milling cutter),
the emergency switch must therefore be unblocked.
2.5.4 4-side clamp
The clamp is designed to secure different families of
keys on each side. The figure shows the copying possi-
bilities on each of the sides of the clamp.
1) The copying of a key with support on the
blade:
Side 1: Keys with normal bit.
Side 2: Keys with narrow bit.
2) The copying of a key by trunnion on the guide
(profile):
Side 3: Keys with a guide on the lower part.
Side 4: Keys with a guide on the upper part.
See figure 6
3) The copying of NEIMAN-type keys by trunnion
on the guide.
See figure 7

