background image


www.jobo.com 

30 

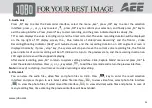
„Setup“, press „+“ or „-“ key to select the menu „Key Tone“, and then you can turn on or turn off the key tone. 

f. If the system is in video recording, press „Stop“ key on the remote control once, JIB 4 will tick twice to indicate the 

video recording stopping. 

g. If the system is in video recording, press „Shutter” key on the remote control once, JIB 4 and horn on TFT display 

screen will not give any prompt. 

h. Press any key on the remote control in standby state, JIB 4 will tick once to wake up the main system. 

14. Prompt of laser light 

a. After starting up, long press „Record” key for 3s in any state, the system will lighten the laser light. 

b. Long press „Record” key for 3s when turning on laser light, the system will turn off the laser light. 

c. The laser light turning on/off also can be operated in standby state. 

d. The wireless remote control can execute laser light turning on/off operation. 

Note:


The function of long pressing „Record”    key for 3s to turn on/off laser light does not interfere with the setting of 

turning on „Laser Synchronous Shooting“ under the camera parameter setting.


15. Turn On/Off TFT Display 

a. In any status, long pressing Shutter key for 3 second to turn on or off TFT display. 

b. TFT display can’t be turned on or off by pressing Shutter key on remote control. 

File Storage and Play 

(1) USB Cable 

You can copy or cut the recorded video files to your computer via the USB cable, or remove the Micro SD card and 

Summary of Contents for AEE JIB 4

Page 1: ...www jobo com 1 JIB 4 JOBO HD Sports Camera...

Page 2: ...www jobo com 2...

Page 3: ...13 Prompt of key tone 29 Setting of Camcorder parameter 14 14 Prompt of laser light 30 Setting of camera parameter 17 15 Turn On Off TFT Display 30 Video recording 21 Fcc Notices 30 Photo shooting 22...

Page 4: ...ot expose the camera to high temperature or sunlight direct 4 Keep the Micro SD card away from the strong magnetic field of TV speaker or magnet Do not put it in any place with potential static or the...

Page 5: ...d information including the instructions on use operation and installation as well as the technical specifications Please read this Manual carefully to understand it before use and keep it well for lo...

Page 6: ...ol function optional accessory Photo rotation at a maximum of 180 Laser indicating function Video loop coverage function With LCD segment screen and split TFT main screen to display various working st...

Page 7: ...image It can remote control video recording stopping and shooting of JIB 4 by using wireless remote control unique code pairing function avoiding interference of other remote control optional accesso...

Page 8: ...www jobo com 8 Product Structure...

Page 9: ...nsmitter 7 OK key 16 Power switch 25 HDMI output 8 Push button of TFT display screen clip 17 Microphone 26 USB output 9 Lanyard hole 18 Red indicator of working charging 27 Thread 10 Buzzer 19 LCD seg...

Page 10: ...n and main body Installation of waterproof case and main body 2 Installation of remote control optional accessory There is a separate remote control attached to JIB 4 Please install the remote control...

Page 11: ...ing prompt The shooting icon can be viewed on the LCD segment screen The icon will twinkle once when shooting one photo C Power icon The power icon can be viewed on the top right corner of LCD segment...

Page 12: ...indication The micro SD card capacity icon can be viewed on the bottom right corner of LCD segment screen to indicate the capacity of micro SD card More black grids indicate the higher spare capacity...

Page 13: ...er charging 2 Format the Micro SD card Please select a high speed Micro SD card only and format it on JIB 4 before recording any video and voice or shooting any photo if the Micro SD card has ever bee...

Page 14: ...n order to have a different mode please ret the product manually 1 Setting of Camcorder parameter a Video image resolution Select 1080P 1080i 960P 720P WGA PAL 1920x1080P 25 fps 16 9 1920x1080i 50 fps...

Page 15: ...www jobo com 15 Same image with different visual angles Comparison of same scene with different View Broad View Medium View Narrow View...

Page 16: ...nds 10 Seconds or 20 Seconds to set the time before video recording so that the product will start recording after countdown h 180 photo rollover in preview status press M to enter mode selecting inte...

Page 17: ...eo to start Auto video countdown Press REC key again to start self recording and the clips taken in last few seconds in Pre video status can be saved as the beginning of the video 2 Setting of camera...

Page 18: ...d there is no switch to turn off voice of photo shooting and video recording in the machine system b Status indicator please turn it on or off before self timing the default setting is ON c Video cont...

Page 19: ...scene looks dark in comparison with light surroundings the user may choose central area In case the scene looks light in comparison with dark surroundings the user may choose central spot i Language E...

Page 20: ...may exit from it 1 Insert the Micro SD card Note Please select branded Micro SD card such as SD card of Toshiba etc 2 Turn the power switch to ON to turn on JIB 4 and the red indicator will be lighte...

Page 21: ...egment screen will be stopped displaying Note a Turn the powers switch to OFF in video recording the system will save the current file recorded and then shut down b If the battery power is low in vide...

Page 22: ...the image resolution before shooting photos Press M key to enter the setup interface pres or key to move the cursor to select the menu Image Resolution and press OK key to enter the resolution setup...

Page 23: ...20s Press M key to exit the setup interface after setting the interval time Press Shutter at this time and JIB 4 will start shooting one photo every 1s 2s 3s 5s 10s 20s till to press Shutter key again...

Page 24: ...and save the current voice recording file the frontal green indicator of voice recording will be off JIB 4 will return to the preview state and the recording duration on LCD segment screen will be sto...

Page 25: ...all interface OK Play Pause Note Fast Forward Reverse can be set as 1 4X 1 2X 2X 4X 8X 16X 2 Browse photo file Enter interface and all files appear on the screen Select the photo file by pressing or a...

Page 26: ...nterface Delete single The deletion selection of and will appear after pressing OK key and select to delete Delete all Delete all photo files under no protection 2 File protection All files can be pro...

Page 27: ...ace no operation can delete the protected files except formatting 3 Auto play Auto play the photo files in the folder at an interval of 5s Default setting is OFF 8 Remote control optional accessories...

Page 28: ...view state after finishing initialization In case of no any mission and operation the system will auto enter standby power saving mode at the end of the auto standby time set Press Record or Shutter k...

Page 29: ...ctionscanbeoperated meanwhile LCDsegmentscreenandTFTdisplayscreenwilldisplaythecorrespondingoperationprompts b In start up state use USB cable to connect with the computer data stored in JIB 4 memory...

Page 30: ...lighten the laser light b Long press Record key for 3s when turning on laser light the system will turn off the laser light c The laser light turning on off also can be operated in standby state d Th...

Page 31: ...ftware s as Media Player and KM Player to play the videos Note 1 Please turn off the JIB 4 before inserting or unplugging the USB cable 2 Turn the power switch to OFF before charging JIB 4 The red ind...

Page 32: ...l battery can be directly installed in the product for power supply Please see below figure Note 1 After connecting JIB 4 to the monitor via the HDMI cable please select the input source for the monit...

Page 33: ...attery or connect backup battery with a computer via USB cable to charge the battery as per the figure This backup battery has automatic protection against overcharging and short circuit The red indic...

Page 34: ...uld be marked one NOTICE When using the power adapter make sure the rating voltage on it is compatible with that of the device to avoid potential damages resulting from incorrect usage of power supply...

Page 35: ...Micro SD card optional Adapter USB Cable Pouch User Manual Note 1 The actual items may be different from the pictures Package is subject to change without prior notice 2 The actual accessories may va...

Page 36: ...7 h max Video Format MOV Voice Control standby Duration 200 h max Voice Format WAV Charging Duration 3 h Photo Shooting File format JPG Micro SD Card Capacity 64GB SDHC Max USB Port USB 2 Operating H...

Page 37: ...ot expose the casing under direct sunshine for a long time to avoid deteriorating its waterproofing performance 5 Before using the casing it s advised to check whether the seal rings are under good co...

Page 38: ...vice may not cause harmful interference and 2 this device must accept any interference received including interference that may cause undesired operation NOTE This equipment has been tested and found...

Page 39: ...loss damage or destruction of data during the operation of a JOBO product Under no circumstances will JOBO be liable for the recreation of such data Under no circumstances can claims be lodged that e...

Page 40: ...elivered within a packaging These Packaging can be recycled Disposal of WEEE Waste Electrical and Electronic Equipment Devices marked with the WEEE logo are subject to the European Community Directive...

Reviews: