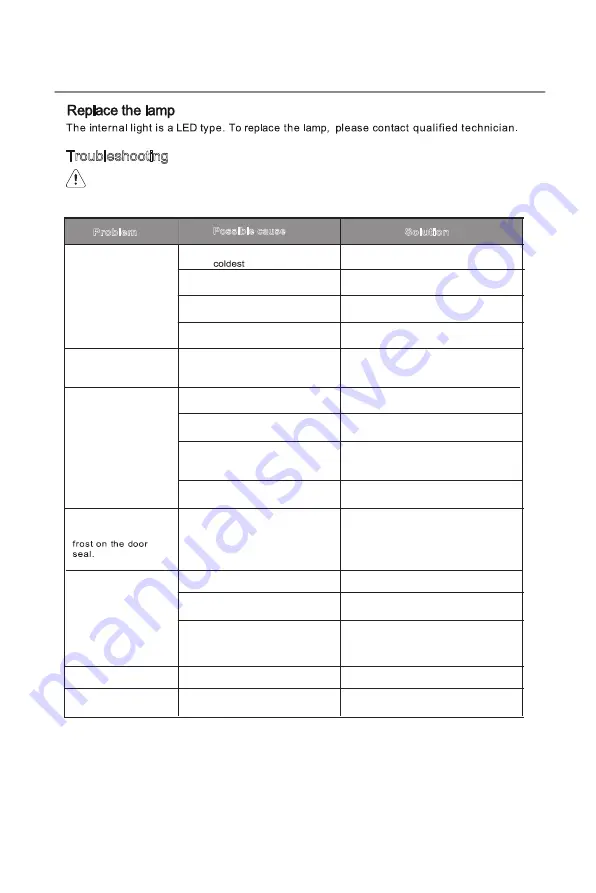
Troubleshooting
Caution!
Before troubleshooting, disconnect the power supply. Only a qualified electrician of
competent person must do the troubleshooting that is not in this manual.
Important!
There are some sounds during normal use (compressor, refrigerant circulation).
If the malfunction shows again, contact the Service Center.
These data are necessary to help you quickly and correctly. Write the necessary data here, refer to the
rating plate.
Mains plug is not plugged in
or is loose
Check fuse, replace if necessary.
Socket is defective
Mains malfunctions are to be
corrected by an electrician.
Problem
Solution
Fuse has blown or is defective
Insert mains plug.
Unusual noises
Appliance is not level.
The appliance is touching the
wall or other objects.
Re-adjust the feet.
Move the appliance slightly.
A component, e.g. a pipe, on
the rear of the appliance is
touching another part of the
appliance or the wall.
If necessary, carefully bend the
component out of the way.
Possible cause
Appliance does not
work
Temperature regulation knob is
set at
Set the knob at other switch on the
appliance.
Water drain hole is blocked.
Water on the floor
See the Cleaning and Care section.
Side panels are hot.
It’s normal. Heat exchange
parts are in the sides.
Take gloves to touch sides if needed.
Appliance freezes or
cools too much
Turn the temperature regulator to a
warmer setting temporarily.
Temperature is set too cold or
the appliance runs at coldest .
Temperature is not properly
adjusted.
Please look in the initial
Temperature Setting section.
Door was open for an extended
period.
Open the door only as long as
necessary.
A large quantity of warm food
was placed in the appliance
within the last 24 hours.
Turn the temperature regulation to a
colder s etting temporarily.
The food is not frozen
enough.
Please look in the installation
location section.
The appliance is near a heat
source.
Door seal is not air tight.
Heavy build up of
Carefully warm the leaking sections
of the door seal with a hair dryer (on
a cool s etting). At the same time
shape the warmed door seal by
hand such that it sits correctly.
e
s
U
y
li
a
D
e
s
U
y
li
a
D
23
Summary of Contents for JC293ID
Page 1: ...MANUAL DE INSTRUCCIONES MANUAL DE INSTRUÇÕES INSTRUCTION MANUAL COMBINADO COMBI JC293ID ...
Page 2: ......
Page 3: ...1 ...
Page 8: ...Cuidado e Limpeza retire a ficha da tomada elétrica 6 ...
Page 9: ...a ficha elétrica esteja colocada com fácil acesso 7 ...
Page 10: ...8 Desligue a ficha da tomada ...
Page 19: ...Pôr Pôr Pôr 17 Abaixo 16ºC ...
Page 21: ...19 ...
Page 22: ...20 ...
Page 23: ...21 ...
Page 28: ...1 ...
Page 29: ...2 ...
Page 30: ...3 ...
Page 31: ...Uso diario 4 ...
Page 33: ...Cuidado y Limpieza 6 ...
Page 34: ...Servicio 7 ...
Page 35: ...Proteccion Ambiental 8 ...
Page 36: ...similar s símbolo de advertencia de riesgo de incendio 9 ...
Page 55: ...1 ...
Page 56: ...2 ...
Page 57: ...3 ...
Page 58: ...4 ...
Page 59: ...tank if have not been used for 48h flush only for models with water tank 5 ...
Page 60: ...6 ...
Page 61: ...7 ...
Page 62: ...8 ...
Page 66: ...Door Reversibility Installation 12 ...
Page 67: ...Installation 13 ...
Page 68: ...Installation 7 9 8 14 ...
Page 69: ...10 11 15 ...
Page 82: ......


