background image

28

 | SOUND MODIFIERS

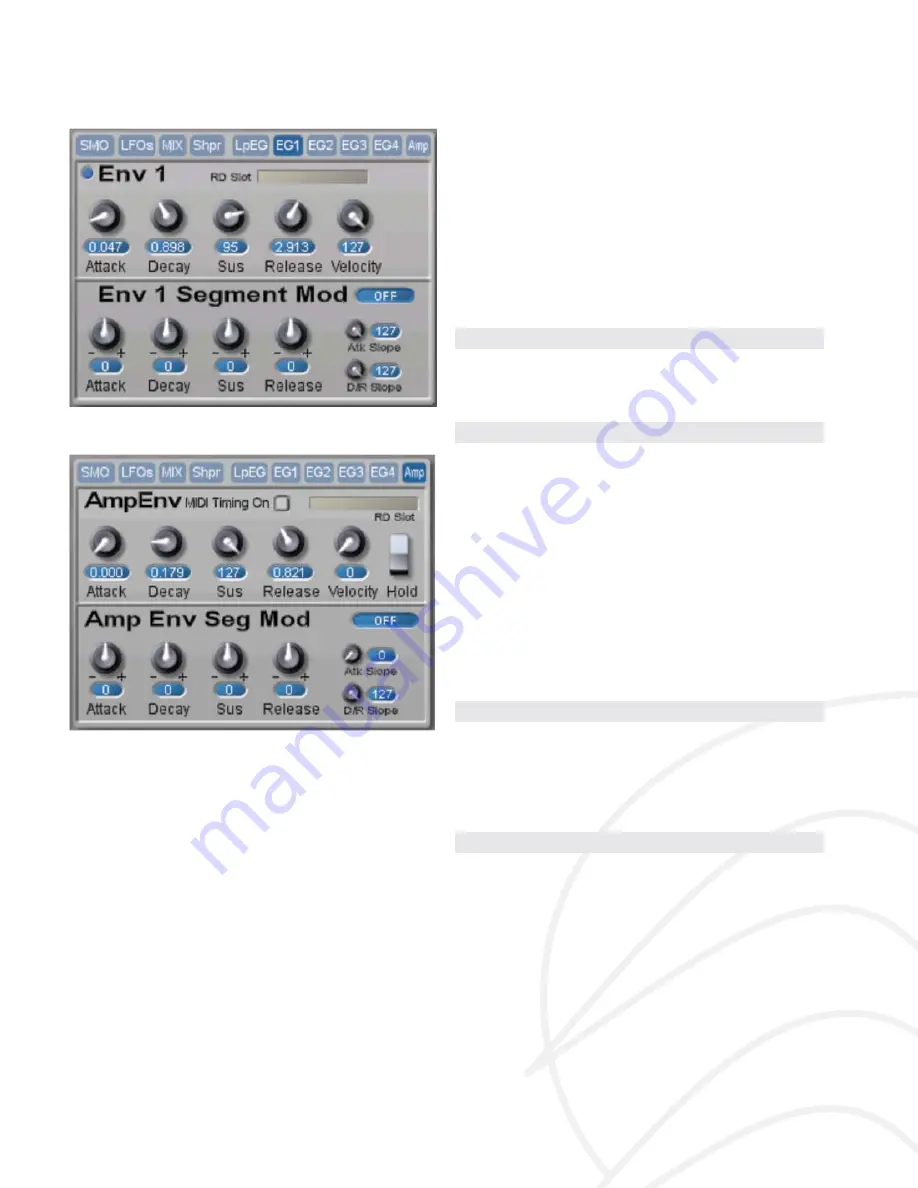
Figure 33: Envelope Generator Panel

Figure 34: Ampli

fi

 er Envelope

All 

fi

 ve envelope generators are of the same ADSR 

type. Envelopes 1 through 4 and the Amp Env are 
freely assignable through the  modulation paths. A Hold 
switch in the AmpEnv allows the ampli

fi

 ers to be ‘open’ 

without a gate or note-on event. This is useful if you 
are processing the external audio inputs through the 

fi

 lters or effects, and don’t want to have to hold down a 

note while manipulating the various parameters. It also 
allows you to use the Amp Env as a more independent 
modi

fi

 er.

Attack time for all envelopes ranges from 0 to 20 
seconds. For Decay and Release the range is 0 to 40 
seconds. The Velocity parameter controls the overall 
amount of the envelope to its destination. Higher val-
ues require a greater velocity to reach their maximum 
value. Atk Slope controls the slope of the Attack time; 
0 is linear, 127 is exponential. D/R Slope controls the 
slope of both the Decay and Release together; 0 is 
linear, 127 is exponential.

Envelope Generator Segment  Modulation 

Each envelope segment can be modulated by a num-
ber of sources – Velocity, Keytrack, Mod Wheel, CC 
1-4, and RD  Slots 1-8. A negative amount will cause 
shorter time values with higher velocities; a positive 
value will cause longer values with higher velocities. 
Careful adjustment and balance between the initial seg-
ment’s settings and the mod amount is usually needed 
to obtain desired results. Shorter time values will limit 
the noticeable effect of velocity  modulation.

With Segment Mod at zero, the actual segment time/level is 
heard. With the amount at +127, maximum velocity will give 
results equal to the actual (original) time/level setting. If time 
values longer than the initial setting are desired, you must 
fi rst set the velocity mod amount, and then adjust the initial 
setting to achieve desired results.

Likewise for amounts of negative value - when at –127, 
minimum velocity will yield the original settings, and 
higher values will be ‘shorter’ than the initial setting.

Envelope Generator RD  Slots

Each envelope has an RD  slot, allowing the user to 
replace the normal ADSR envelope with any of the 
RD  series II envelope modules (such as the looping, 
MultiSegment envelope). When the envelope’s RD 
slot is loaded, the Velocity Mod and Slope controls are 
ignored, as these parameters are not available for RD 
slot modules. 

Unfortunately, there is a permanent bug in the graphic object 
that displays the number of points and values for the RD 
MultiSegment Env module . This means that sometimes the 
graphic will correctly represent that which was programmed 
for the preset, but other times the display will not be correct, 
even though the MultiSegment Env output is correct. How-
ever, it is also the case that the changed graphic display will 
aff ect the actual envelope output.

Summary of Contents for Solaris V5

Page 1: ...User Guide V5 By John Bowen and Brent Garlow ...

Page 2: ...Solaris version 5 synthesizer plugin for Sonic Core platform User Manual 2008 John Bowen Synth Design Written by John Bowen and Brent Garlow 10 9 8 7 6 5 4 3 2 1 ...

Page 3: ...d Sources 10 Multimode Oscillators MM 10 Wavetable Oscillators WT 11 Red Dwarf EX Module Slots RDX 11 Wave Oscillators Wav 12 CEM Oscillators CEM 13 Modular Oscillators Modular 13 Audio Out 13 FM Oscillators FM 14 Linear Frequency Modulation 14 Sync 14 Phase Control 14 Special Sound Sources 14 Rotor Processors Rotor 15 AM Synthesis AM xMult 15 X Mult multiplier 16 Vector Synthesis Vector 16 Sound ...

Page 4: ...Envelope LpEG 28 Effects 31 Cross Flanger Flanger 31 Cross Delay Delay 31 Formant Filters FormF 32 3 Band Equalizer EQ OD 32 FX Insert BP Noise CC Misc 32 Global Settings 34 Tuning and Unison Tune Uni 34 PolyGlide Glide 35 Filter CutoffTracking FcTrack 35 Tables 36 Key Level KeyLv 36 Modulation Chains ModChn 36 Step Sequencer 37 Global Controls 38 MIDI Clock Settings 38 Banks and Patterns 38 Patte...

Page 5: ...k 41 Step Sequencer 41 LFOs 41 Cross Delay 41 Expanding Solaris 42 Expanding Solaris with Sonic Core Modular 42 Modular Oscillators and Filters 42 Modular Gated 42 Using a Modular IITemplate 42 Expanding Solaris with RD Modules 43 Overview 43 Instructions 43 Saving Modular Patches 43 ...

Page 6: ... filter type MIDI timing added for all Envelopes 2 additional External Inputs Installation Installation is similar to that of other Sonic Core plugins Please note the following Unzip the App zip file and drag the App folder into 1 your SFP Scope main folder If asked to overwrite the folder say Yes Put the synth dev file in the following location SFP 2 Devices Synths Put the Solaris v5_0 pre and ot...

Page 7: ...se two larger sections are many more page buttons The different pages are acces sible by clicking on the light blue page tab buttons that appear generally in the upper portion of the section For example the Filter section has page tab buttons for each of the four filter pages F1 F2 F3 and F4 The page tab button for the page you are viewing will be dark blue In addition there are tiny blue LEDs abo...

Page 8: ...d if so will take a bit longer than the average preset change The main sound sources available within Solaris are Sound Source PageTab Label Multimode Oscillators MM Wavetable Oscillators WT RDX Module Slots RDX 1 2 WAV Oscillators WAV CEM Oscillators CEM ModularWindows Mod FM Oscillators FM AM cross modulation proces sors AM x Mult Sound Source PageTab Label Rotor processors Rotor Vector Synthesi...

Page 9: ... path 2 will result in a can celing of the keyboard tracking giving a drone pitch at full negative value 63 If not using KeyTrk you must de select it as it will affect the oscillator s pitch tracking otherwise Oscillator 2 has only one Frequency Modulation path and this acts the same as the first frequency modula tion path described for Oscillator 1 Applying the KeyTrk to the Wav OSCs is the only ...

Page 10: ...ation lists in 2 forms unaltered and shaped Whenever you see MMosc 2 in the modulation source lists it is the unaltered MM Osc 2 output Whenever you see EnOsc2 or EnvOsc 2 it is the output of MM Osc 2 with its amplitude shaped by Envelope Generator 1 EG1 For MMosc 2 when using MIDI Clock I assumed the user would want more precise control over the onset of waveshape events to allow better modulatio...

Page 11: ...able oscillators are from the old Creamware Modular I Waldorf oscillator and provide you with 63 sweepable wavetables Sometimes wavetable is thought to mean a single cycle waveshape as in the Prophet VS waveshapes With Solaris wavetables however you have a series of waveshapes 1 63 which are stepped through by moving the Wave con trol or by applying some WaveMod modulation Figure 5 Partial list of...

Page 12: ...ator modules The RD slots can be loaded either by right clicking with the mouse pointer over the insert slot or by dragging and dropping in a module from the File Browser More is explained in the section Expanding SOLARIS with RD Modules Wave Oscillators Wav Figure 8 Wave Oscillator Pair These oscillators allow the loading and playback of sample files Formats are Akai s AIFF and wav The slots load...

Page 13: ...ws allow the ultimate customization of the sound sources To use first Enable the desired section with the blue buttons then open the appropriate Modular Window by clicking on the Show button You can then drag in the desired Modular modules as needed Each Window has a text field labeling it as Mod1 Slot or Mod2 Slot Figure 11 Modular Window Input Description Freq Frequency control This includes the...

Page 14: ...ion the FM Index to be set by the corresponding knob The second linear modulation path allows the initial modula tion index to be set by the knob and then a modulation source applied to that path sidechain modulation con trol For example an LFO could be used to modulate the amount of frequency modulation provided by the carrier specified in Linear Frequency Modulation path 2 In addition if you are...

Page 15: ...ge buttons in the upper right section for each Rotor Mixer and X Fade Clicking on the Mixer button switches out the display to show four small mixer knobs These allow you to precisely set each level of the four inputs in the case of an imbal ance of levels from the sound sources Also the mix levels are bipolar for inverting the phase of the incom ing signal Clicking back to X Fade displays the ini...

Page 16: ... the source by taking the output and multiplying it again and again for the dif ferent octaves The Mult Factor control allows you to specify how many times the signal is multiplied The x Mult sections consist of The input selection Source The number of times you multiply the signal by itself Mult Factor The X Fade Amt amount the dry signal and the multiplied signals will be cross faded Factor Effe...

Page 17: ...the gray dot you will see the 2 sliders X and Y move concurrently If you want to control the Vector Mix with some external MIDI controls just right click over each slider to assign a Midi Controller value Save your MIDI Controller settings in the special MIDI Controler bank of your Solaris preset list You can also modulate either axis from the standard list of modulation sources There is one modul...

Page 18: ... as modulation sources allowing for complex feedback paths to occur Finally there is a 3x16 step sequencer Each of the three sequence rows is selectable in the modulation source lists provided for almost all modulation paths All knobs labeled Freq Mod Mod 1 2 3 WaveMod Shape etc have Sound Modifiers control over some a dynamic aspect of the sound and most have a Mod Source popup list associated wi...

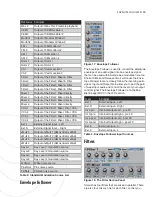
Page 19: ...r xMult xMult 3 Output of xMult 3 AM oscillator xMult xMult 4 Output of xMult 4 AM oscillator xMult KeyLv1 Key Level 1 modulation source KeyLv2 Key Level 2 modulation source KeyLv3 Key Level 3 modulation source KeyLv4 Key Level 4 modulation source WhNoiz White noise source PinkNoiz Pink noise source FiltNoiz Filtered noise source Standard Table 2 Modulation Source List Envelope Follower Figure 17 ...

Page 20: ...ol pages for filters 1 4 can be accessed by clicking on the page buttons F1 F4 respectively The 4 Mixer Filter sections are identical and each section is composed of A filter which can be activated or bypassed A four channel input mixer This pre filter mixer gives access to up to four oscillators signals which means up to 4x4 16 separate oscillators for the all filter sections The Filters Figure 1...

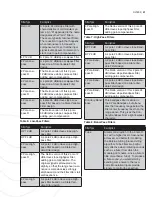
Page 21: ...he range near reso nance is somewhat less strongly emphasized and the filter offers full self resonance 4 Pole High pass A 4 pole 24 dB octave slope High pass filter based on a State Vari able Filter design FilterType Description 4 Pole High pass R The Retro version of this 4 pole 24 dB octave slope Highpass filter adding gain compensation High Pass Table 7 Filters FilterType Description BP 12 dB ...

Page 22: ...helf EQ that attenuates a wide range of frequen cies above the target frequency FilterType Description 2 Pole Notch This filter permits the complete suppression of specific frequencies without affecting nearby frequency ranges Only frequencies directly around the cutoff frequency are removed The frequency response curve exhibits a deep notch at this frequency With this filter the reso nance parame...

Page 23: ...ons at the top of the Filter Mixer section Mix Level Page Control Description Blue LED switch On Off to unload Mixer from the DSP Mix Mod Enable LED switch Enable Disable to load unload Mix Mod section from the DSP 4 inputs Each with a bipolar mix level to provide inverted phase Inverting the phase with 2 or more oscillators on can cause subtle but notable changes in the harmonic content Level The...

Page 24: ...al from the Mute buttons will remove the signal from the audio path but not the modulation sources Figure 23 Filter Output Panel Filter Outputs Summary Page Outputs Figure 24 Filter Output Summary Page Clicking on the Outputs button displays a summary view of all 4 filters and filter mixers with key param eters such as filter type cutoff frequency resonance envelope amount and source for the mixer...

Page 25: ...and Fine tuning to reflect the use of the SMO as an audio rate oscillator When switching to MIDI Clock Sync the Frequency and tuning of the SMO is overridden by the incoming MIDI signal disabling and removing the other frequency displays MIDI Clock Sync switches the frequency control to a popup table of note values divisions See the MIDI Implementation section for a description of the values Quant...

Page 26: ... the MIDI switch Midi Clock sync is selected as all frequency controls are re routed to the MIDI Clock See the MIDI Implementation section for a description of the values There is a Retrig function as with the SMO and this is always activated when switched on however to effec tively use this one needs to have access to the Phase settings as well which only appear when Midi Clock sync is displayed ...

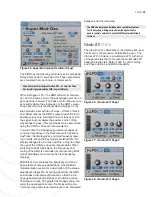
Page 27: ...hould be located in the Envelope Section the Envelope Follower provides a varying control signal for modulation purposes and can be found in the modulation source lists as Env Foll It tracks a Source input selectable from a number of External or Internal routings and allows you to create an envelope based on the amplitude changes of the source material The Envelope Follower is monophonic and uses ...

Page 28: ...ties Careful adjustment and balance between the initial seg ment s settings and the mod amount is usually needed to obtain desired results Shorter time values will limit the noticeable effect of velocity modulation With Segment Mod at zero the actual segment time level is heard With the amount at 127 maximum velocity will give results equal to the actual original time level setting If time values ...

Page 29: ...dulation will be applied to the amount values of the 8 envelope segments The modulation source can be selected from the popup menu below the Level Mod control The range for this control is 63 NOTE if no level modulation is de sired make sure OFF is selected as the mod source otherwise the envelope may not appear to func tion Loop Mode On This button enables disables the looping feature of this env...

Page 30: ...30 SOUND MODIFIERS Figure 35 Looping Envelope Diagram ...

Page 31: ... differ ent delay effects a normal stereo delay and a cross delay The standard stereo delay consists of two delay circuits left and right that have feedback loops into their own inputs The cross delay features two delay circuits whose feedback circuits are crossed over into the inputs of the other delay creating interesting pan oramic effects Control Description Time L The time in milliseconds bet...

Page 32: ...ion Path 3 Band Equalizer EQ OD Figure 39 3 Band Equalizer Panel Each band has a possible center frequency setting from 20 20 000 Hertz A cut or boost of 12 dB per band is available Q controls the bandwidth of the cut or boost 0 7 is the minimum Q setting and allows the widest bandwidth around the center frequency 20 0 is the maximum giving the narrowest bandwidth The 3 Band EQ circuit can be plac...

Page 33: ...his will allow you to see all of the assigned controllers and set a modulation range for each Use the default preset bank called MIDI Controller to store different MIDI Controller assignment presets of these knobs The CC Knobs appear in the modula tion source lists and therefore any MIDI Controller can be used as a modulation source Filtered BP Noise The filtered noise section allows you to choose...

Page 34: ... they are currently when a new key is pressed Global Settings Control Description Unison Voices This should normally be set to All however there is an intelligent as signment if you want to stack unison voices If the synthesizer is set to play 12 voices in your Project then set ting the Unison Voices parameter to 6 will give you 2 playable notes each with 6 voices stacked together The Unison Detun...

Page 35: ...he filters especially useful when a filter is in full reso nance and being used as a simple sine oscillator The Gradient parameter is now separate for each of the 4 filters The Note value however must remain the same for all four The Gradient knobs changes with each filter page as selected PolyGlide Glide New Independent Exponential Glide Figure 42 PolyGlide Panel Independent exponential glide on ...

Page 36: ...y I used 0 127 for everything where 127 100 You can click on the vertical bars and drag them left right setting the upper and lower key limits for the table Clicking directly on the blue dots then dragging them up or down allows one to adjust the scaling Because these use the same graphic display as the MultiSeg ment Env in the Scope library there persists a graphics bug in the preset settings The...

Page 37: ...cer and what pattern the sequencer will play Regarding use of the Sequencer there were several times I wanted to have the sequenced sound play with normal Amp Release times but unfortunately there was some problem when Sequence HOLD switches were set ON and you stopped the sequence advance at that point the synth would drone on and on since the HOLD was high leaving the Amp open In the end I decid...

Page 38: ...h a Reset button a Midi Note ExtL Trig Level switch and a threshold knob setting with display see screen shot next page When Midi Note is selected any incoming note whose value is less than or equal to the Key Split point will move the sequence to the next step When Ext L Trig Level is selected the input signal connected to the External Left input will create a trigger depending on the threshold s...

Page 39: ...und with these settings until you get the desired effect The fourth row produces the actual control values for each sequence row There is a difference between row A and the B C rows Row A will output 24 semi tones whereas B and C output 127 semitones This wider range for B and C is necessary to control filter cutoffs or shape and pulse width parameters since they need the full control range of the...

Page 40: ...to play This circuit sets the maximum amount of headroom available for all voices to ensure that clipping is kept to a minimum but that you get the best levels for the polyphony required The Poly Level should be adjusted lower as the num ber of polyphonic voices increases So if you are set to use 1 voice and then set the Poly Level at 127 if you select 4 voices you probably want to adjust the leve...

Page 41: ... TRIPLETS 16P 1 5 Sixteenth note 3 32nd notes 16 Sixteenth notes 32 Thirty second notes Table 1 MIDI Clock Divisions for Step Sequencer LFOs Division Description 8 1 1 cycle every 8 measures 6 1 1 cycle every 6 measures 4 1 1 cycle every 4 measures 3 1 1 cycle every 3 measures 2 1 1 cycle every 2 measures 1 1 Whole notes 1 2P 1 5 Half note 3 quarter notes 1 2 Half notes Division Description 1 2T H...

Page 42: ...put Tmod1 or Tmod2 then turn up the associated amount knob With these you can usually adjust things in a positive or negative direction depending on the desired affect The Outputs are Control and Audio Connect the Out of the envelope to the Control Output The Audio Output is only used for Drum Oscs in the current Red Dwarf EX Gated Mod slots This function may appear on other synths in future versi...

Page 43: ... you double click on the inserted filter module and get nothing then there is no control surface needed for that module for example the 18 dB Lowpass has no resonance so no control panel You will need to adjust the main synth s controls and the mini control panel settings together to get the most out of the oscillator pairs Just be aware that the main coarse and fine tuning controls interact with ...

Page 44: ...store the Solaris with the samples in it To avoid this clear the Wav Oscs before saving the device Now you can create presets using the older style Modular preset list To store a preset with the older style Preset List click on the small disk icon below and to the right of the red X below the word Preset This will save all parameters currently in the Solaris includ ing the new style Preset List St...

Page 45: ...n Oscillator SMO 24 Linear Frequency Modulation 14 Loop 28 29 Looping Envelope LpEG 28 Low Freq Mode 9 M Master Volume 8 40 MIDI Clock 10 25 26 31 38 41 MIDI Implementation 25 26 31 41 MIDI Note 36 38 MIDI Sync 9 Modular 8 9 11 12 13 19 22 23 32 42 43 44 Modulation 9 13 14 15 19 21 23 24 28 32 36 modulation vi 7 8 9 10 11 12 13 14 15 16 17 18 19 20 23 24 25 26 27 28 29 31 32 33 35 36 37 40 43 45 M...

Page 46: ... Signal Flow 8 Step Sequencer 7 37 38 39 41 step sequencer 18 38 Sync 9 13 14 25 26 31 32 T Tables 36 Tuning and Unison Tune Uni 34 U User Interface 7 V Vibrato LFO V LFO 25 W Wavetable Oscillators 11 wavetable 11 X XTC 44 ...

Page 47: ...John Bowen Synth Design www johnbowen com ...

Reviews: