0
7
0
8
Warning:
Although we have provided fixings, different wall materials require
different types of screws / fixings. Please ensure you use the correct screws /
fixings for your type of walls and seek professional advice if you are not sure.
Failure of the product due to incorrect fixings is the responsibility of the
installer.
Important
- When drilling into the walls always check that there are no hidden
wires or pipes etc.
Take care when drilling on glazed tile surfaces in case the drill slips.
KEY INFORMATION
CARING FOR
YOUR PRODUCT
The
slats
may be dusted using a dry cloth. To clean, wipe with a barely damp cloth.
The product is maintenance free however we recommend that regular checks are
completed to ensure that no components have been damaged, which could result in
operating difficulties or cause a safety risk.
General Purpose wall plug
Generally aerated blocks should not be used to support
heavy loads, use a specialist fitting in this case. For light
loads,
general – purpose wall plugs can be used.
Plasterboard wall plug
For use when attaching light loads on to plasterboard
partitions.
Cavity Fixing wall plug
For use with plasterboard partitions or hollow
wooden doors.
Cavity Fixing – Heavy Duty wall plug
For use when fitting or supporting heavy loads
such as shelving, wall cabinets and coat racks.
Hammer Fixing wall plug
For use with walls stuck with plasterboard. The hammer
fixing
allows it to be fixed to the wall rather than the plasterboard.
Always check the fixing is secure to the
retaining wall.
Shield Anchor wall plug – Heavy loads
For use with heavier loads such as TV and Hi-Fi
speakers and
satellite dishes etc.
FIXINGS
PRODUCT INFORMATION
GUIDE TO WALL MOUNTING & FIXINGS
You can use one of the following types of wall plug if your walls are made of brick,
breezeblock, concrete, stone or wood.
!
6
.
Blind
i
nstallation
8
.
Operating
the blind
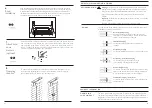
To open and close the blind, first attach the control wand to the eyelet. Turn the
control wand to angle the slats. To raise or lower the blind, simply lift or gently
pull on the bottom bar to place in your desired position.
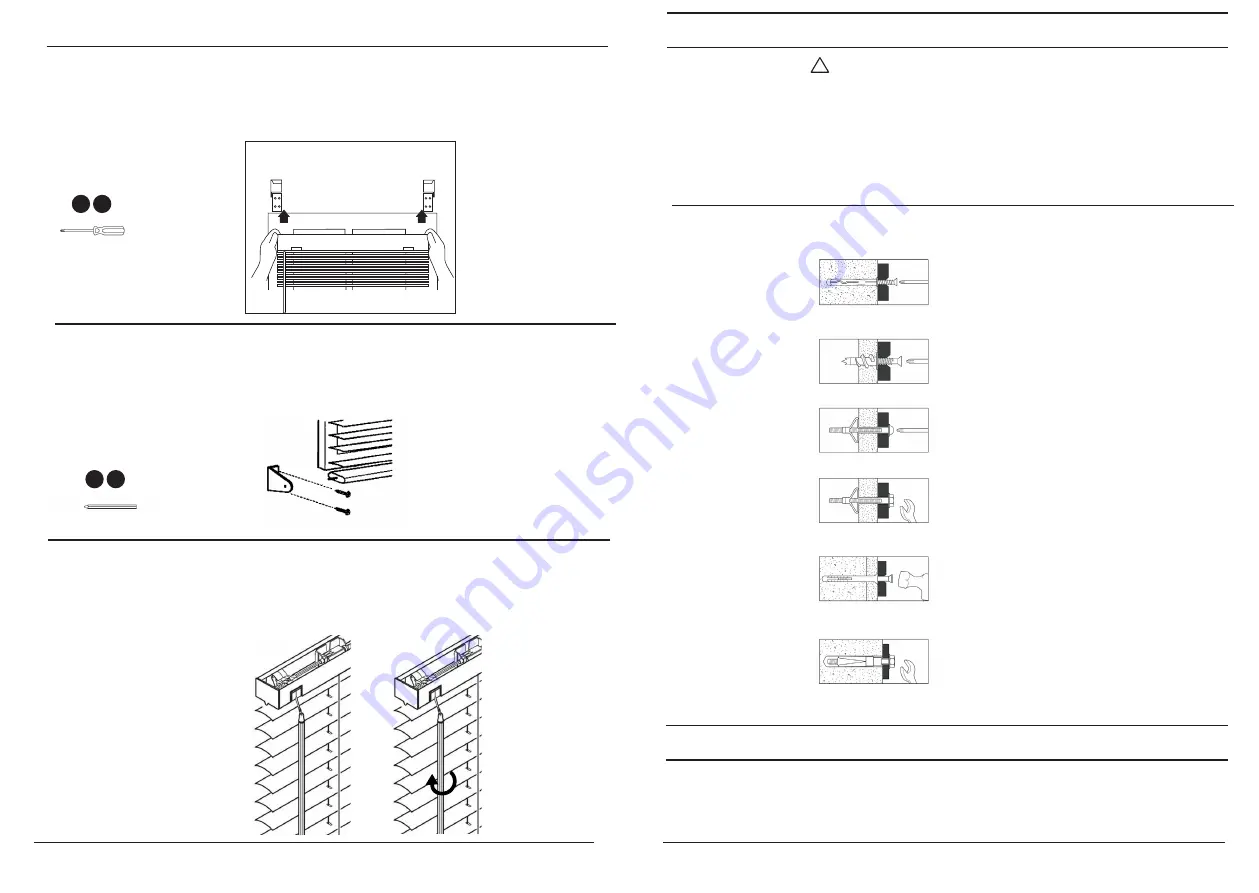
Align the headrail with the center support and box brackets. The head
rail should
have the tilt mechanism facing toward the room. Be careful not to tr
ap
the top slat
in the brack
e
ts and slide the headrail straight back until it is snug in the brackets. If
the headrail can slide from side to side in the box brac.kets, you can use a flat head
screwdriver to bend out the tabs on the end of the until it is snug.
2
1
7.
Attach hold
down
brackets
(optional)
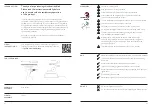
With the hold down brackets attached to the bottom rail, lower the blind to the hold
down bracket mounting surface and mark the bracket locations.
A
ttach the hold
down brackets at the bottom of the window or door with the included screws as
shown.
T
o attach the bottom-rail, gently pull the brackets out slightly, and insert the
pins into the holes on the bottom-rail of the blinds.
A
5


