background image

7

Unpacking

Remove all packaging before positioning the appliance.
Remove the transport supports placed along the door
sides.

Some models are fitted with a silencing pad under the

freezer. Do not remove this pad.

Installing the freezer

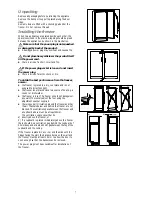
When two appliances are placed beside each other, the

spacers enclosed in the plastic wrapping should be glued

between the appliances. As shown in the illustration.

Make sure that the power plug is not squashed

or damaged by back of the product.

D

A damaged power plug may overheat and cause a fire.

Do not place heavy articles or the product itself

on the power cord.

D

there is a risk of a short circuit and fire.

If the power plug socket is loose, do not insert

the power plug.

D

there is a risk of electric shock or fire.

To obtain the best performance from the freezer,

ensure :

D

the freezer is placed in a dry, cool place and is not

exposed to direct sunlight.

D

the freezer is not placed close to a source of heat, e.g. a

cooker or dishwasher.

D

the freezer is level. The freezer should not leanagainst

any wall. If necessary adjust the feet using the

adjustment spanner supplied.

D

there is good air circulation around the freezer and that

the air channels below and behind the freezer are not

blocked. The ventilation space between the freezer and

a cupboard above must be at least 40mm.

The ventilation space can either be

a) directly above the freezer, or

b) If a cupboard is placed immediately above the freezer

there should be a ventilation gap behind the cupboard of

50mm deep and at least a 40mm gap between the top of the

cupboard and the ceiling.
If the freezer is placed in a corner and the side with the
hinges facing the wall, the distance between the wall and
the freezer must be at least 15 mm to allow the door to
open enough so that the baskets can be removed.
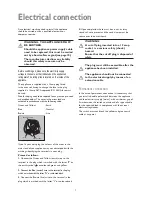
The power plug must be accessible after installation of
the freezer.

50mm

a)

b)

Summary of Contents for JLFZW 1806

Page 1: ...JLFZW 1806 freezer Instruction manual...

Page 2: ...the door catch in order to prevent children from becoming trapped inside while playing D This appliance is designed for domestic use only specifically for the storage of edible foodstuffs only It is...

Page 3: ...uncil or Environmental Health Office to see if there are facilities in your area for recycling this appliance D When the appliance is to be scrapped cut off the power supply cable and remove the door...

Page 4: ...8 For the Installer Installation 6 Technical Specifications 6 Unpacking 7 Installing the freezer 7 Door reversal 8 Climate classification 8 Electrical connection 10 Contents Guide to using the Instruc...

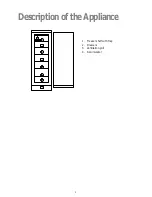
Page 5: ...5 3 2 1 2 1 2 2 2 4 1 Freezer shelf with flap 2 Drawers 3 Ventilation grill 4 Accumulator Description of the Appliance...

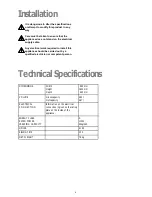
Page 6: ...ce should be carried out by a qualified electrician or competent person DIMENSIONS Width Height Depth 595 mm 1800 mm 623 mm VOLUME Gross capacity Net capacity 285 l 267 l ELECTRICAL CONNECTION Informa...

Page 7: ...ry cool place and is not exposed to direct sunlight D the freezer is not placed close to a source of heat e g a cooker or dishwasher D the freezer is level The freezer should not leanagainst any wall...

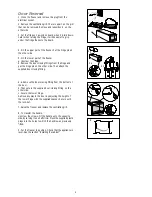
Page 8: ...the hinge pin on the other side Then attach the supplied door closing fitting 6 a Remove the door closing fitting from the bottom of the door b Then secure the supplied door closing fitting on the oth...

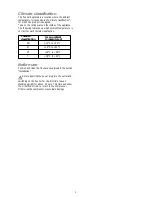
Page 9: ...or each climate classification Climate classification for an ambient temperature of 10 C to 32 C 16 C to 32 C 18 C to 38 C 18 C to 43 C SN N ST T Before use Position and clean the freezer as explained...

Page 10: ...Blue neutral wire to the terminal in the plug which is marked with the letter N or coloured black 3 Connect the Brown live wire to the terminal in the plug which is marked with the letter L or colour...

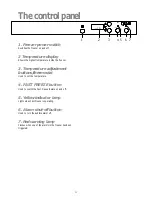
Page 11: ...Temperature adjustment buttons thermostat Used to set the temperature 4 FAST FREEZE button Used to switch the Fast Freeze feature on and off 5 Yellow indicator lamp Lights when Fast Freeze is operatin...

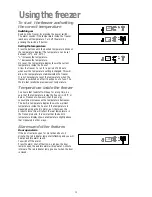
Page 12: ...temperature Temperature inside the freezer To ensure that foodstuff will keep for a long time be sure that the temperature inside the freezer is 18 C or below Please note however that the energy cons...

Page 13: ...possible to decide whether or not to discard the products inside the freezer At about 12 C Most food products can be immediately re frozen Ice cream is especially sensitive to temperature changes and...

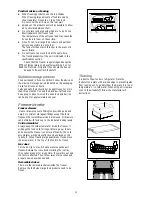
Page 14: ...at food may be kept up to about six months Lean food and berries can be kept for approximately one year Freezer interior Freezer drawers Freezer drawers ensure finding foods will be quick and easy For...

Page 15: ...nsulated container is advisable When you arrive home place the frozen food in the freezer immediately D Ensure that food placed in the freezer is dated and labelled and used in date order to ensure th...

Page 16: ...vaporator is defrosted automatically To change the light bulb This freezer is fitted with a clear halogen light bulb The light is switched on automatically when the door is opened If the bulb fails an...

Page 17: ...roducts to allow cold air to circulate around them It is too cold inside the freezer D Set a warmer temperature D Fast Freeze could have been switched on D The temperature display shows the highest te...

Page 18: ...u wish to purchase spare parts please contact our extended warranty administrators by telephoning 0870 010 7887 They will give you details for your local Service Force Centre Before calling out an eng...

Page 19: ......

Page 20: ...8183805 00 4 05 06 John Lewis Partnership 171 Victoria Street London SW1E 5NN www johnlewis com...

Reviews: