background image

Analog

Analog delay was the method originally used to electronically duplicate a tape delay. It is characterized by the way each repeat degrades or
deteriorates from the original input signal.

Delay

Delay is an effect that will record a portion of the incoming signal, and then play it back a short time later. It can repeat the recording
several times, or just once. This type of effect is also referred to as an echo because it basically echoes the original signal. This is a full band
width digital delay with no degradation of repeats.

Ping Pong

A ping pong delay is an effect that will record a portion of the incoming signal, and then repeat the recording a short time later. When it
replays the recorded signal, the repeats will bounce from side to side (in stereo). This is why it is called ping pong, because the repeats will
go back and forth from side to side.

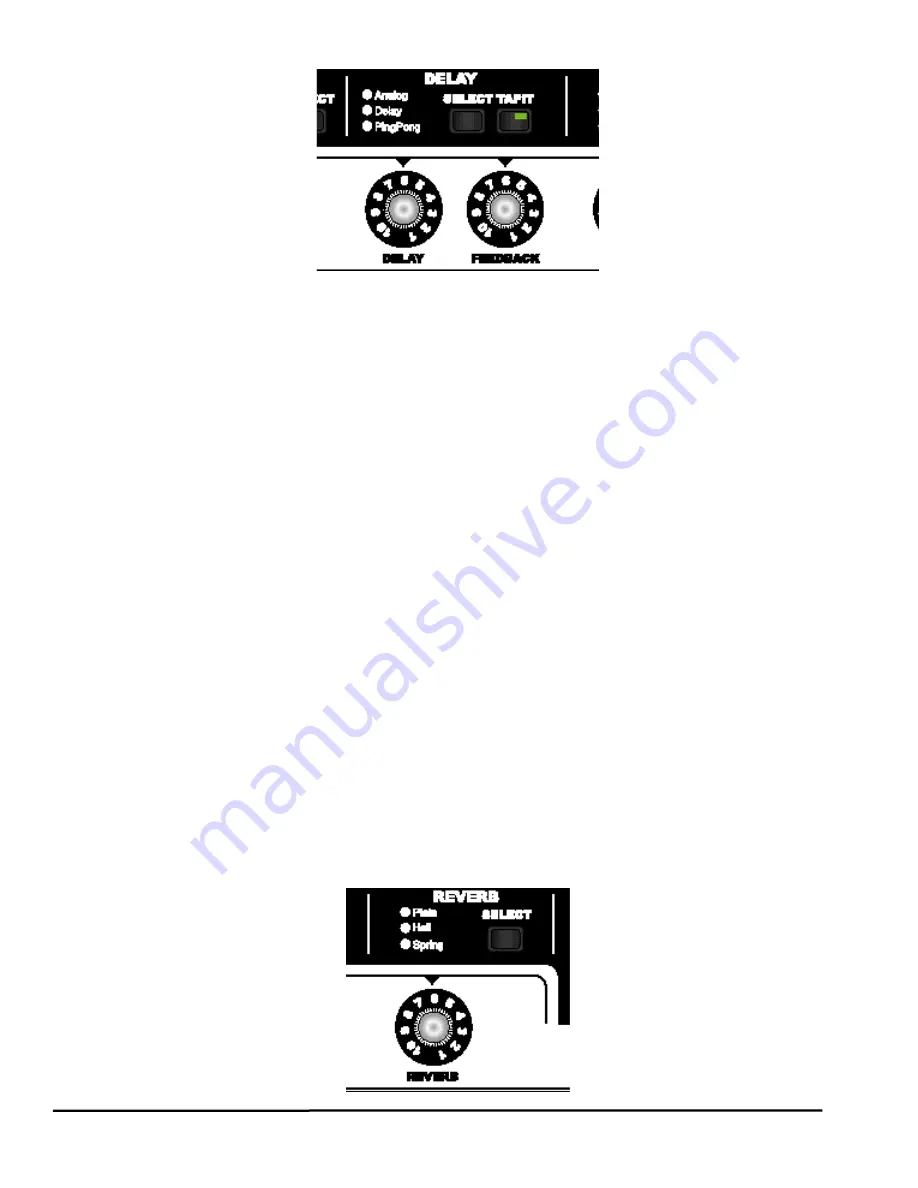
Delay  -

Adjusts the volume of the delay effect.

Feedback -

Adjusts how many times the delay will repeat the signal.

Tap It  -

The Tap It button is used to set the delay time, or the amount of time between repeats. Tapping this button in time with
the music will align the repeats of the delay in synchronization with the beat of the music.  Pressing and holding the Tap It
button down for a few seconds will select the fine tune adjustment of the delay time using the Select knob.  Press any
button to exit.

Reverb Effects Group

The Marquis JM60/JM120 have three different reverb types to choose from. Each successive press of the Reverb Select button will advance to
the next type of reverb. The reverb effect may be bypassed by pressing and holding the Reverb Select button down. The only adjustable
parameter for the reverb effect group is the level. The following is a description of each reverb type:

15

Section 2 - Using the Marquis JM60/JM120

Summary of Contents for Marquis JM120

Page 1: ...User s Guide please visit Johnson Amplification on the World Wide Web at http www johnson amp com ...

Page 2: ...rth ground are touched simultaneously U K MAINS PLUG WARNING A molded mains plug that has been cut off from the cord is unsafe Discard the mains plug at a suitable disposal facility NEVER UNDER ANY CIRCUMSTANCES SHOULD YOU INSER T A DAMAGED OR CUT MAINS PLUG INT O A 13 AMP POWER SOCKET Do not use the mains plug without the fuse cover in place Replacement fuse covers can be obtained from your local...

Page 3: ...Amendments 1 2 3 JM120 EMC EN 55013 1990 EN 55020 1991 Supplementary Information The product herewith complies with the requirements of the Low Voltage Directive 89 336 EEC as amended by Directive 93 68 EEC Johnson Amplification President of Johnson Amplification 8760 S Sandy Parkway Sandy Utah 84070 USA Tel 801 566 8800 Fax 801 566 7005 Effective November 16 1998 European Contact Your local Johns...

Page 4: ...nts upon this product without incurring any obligation to install the same on products previously manufactured 6 The consumer forfeits the benefits of this warranty if the product s main assembly is opened and tampered with by anyone other than a certified Johnson Amplification technician or if the product is used with AC voltages outside of the range suggested by the manufacturer 7 The foregoing ...

Page 5: ...on 7 Direct Output 8 Footswitch Connections 8 Powering 9 Selecting a Preset 9 Editing a Preset 9 Selecting an Amp Model 9 Amp Models 9 Editing an Amp Model 10 Amp Controls 10 Noise Gate 10 Editing Effects 11 Selecting Effects 11 JM60 Mod Pitch Effects 11 JM120 Mod Pitch Effects 13 Delay Effects Group 14 Reverb Effects Group 15 Storing Copying a Preset 16 Section 3 Guided Example Creating a Preset ...

Page 6: ... you proceed any further make sure the following items are included 1 User s Guide 1 Johnson Marquis JM60 JM120 Amplifier 1 Johnson Amplification Warranty Card 1 Detachable Power Cord Please take a moment to fill out the warranty registration card and be sure to save all packing materials The warranty is your safeguard in the unlikely event that the unit requires servicing and the packing material...

Page 7: ...presets that suit your taste you can alter the sounds to your specific needs Each of the various effects will have dedicated knobs which will vary the amount of their associated parameters The Amp section has a Gain Treble Mid Bass Presence JM120 only and a preset Level knob The Mod Pitch effects section has a Speed and Depth knob the JM120 includes a Level knob for the Mod Pitch effects The Delay...

Page 8: ...in fuzz distortion Overdrive a smooth crunch distortion and Metal a high gain solid state distortion 4 Amp Controls These knobs control all of the amplifiers equalization and levels for each preset 4a Gain This knob controls the amount of distortion gain drive for each preset 4b Treble This knob is used to increase or decrease the amount of treble enhancement in each preset 4c Mid This knob is use...

Page 9: ...k number and the second digit shows whether channel 1 2 or 3 is selected A decimal point in the lower right hand corner of the display indicates a factory preset is active 10 Manual This button is used to activate the current position of all knobs on the front panel In other words the front panel knob positions will not necessarily reflect the sound of a preset until the Manual button has been pre...

Page 10: ...peaker load of 8 Ωs is required 6 Headphone Jack This stereo TRS jack is used to connect a pair of stereo headphones It can also be used as a speaker compensated direct out for direct to mixing console connections 7 Speaker On Off Switch This switch enables or disables the internal speaker on the JM60 JM120 for those times when you do not want the speaker active such as during direct recording 8 L...

Page 11: ...are the master volume gain treble mid bass presence only on the JM120 and level controls These buttons and knobs all work in conjunction with each other to provide you with your basic tone Effects Section The effects section of the JM60 JM120 is on the right half of the faceplate It includes the Mod Pitch the Delay and the Reverb Each successive press of the Select button of a given effect group w...

Page 12: ...ilable to you Stereo Operation Running the Marquis in stereo will add a thicker texture and more lush sound to your instrument The JM60 has an external speaker connector located on the rear panel This is a powered output which provides an additional 60 Watts of power for connection of a satellite speaker cabinet such as the J112 Connecting a speaker to this jack will automatically put the JM60 in ...

Page 13: ... or you can disengage the speaker with the Speaker on off switch located on the rear panel of the amp Footswitch Connections The Marquis JM60 JM120 provide two foot control options the J3 and or the J8 On the rear panel you will find a single TRS jack for connecting the optional J3 footswitch You will also find a single 5 pin DIN jack for use with the optional J8 foot controller To use either simp...

Page 14: ...ing presets very simple The layout of the amp and processor on the front panel makes editing as easy as pushing a button or turning a knob All functions are shown on the front panel simultaneously Selecting an Amp Model The amp models of the JM60 JM120 have been divided in to three different groups Each group has 6 LEDs defining the model and one Model button which allows you to choose any amp mod...

Page 15: ...aring In other words the amp does not look at the current setting of the knob when an amp model is first selected Once a knob is turned at least one whole number the amp will update the sound to reflect that knobs current position for the sound you hear The following is a description of each knobs function Gain This knob controls the amount of distortion gain drive for each preset Treble This knob...

Page 16: ...ts When a preset is selected on the JM60 JM120 the effects that are active in the preset will be indicated by the LEDs for each effect group Each of the three effects may be bypassed by pressing and holding down the Select button corresponding to the effect group that you wish to bypass Likewise if an effect group is bypassed you may engage that effect group by pressing the Select button once Each...

Page 17: ...d knob adjusts how fast the phase is being changed Depth The depth knob adjusts the intensity of the phasing effect Tremolo A tremolo is an effect that modulates the volume of the incoming signal at a steady even pace The incoming signal will go back and forth getting louder and softer It would be kind of like having a motor on your guitars volume knob which increased and decreased the volume at a...

Page 18: ...your guitars volume knob which increased and decreased the volume at an even rate The TremoPan incorporates an automatic panner with the tremolo effect The panner shifts the signal back and forth from left to right Speed The speed knob adjusts how fast the volume will fluctuate Depth The depth knob will adjust the intensity of the volume fluctuation Level The Level control adjusts the amount of pa...

Page 19: ...m 0 to 20 cents Level The level knob determines the amount of detune in both speakers from 0 100 Rotary Speaker The Rotary Speaker effect creates a doppler type effect associated with a rotating speaker The rotation of a speaker changes the panning of the sound as well as the pitch simultaneously As the sound comes toward the listener it is a slightly higher pitch then when the sound is going away...

Page 20: ...pong because the repeats will go back and forth from side to side Delay Adjusts the volume of the delay effect Feedback Adjusts how many times the delay will repeat the signal Tap It The Tap It button is used to set the delay time or the amount of time between repeats Tapping this button in time with the music will align the repeats of the delay in synchronization with the beat of the music Pressi...

Page 21: ... The reverb knob adjusts the volume of the reverb effect Storing Copying a Preset After you have edited a preset you must save your new sound otherwise the JM60 JM120 will erase the changes that you had made and revert back to the original sound of the preset You can save your modifications to any one of the 27 user locations When you have made all of the changes that you intend to and you are hap...

Page 22: ...b to adjust the amount of high end response that you need Let s start with the treble knob set to 5 4 Use the Mid knob to adjust the mid range frequency response that you desire Mid range frequencies tend to cut through the mix quite well so this should be set lower than the rest of the EQ knobs Try setting it at 2 for starters 5 Use the Bass knob to adjust how dark the sound should be Try setting...

Page 23: ... the Delay Level knob to adjust the volume of the delay Let s set this to 6 or 7 for our example 3 Use the Feedback knob to set the number of repeats that you want For our example we were going to use one repeat so set the feedback knob at 1 4 Begin pressing the Tap It button in tempo with the music Continue tapping the button for a couple of measures This will set the delay time in synchronizatio...

Page 24: ... hearing The knobs must be turned at least one whole number before the JM60 JM120 will update to the position of the knob The Manual button located on the top right hand corner will over ride all stored preset values making the position of all knobs active In other words if your press the Manual button the sound that you are hearing will relate to the position of all of the knobs To engage Manual ...

Page 25: ...I cable must have a 5 conductor cable with all 5 pins connected Standard MIDI transmissions use only 3 of the 5 pins Therefore many MIDI cords only have 3 conductor cable J8 Expression Pedal Calibration The J8 s expression pedal needs to be calibrated in order for it to work with the JM60 JM120 To calibrate the J8 s expression pedal do the following 1 Begin with the power off 2 Press and hold the ...

Page 26: ...conds the JM60 JM120 will revert back to the last bank and channel that had been active Expression Pedal The expression pedal on the JM8 can be used as a volume pedal or a wah wah pedal In normal operation of the JM60 JM120 the J8 will be a volume pedal To change the function to a wah simply rock the pedal all the way forward toe down and apply pressure on the toe This will engage the switch and a...

Page 27: ...On both of these jacks the tip is left internal speaker on the JM60 and the ring is right external speaker on the JM60 You will need 2 stereo Y cords to utilize the stereo sends and returns FX Send The effect send is a stereo output from the JM60 JM120 s preamp These would be connected to the inputs of an external effect device of your choosing The input level of the external effects processor wil...

Page 28: ... JM60 Factory Preset List JM120 Factory Preset List Bank 1 1 Rectifier Solo 2 Classic Twin 3 Phasadelic Bank 2 1 British Plate 2 Thick Boutique 3 Trem Tweed Bank 3 1 Voxbrato 2 Johnson Grease 3 Boutique Chorus Bank 4 1 Hot Rod Hall 2 Johnson Solo 3 Bluesy Delay Bank 5 1 Hard Rock Verb 2 Fuzz 4ths 3 Texas Blues 23 Appendix Bank 6 1 Tweed Spank 2 Mod British Stack 3 Rotary Jazz Bank 7 1 Metal Octave...

Page 29: ...12AX7 Plate Voltage 240 Volt Power Amp Output Mono 60 Watts RMS into 8 Ωs Power Amp Output Stereo 120 Watts RMS 60 per channel into 8 Ωs DSP Section Frequency Response 20 20kHz 0 5 dB Signal to Noise Greater than 96 dB A weighted ref max signal 22kHz measurement bandwidth A D Converter 20 bit 128x Oversampled D A Converter 20 bit 128x Oversampled Sampling Rate 46 875 kHz Power Power Requirements 1...

Page 30: ...25 Appendix ...

Page 31: ...A Telephone 801 568 7642 FAX 801 568 7638 Johnson Amplification and Marquis are trademarks of the Harman Music Group Incorporated Copyright 1999 the Harman Music Group Incorporated Printed in USA 03 99 Manufactured in the USA Marquis JM60 JM120 Manual 18 2269 B Please Visit Johnson Amplification on the World Wide Web at http www johnson amp com ...

Reviews: