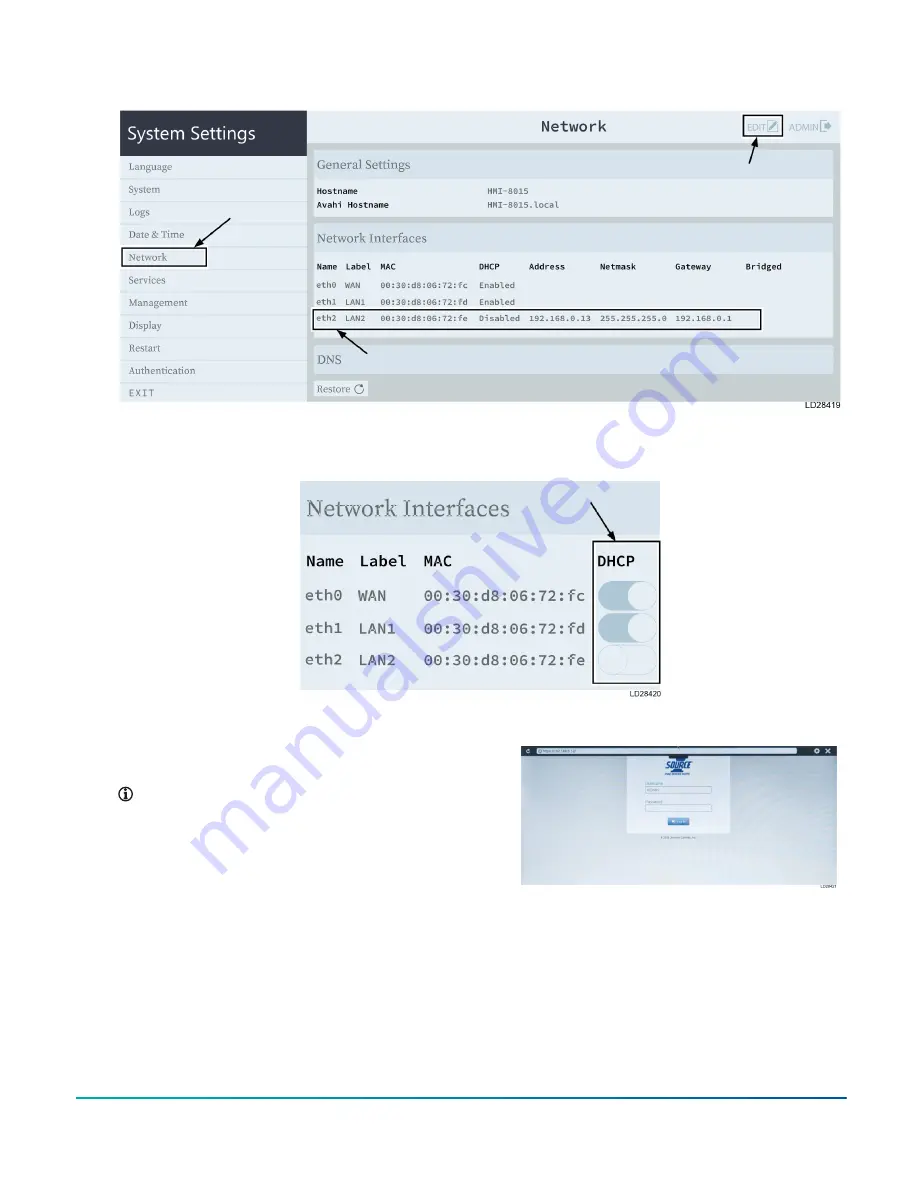
Figure 25: Network page
Figure 26: DHCP button
18. Disable the DHCP button on the port where
the Ethernet cable is connected. See Figure 26.
19. Set the static HMI IP Address for the display.
Note:
When entering the static IP
Address, ensure the first three set of
numbers match the MAP IP Address
which was configured in Step 13. For
example, if the MAP IP Address is
192.168.0.12, then the HMI IP Address
must be 192.168.0.XX. XX should be a
value other than 12.
20. Enter the Network (Subnet Mask) and
Gateway address, which are the same as the
MAP configuration from Step 13. Tap
Save
on
the top of the screen.
21. Tap
Exit
under the System Settings tab.
Figure 27: Log in
22. Tap on
Start HMI
for the display to appear.
23. When the display shows, log in into the
application and select the device, Dev ID,
from the drop-down from where the serial
communication cable is connected.
24. Tap on the
Settings
icon.
Advanced Graphic Touchscreen Display on 25 Ton to 80 Ton Johnson Controls Premier Rooftop Units
27
Johnson Controls


