background image

Safety instructions 

Thank you for purchasing our products. The correct use of this equipment is your guarantee of safety and 

health. Please read this manual carefully before installing and using this equipment! Exercises can be made 

safe and effective only if they are properly installed, maintained, and used. 

1.

Before starting a practice program, consult your doctor to determine your current physical condition and whether  it will be

hazardous to your health when using this equipment.  If you are doing some treatment about heart rate, blood pressure, and

cholesterol, then the doctor's advice is very important.

2.

Pay attention to some signals from your own body. Incorrect and excessive exercise will hurt your health. If you feel the following

discomfort: pain, chest tightness, fast heartbeat, shortness of breath, top-heavy, dizzy, and nausea, stop practicing immediately. If

you want to continue your practice program, please consult your doctor first.

3.

Keep children and pets away from this equipment. This equipment is designed for adults.

4.

Put a sturdy, flat material at the bottom of the equipment to protect your floor and carpet. For your safety, please ensure that there

is at least 0.6m of free space around the equipment.

5.

Please ensure that the screws and nuts are tightly locked before use and check the product regularly.

6.

Please use the machine carefully. If you notice any defects when installing or using the equipment, or if you hear any abnormal

noise, stop the exercise immediately.Do not continue to use the machine until the problem is resolved.

7.

Wear fitted clothing during exercise to prevent loose clothing from being shackled or restricting movement.

8.

Do not put your fingers or other objects in the equipment.

9.

The maximum load of this product is 136KG (300 lbs).

10. This product cannot be used as a medical device.

11. Be careful when handling this equipment to avoid unnecessary injury.

12. This product is suitable for use in a cool, dry environment. Do not store in extremely cold, hot or humid places as this may corrode

the product or cause other problems.

13. This product is for indoor use only and is not suitable for commercial use.

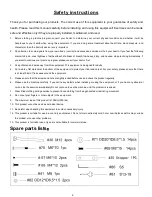
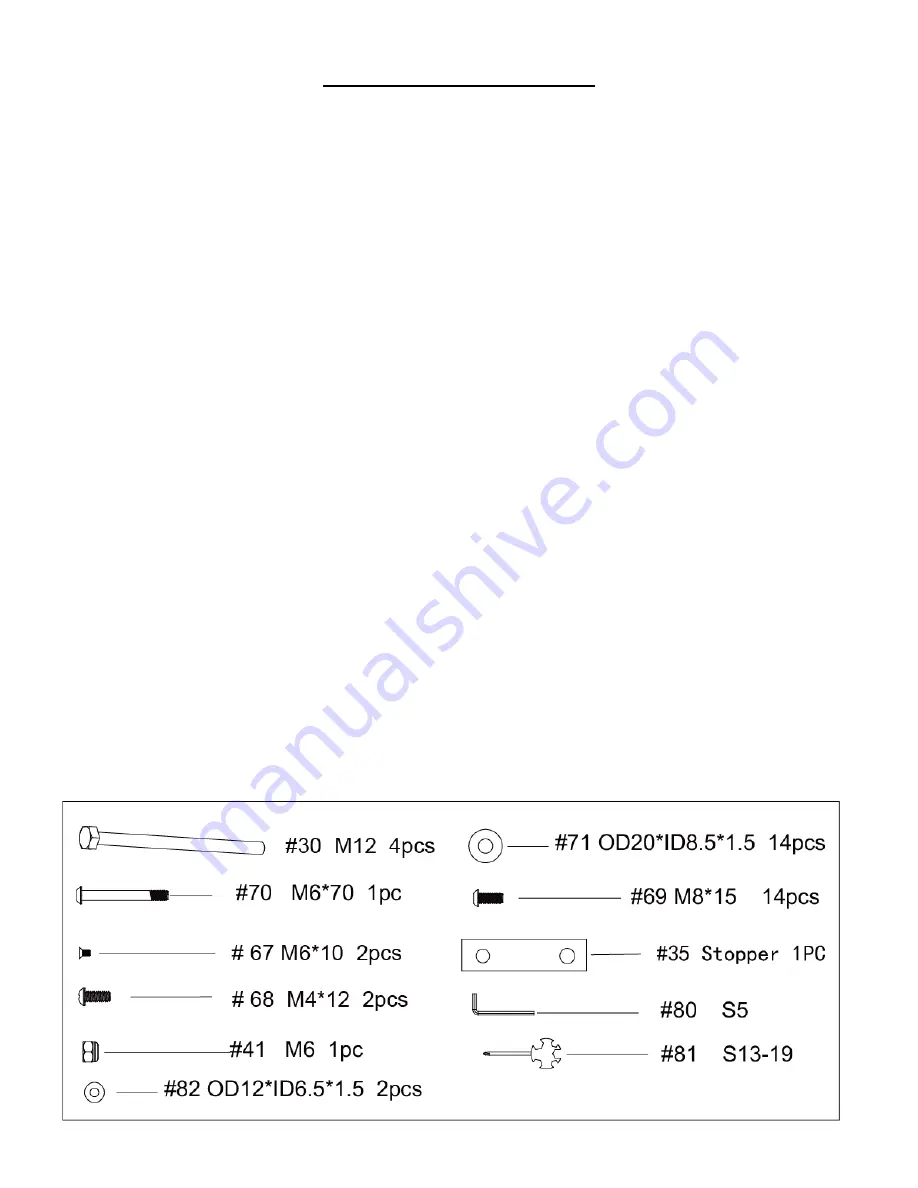
Spare parts lists


Summary of Contents for Tempo Fitness TP-DH-8619

Page 1: ...A brand of Johnson Health Tech TP DH 8619 AIR ROWER USER MANUAL https www jhta com au consumer support ...

Page 2: ...his equipment This equipment is designed for adults 4 Put a sturdy flat material at the bottom of the equipment to protect your floor and carpet For your safety please ensure that there is at least 0 6m of free space around the equipment 5 Please ensure that the screws and nuts are tightly locked before use and check the product regularly 6 Please use the machine carefully If you notice any defect...

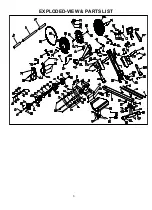
Page 3: ...3 EXPLODED VIEW PARTS LIST ...

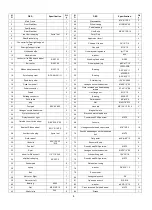
Page 4: ...ating connector 1 61 Bearing 6008 2Z 6 20 Pull handle 1 62 Roller spacer d8 φ15 4 6 21 plug 1 63 Nut M8 H7 5 S13 4 22 Footpad Φ52 40 M10 1 64 Hex bolts M8 125 15 S14 3 23 Hexagon socket head screw 2 65 Magnetic plate 1 24 Protective cover left 1 66 Electronic watch fixed piece 1 25 Protective cover right 1 67 Countersunk Phillips screw M6 10 4 26 Outside cover for the wheel Φ89 Φ16 5 0 5 1 68 Cons...

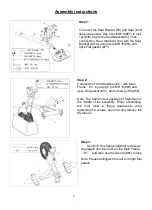
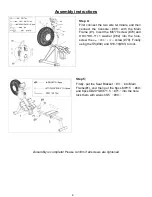
Page 5: ...he Front Stabilizer 2 with Main Frame 1 by using 4 pcs M8 15 69 and 4pcs Flat gasket 71 and locked by S5 80 Note The frame has a package of Styrofoam in the middle of the assembly When assembling the front roller is facing downwards After tightening the screws stand up and remove the Styrofoam Step 3 Use M12 Hex flange nut 30 to through the padels and then lock on the Main Frame 1 and then use the...

Page 6: ...w 70 and OD12 ID6 5 1 5 washer 82 into the hole screw the Nut 41 into screw 70 Finally using the S5 80 and S10 19 81 to lock Step 5 Firstly put the Seat Bracket 3 into Main Frame 1 and then put the 6pcs M8 15 69 and 6pcs OD20 ID8 5 1 5 71 into the hole lock them with wrench S5 80 Assembly is complete Please confirm if all screws are tightened ...

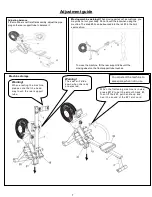
Page 7: ...ort tube To move the machine lift the rear support tube until the moving wheel on the front support tube touches Adjusting balance If the machine is not flat after assembly adjust the pipe plug on the rear support tube to balance it Machine storage Warning The seat will slide down when the rails are erected When the flattening machine is in use press 21 to put the smooth track 3 then lift the 20 p...

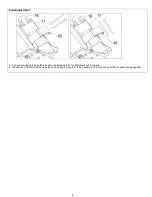
Page 8: ...he pedal webbing is adjustable and can be adjusted to 37 for different user s foot sizes 2 The position of the foot can be adjusted by adjusting the length of the 23 pedals and the foot size of different users can be applied ...

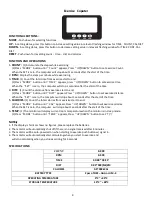
Page 9: ...DE button until DIST appears Press UP DOWN button to set exercise distance When the SET is zero the computer will stop about 1 seconds after the start of the time 5 CALORIES 1 Count the total calories from exercise start to end 2 Press MODE button until CAL appears Press UP DOWN button to set exercise calories When the SET is zero the computer will stop about 1 seconds after the start of the time ...

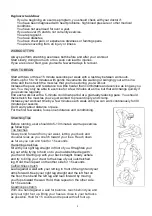
Page 10: ...ducing pace You should then stretch the muscles you ve just worked to prevent injury and cramp Increase your workout time by a few minutes each week until you can work continuously for 30 minutes per session Don t worry about distance or pace For the first few weeks focus on endurance and conditioning Stretching Tips Before running user should do 5 10 minute s warm up exercise as followings Toe to...

Page 11: ...ly push your knees toward the floor Hold for 15 counts 10 Johnson Health Tech Australia 78 Logis Boulevard Dandenong South VIC 3175 2018 Johnson Health Tech Australia All Rights Reserved Product specifications subject to change without notice For any customer service support please call 1300 760 601 or log on to https www jhta com au consumer support ...

Reviews: