i-Pilot rev 04/21
5
Case XV. Pressing any button on the 1.0 or 1.5 remote causes all the icons to
come on for a few seconds and then turn off, OR the screen on the 1.6 remote
reads “Motor Not Found” when the remote is on.
Step 1.
Verify power is supplied to the i-Pilot Controller.
A.
For PowerDrive Motors press the “Push-to-Test” battery meter to verify voltage to the motor and
check the connection to the footpedal plug is secure
B.
For all other motors verify the motor is turned on, a system ready or power light will be illuminated
(on the base of the motor on all Terrova/Ulterra Models, on the footpedal on Ultrex).
Step 2.
Re-pair/re-learn the remote to the Controller. (See
Part II. Miscellaneous System Information
)
Step 3.
Turn the system OFF and then back ON (for PowerDrive models, disconnect then reconnect power).
Case XVI. The remote LCD backlighting will not come on.
Step 1.
Check if the low battery indicator icon is on. Backlighting is disabled when a low battery level is detected.
Replace the battery.
A.
The backlight will not come on if the remote is not currently communicating with the i-Pilot
Controller.
Case XVII. Customer complaint that the battery in the i-Pilot remote drains
quickly.
NOTE:
This cannot be due to a problem with the motor or the i-Pilot Controller.
Step 1.
If this is an i-Pilot remote version 1.0, the customer may be misunderstanding the “low battery” icon.
A.
This icon is not a gauge showing the voltage left in the battery. It is simply a warning icon.
B.
On early models, when a customer “wakes up” the remote by pressing any button, all of the icons were
briefly displayed. The “low battery” icon was included in this start-up display. After the start-up
display, the “low battery” icon was only shown on the LCD if the voltage in the remote’s battery was
actually low. (A software change in later models addressed this by removing the “low battery” icon
from the initial startup display.)
Step 2.
Turn the backlight off to significantly increase battery life.
Step 3.
Constantly sending signals with the remote will run the battery down. We have heard a few complaints where
the customer sat on the remote (or somehow otherwise engaged a remote button) thus sending constant signals.
Case XVIII. There is moisture in the LCD window or the remote case.
Step 1.
Remove the battery cover on the back side of the remote to examine the battery cover o-ring/gasket and cover
locking tabs for damage. If either is damaged you will need to replace the cover.
Step 2.
Check the battery and battery contact for corrosion.
A.
If corrosion is noted on the battery(s) replace it/them.
B.
If corrosion is noted on the battery contacts in the remote clean them, as necessary.
Step 3
. Prior to installing the cover, allow the remote to dry out by placing it in a warm dry location for several hours.
If necessary use dry, low pressure air to ventilate the remote case.
A.
Reassemble the remote and test.
B.
If the remote ceases to function after this then the microcircuits or components on the remote circuit
board have shorted out and the remote will need to be replaced.
©Johnson Outdoors 2021
Summary of Contents for i-Pilot
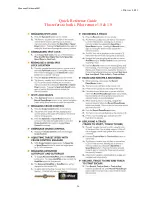
Page 14: ...i Pilot rev 04 21 11 Quick Reference Guide 1 6 Johnson Outdoors 2021 ...
Page 15: ...i Pilot rev 04 21 12 Quick Reference Guide 1 6 Johnson Outdoors 2021 ...
Page 16: ...i Pilot rev 04 21 13 Quick Reference Guide 1 6 Johnson Outdoors 2021 ...
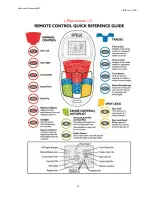
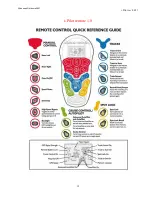
Page 17: ...i Pilot rev 04 21 14 i Pilot remote 1 5 Johnson Outdoors 2021 ...
Page 18: ...i Pilot rev 04 21 15 i Pilot remote 1 0 Johnson Outdoors 2021 ...


