32
CHAPTER 4: Part Replacement Guide
4.9 CRANK REPLACEMENT
1. Remove the link arm(see section4.8)
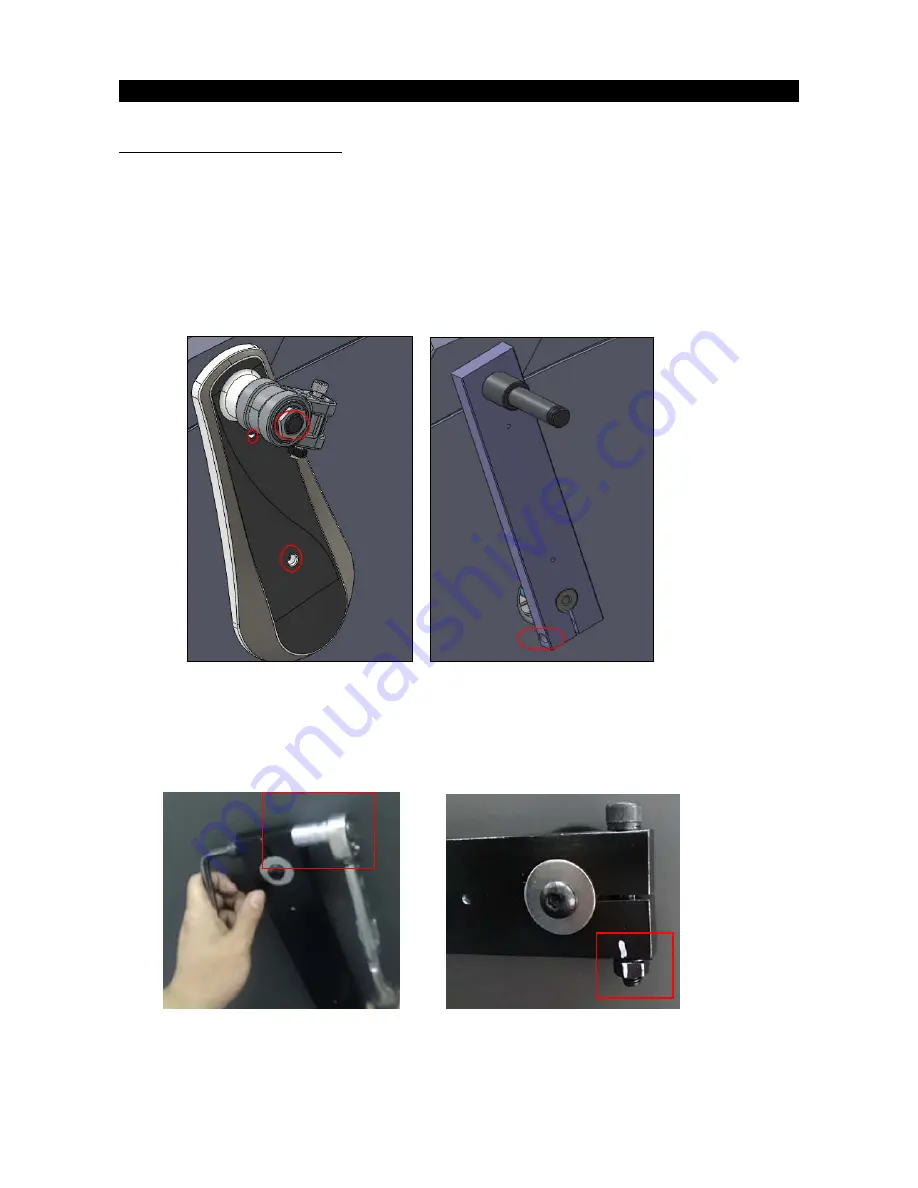
2. After remove the link arm, you can see the crank. Remove the nut and screws to remove the plastic cover
of the crank. (Figure A)
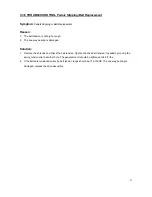
3. After remove the cover, remove the crank arm bolt to remove the crank, a two jaw puller might be needed.
(Figure B)
Figure A Figure B
4. The torque on crank bolts must be 800kgf.cm (Figure C & Figure D)
Figure C Figure D
Summary of Contents for Matrix Retail A30
Page 5: ...5 CHAPTER 1 Serial Number Location ...
Page 6: ...6 CHAPTER 1 Serial Number Location ...
Page 7: ...7 CHAPTER 1 Serial Number Location ...
Page 8: ...8 CHAPTER 2 Console Browse Please refer to XR XER XIR service manual to get more details ...
Page 9: ...9 CHAPTER 3 Troubleshooting 3 1 ELECTRICAL DIAGRAM A30 ...
Page 10: ...10 CHAPTER 3 Troubleshooting 3 1 ELECTRICAL DIAGRAM A50 ...
Page 11: ...11 CHAPTER 3 Troubleshooting 3 1 ELECTRICAL DIAGRAM A30 50 Connection Console Connection ...


