31
32
Installation with 3-point-belt
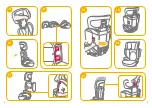
With back support
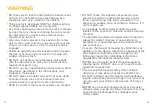
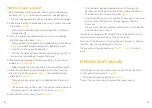
1. The back of the booster seat MUST fit tight against the
vehicle seat back as shown.
(Fig. 16)
!
The front of booster seat MUST NOT hang over front of
vehicle seat.
!
DO NOT use a booster seat in reclined position.
(Fig. 17)
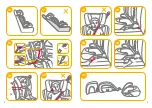
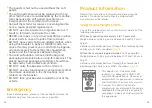
2. Open the route of the vehicle safety belt through the belt
path
(Fig. 18)
, and lock it into the buckle.
(Fig. 18.3)
!
Position shoulder belt through the shoulder belt guide
shown in
Fig. 18.1
!
DO NOT position vehicle belt over top of the armrests. It
must pass underneath the armrests.
(Fig. 18.2)
!
The booster can not be used if the vehicle safety belt with
female buckle is too long to tie the booster.
(Fig. 18.4)
!
The importance of ensuring that any lap strap is worn low
down, so that the pelvis is firmly engaged, shall be
stressed.
The vehicle safety belt assembled as
Fig. 18
!
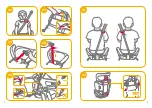
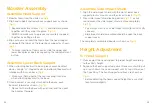
To ensure the correct head support height is obtained,
the bottom of headrest must be level with the highest
point of children shoulder or higher it slightly as
shown in
Fig. 19
!
At the back seat of vehicle, a booster used for forward-
facing must use the vehicle safety belt correctly.
!
Have your child sit in a booster seat with their back flat
against back of a booster seat.
!
NOT as shown in
Fig. 20
. Fasten buckle and pull up on
the shoulder belt to tighten.
!
If the belt lays across child neck, head or face, readjust
head support height.
(Fig.21)
!
Belt must not be twisted.
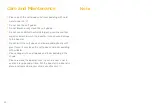
If vehicle is equipped with ISOFIX, the vehicle lower anchor
points may be visible at the vehicle seat crease. See your
vehicle owner’s manual for exact locations, anchor
identification, and requirements for use .
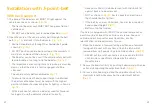
1. Place the booster in forward-facing position on a forward-
facing vehicle seat with anchors, attach the
latch which
removed from soft goods rings to vehicle anchors.
(Fig.22)
!
NEVER put two latch connectors on one vehicle ISOFIX
anchor unless specifically allowed by the vehicle
manufacturer.
2. Secure the booster firmly by pushing it downward with knee
or hand while pulling the adjustment belt.
(Fig.23)
3. For ease of unhooking, extend the adjustment belt to its
maximum length while pressing the adjustment button.
(Fig.24)

