background image

English

 – 23

MAINTENANCE

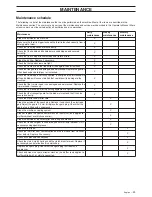
Maintenance schedule

The following is a list of the maintenance that must be performed on the machine. Most of the items are described in the 
Maintenance section. The user must only carry out the maintenance and service work described in this Operator’s Manual. More 
extensive work must be carried out by an authorized service workshop.

Maintenance

Daily 
maintenance

Weekly 
maintenance

Monthly 
maintenance

Clean the outside of the machine.

X

Make sure the throttle trigger lock and the throttle function correctly from a 
safety point of view.

X

Check that the stop switch works correctly.

X

Check that the handle and handlebar are undamaged and secured 
correctly.

X

Check that the cutting attachment does not rotate at idle.

X

Clean the air filter. Replace if necessary.

X

Check that nuts and screws are tight.

X

Check that there are no fuel leaks from the engine, tank or fuel lines.

X

Check that the guard is undamaged and not cracked. Replace the guard if 
it has been exposed to impact or is cracked.

X

Check that the blade is correctly centred, is sharp, and is not cracked. An 
off-centre blade will cause vibration that could result in damage to the 
machine.

X

Check that the trimmer head is undamaged and not cracked. Replace the 
trimmer head if necessary.

X

Check that the locking nut of the cutting equipment is tighten correctly.

X

Check that the transport guard for the blade is intact and that it can be 
secured correctly.

X

Check the starter and starter cord.

X

Clean the outside of the spark plug. Remove it and check the electrode 
gap. Adjust the gap to 0,6 mm or replace the spark plug. Check that the 
spark plug is fitted with a suppressor.

X

Clean the machine’s cooling system.

X

Clean or replace the spark arrestor mesh on the muffler (only applies to 
mufflers without a catalytic converter).

X

Clean the outside of the carburettor and the space around it.

X

Check that the bevel gear is filled three-quarters full with lubricant. Fill if 
necessary using special grease.

X

Clean the fuel tank.

X

Check the fuel filter from contamination and the fuel hose from cracks or 
other defects. Replace if necessary.

X

Check all cables and connections.

X

Check the clutch, clutch springs and the clutch drum for wear. Replace if 
necessary by an autorized service workshop.

X

Replace the spark plug. Check that the spark plug is fitted with a 
suppressor.

X

Check and clean the spark arrestor mesh on the muffler (only applies to 
mufflers fitted with a catalytic converter).

X

Summary of Contents for GC2123

Page 1: ...Operator s manual Please read the operator s manual carefully and make sure you understand the instructions before using the machine...

Page 2: ...metres Machines fitted with saw blades or grass blades can be thrown violently to the side when the blade comes into contact with a fixed object This is called blade thrust The blade is capable of amp...

Page 3: ...UES General working instructions 17 MAINTENANCE Carburettor 20 Muffler 20 Cooling system 21 Spark plug 21 Air filter 21 Gear 22 Maintenance schedule 23 TECHNICAL DATA Technical data 24 EC declaration...

Page 4: ...ers ask for the address of your nearest service workshop It is our wish that you will be satisfied with your product and that it will be your companion for a long time Think of this operator s manual...

Page 5: ...5 Cutting attachment guard 6 Guard extension 7 Shaft 8 Loop handle 9 J handle 10 Throttle control 11 Stop switch 12 Throttle lock 13 Start throttle button 14 Harness support hook 15 Starter handle 16...

Page 6: ...his manual Some maintenance and service measures must be carried out by trained and qualified specialists See instructions under the heading Maintenance All covers guards and handles must be fitted be...

Page 7: ...le control and throttle lockout move freely and that the return springs work properly See instructions under the heading Start Start the hedge trimmer and apply full throttle Release the throttle trig...

Page 8: ...n put on approx 10 times Cutting equipment This section describes how to choose and maintain your cutting equipment in order to Reduce the risk of blade thrust Obtain maximum cutting performance Exten...

Page 9: ...ly automatic trimmer head is used Only use the recommended cutting attachment See the chapter on Technical data Smaller machines generally require small trimmer heads and vice versa This is because wh...

Page 10: ...imes to make sure that it works correctly 5 Adjust the cable adjuster sleeve so the stop on the carburettor throttle cam just contacts the throttle stop and the cable position keep 1 2 mm play between...

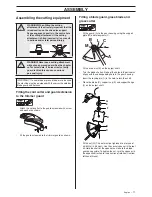
Page 11: ...ightened to a torque of 35 50 Nm 3 5 5 kpm Use the socket spanner in the tool kit Hold the shaft of the spanner as close to the blade guard as possible To tighten the nut turn the spanner in the oppos...

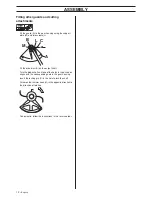
Page 12: ...ive disc B on the output shaft Turn the blade shaft until one of the holes in the drive disc aligns with the corresponding hole in the gear housing Insert the locking pin C in the hole to lock the sha...

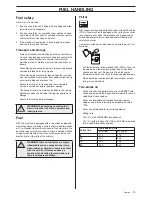
Page 13: ...n mixing small amounts of fuel even small inaccuracies can drastically affect the ratio of the mixture Petrol NB Always use a quality petrol oil mixture at least 90 octane RON If your machine is equip...

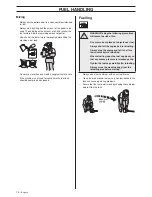
Page 14: ...ed Fuelling Always use a fuel container with an anti spill valve Clean the area around the fuel cap Contamination in the tank can cause operating problems Ensure that the fuel is well mixed by shaking...

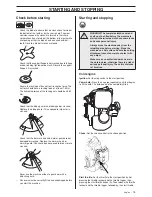
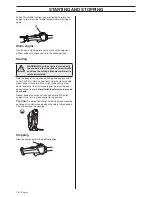
Page 15: ...o impact or are cracked Never use the machine without a guard nor with a defective guard All covers must be correctly fitted and undamaged before you start the machine Starting and stopping Cold engin...

Page 16: ...with your right hand until you feel some resistance the starter pawls grip now quickly and powerfully pull the cord Never twist the starter cord around your hand Repeat pulling the cord until the eng...

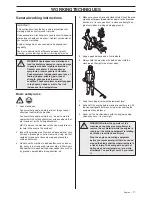
Page 17: ...it the transport guard before carrying or transporting the equipment any distance 9 Never put the machine down with the engine running unless you have it in clear sight IMPORTANT This section describe...

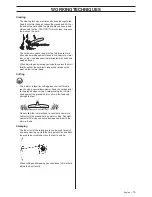
Page 18: ...pace Never press the cord into the area to be cut The cord can easily remove grass and weeds up against walls fences trees and borders however it can also damage sensitive bark on trees and bushes an...

Page 19: ...cord lasts longer and to reduce the wear on the trimmer head Cutting The trimmer is ideal for cutting grass that is difficult to reach using a normal lawn mower Keep the cord parallel to the ground w...

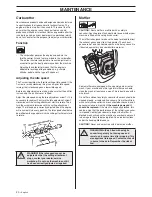
Page 20: ...ed should also be well below the speed at which the cutting attachment starts to rotate Muffler CAUTION Some mufflers are fitted with a catalytic converter See chapter on Technical data to see whether...

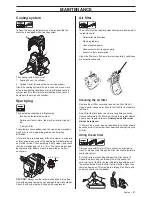
Page 21: ...that the spark plug is fitted with a suppressor Air filter The air filter must be regularly cleaned to remove dust and dirt in order to avoid Carburettor malfunctions Starting problems Loss of engine...

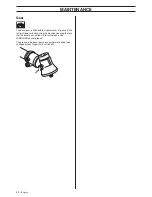
Page 22: ...ght amount of grease at the factory However before using the machine you should check that the bevel gear is filled 3 4 full with grease Use JONSERED special grease The grease in the bevel gear does n...

Page 23: ...could result in damage to the machine X Check that the trimmer head is undamaged and not cracked Replace the trimmer head if necessary X Check that the locking nut of the cutting equipment is tighten...

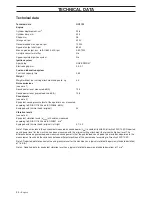
Page 24: ...deviation of 1 m s2 Technical data GC2123 Engine Cylinder displacement cm3 22 8 Cylinder bore mm 32 2 Stroke mm 28 Idle speed rpm 3000 Recommended max speed rpm 10900 Speed of output shaft rpm 8030 M...

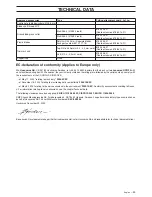
Page 25: ...00 2 2003 CISPR 12 2007 EN ISO 11806 2008 SMP Svensk Maskinprovning AB Fyrisborgsgatan 3 SE 754 50 Uppsala Sweden has performed voluntary type examination on behalf of Husqvarna AB The certificates ar...

Page 26: ......

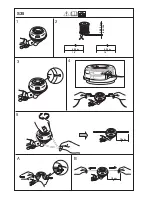
Page 27: ...1 Poly Trim 2 3 4 5 6 7 8 20mm 20mm B A 6 Nm X 10...

Page 28: ...Clic 1 2 3 5 6 7 10 11 8 5 m 28 4 8 4 2 m 14 2 4 2 7 mm 095 106 10 cm 4 6 15 cm S35...

Page 29: ...1 2 4 3 2 4 2 7 mm 095 106 4 25 m 14 4 25 m 14 B 6 15 cm A 6 15 cm S35 5...

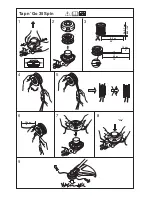
Page 30: ...Tap n Go 35 Spin Clic 1 2 3 5 6 7 9 8 5 m 28 4 8 4 3 m 14 2 4 2 7 mm 095 106 10 cm 4 6 15 cm...

Page 31: ......

Page 32: ...z TkJ 6g 2010 02 23 z TkJ 6g 1152754 26 Original instructions...

Reviews: