24
– English
STARTING AND STOPPING
NOTE! The first time the sawmill is started or
when it has been moved to another power
outlet:
•
Test start the sawmill in accordance with
the starting instructions.
•
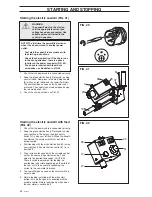
Check the chain direction. If the chain runs
in the wrong direction, there is a phase
inverter on the power connector (FIG. 40).
The phase is inverted with the aid of a
screwdriver, as illustrated in FIG. 40.
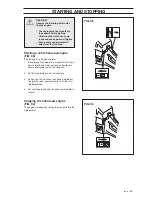
WARNING
The sawmill must not be started
until the appropriate current and
voltage have been connected. Use
suitable personnel trained in the
country in question.
Starting the electric sawmill (FIG. 41)
FIG. 40
FIG. 41
!
1.
Check that the power cable is connected correctly.
2.
Keep the green start button (29) pressed in using
your left hand. Now press in the start/stop handle
(B) with your right hand and the sawmill will start.
The sawmill stops as soon as the handle is not
activated. The sawmill can also be stopped using
the red stop button (32).
3.
Check the chain direction, see FIG. 29.
FIG. 42
37
29
27
31
30
A
27
16
29
32
37
B
Starting the electric sawmill with feed
(FIG. 42)
1.
Check that the power cable is connected correctly.
2.
Keep the green start button (29) pressed in using
your right hand. Then press the black safety
switch (37) using your left hand. When the sawmill
has started, the safety switch must be held in
during sawing.
3.
Start feeding with the white start button (30) using
your right hand. Ensure that the control (31) is in
position ”0”.
4.
Then increase the speed with the variable control
so that the saw carriage starts moving. Then
adjust to the desired feed speed. CAUTION!
There is variable adjustment for feeding, so
overloading is possible depending on the width of
the saw cut. In the event of overloading, the
current to the saw motor is broken.
5.
The sawmill stops as soon as the safety switch is
not activated.
6.
Return feeding is started with the white start
button (30) and the speed is controlled with the
variable control. Return feeding only starts when
the saw motor is switched off.
Summary of Contents for SM 2055 E
Page 35: ......
Page 36: ...2003W50 z x 6 108 89 11 26 ...


