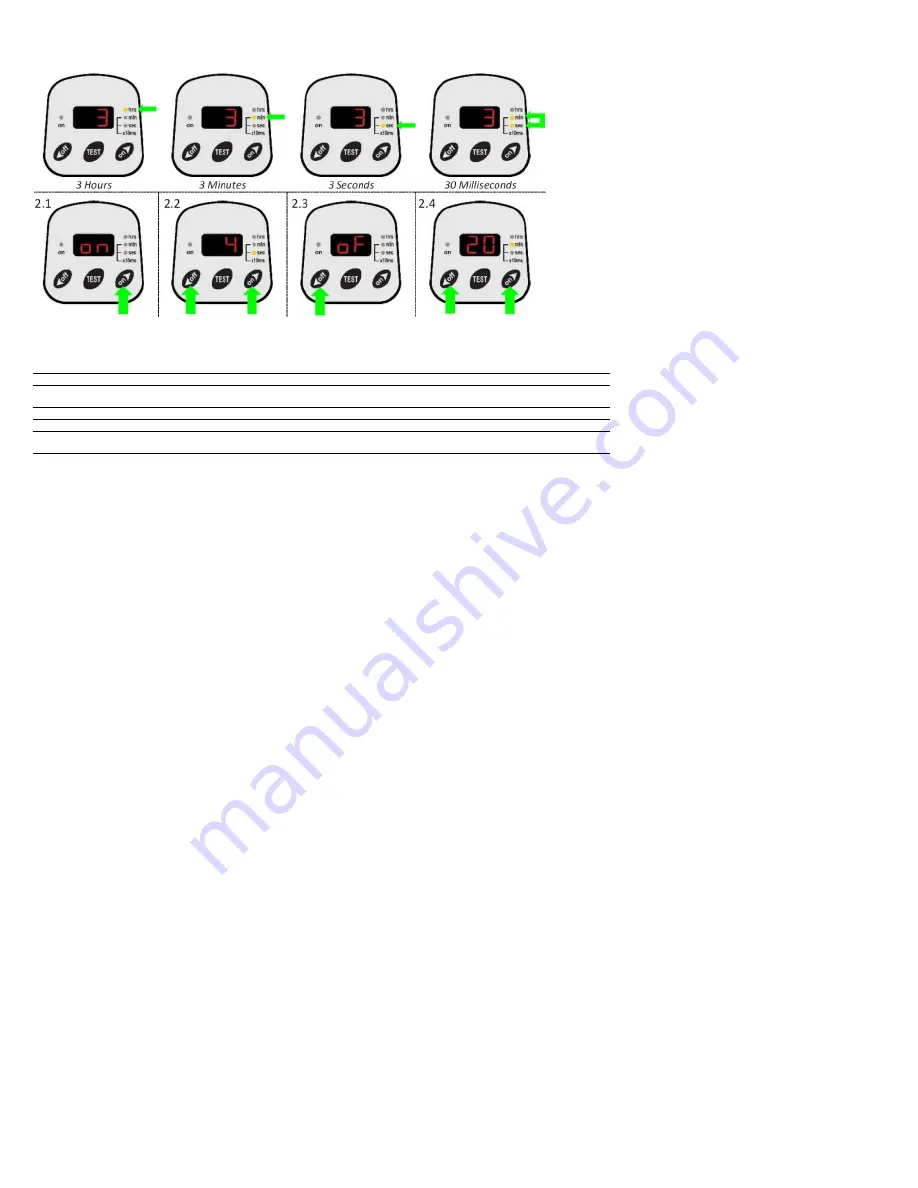
TIME SETTING OPTIONS
The ON and OFF time of the timer can be programmed anywhere between 10ms and 99h.
The set time will be indicated by the LED display.
TIME SETTING OPTIONS
2.1 To change the ON time, press the right ‘on/arrow up’ button and ‘ON’ will appear briefly on the display.
2.2 You can now press the left ‘off/arrow down’ button for decreasing the time or the right ‘on/arrow up’ button to increase the time.
2.3 When the desired ON time is set, don’t press any buttons. After a few seconds the display will start flashing, indicating that the new time is being saved.
Once the new time is saved, the timer will start operating with the new time setting.
2.4 To change the OFF time, press the left ‘off/arrow down’ button and ‘OF’ will appear briefly on the display.
2.5 You can now press the left ‘off/arrow down’ button for decreasing the time or the right ‘on/arrow up’ button to increase the time.
2.6 When the desired OFF time is set, don’t press any buttons. After a few seconds the display will start flashing, indicating that the new time is being saved.
Once the new time is saved, the timer will start operating with the new time setting.
2.7 The timer is now fully programmed to your desired time settings and will work fully automatically.
CHANGING THE TIMER FUNCTION
Function ‘A’ - start with the ON time and then the OFF time, etc.
Function ‘C’ - start with the OFF time and then the ON time, etc.
Function ’B’ - single shot, starts with the ON time and then switches OFF indefinite.
Function ‘D’ - single shot, starts with the OFF time and then switches ON indefinite.
Function ‘E’ - start with ON time then OFF time and then switches ON indefinite.
Function ‘F’ - start with OFF time then ON time and then switches OFF indefinite.
The timer is factory set to function 'A'. Follow these steps to change the timer function:
1. Disconnect the unit from the power supply.
2. Press and hold down the ‘TEST’ button and connect the unit to the power supply.
3. Release the ‘TEST’ button after the current timer function appears on the display (A/ B/ C/ D/ E or F).
4. Use ‘off/arrow down’ and ‘on/arrow up’ buttons to select the function (A/ B/ C/ D/ E or F).
5. When the function is selected do not press anything, after a few seconds the unit will resume operation with the new function
setting.
6. Change the pre-set ON and/or OFF times if required.
RETURNING TO THE FACTORY SETTINGS
Factory settings of the timer: 3 seconds ON time, 30 minutes OFF time, function ‘A’.
No matter how you change the settings you can always reset all settings to factory settings.
To do so please follow these easy steps:
1. Disconnect the unit from the power supply.
2. Press and hold down ‘off/arrow down’ and ‘TEST’ buttons, connect the unit to the power supply.
3. Release the buttons after 'P' appears on the display.
4. When 'A' appears on the display, do not press anything.
5. After a few seconds the unit will resume operation with factory settings.


