


26
130112_Rev 2 GF 160 DV 1/22
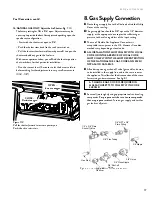
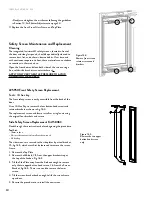
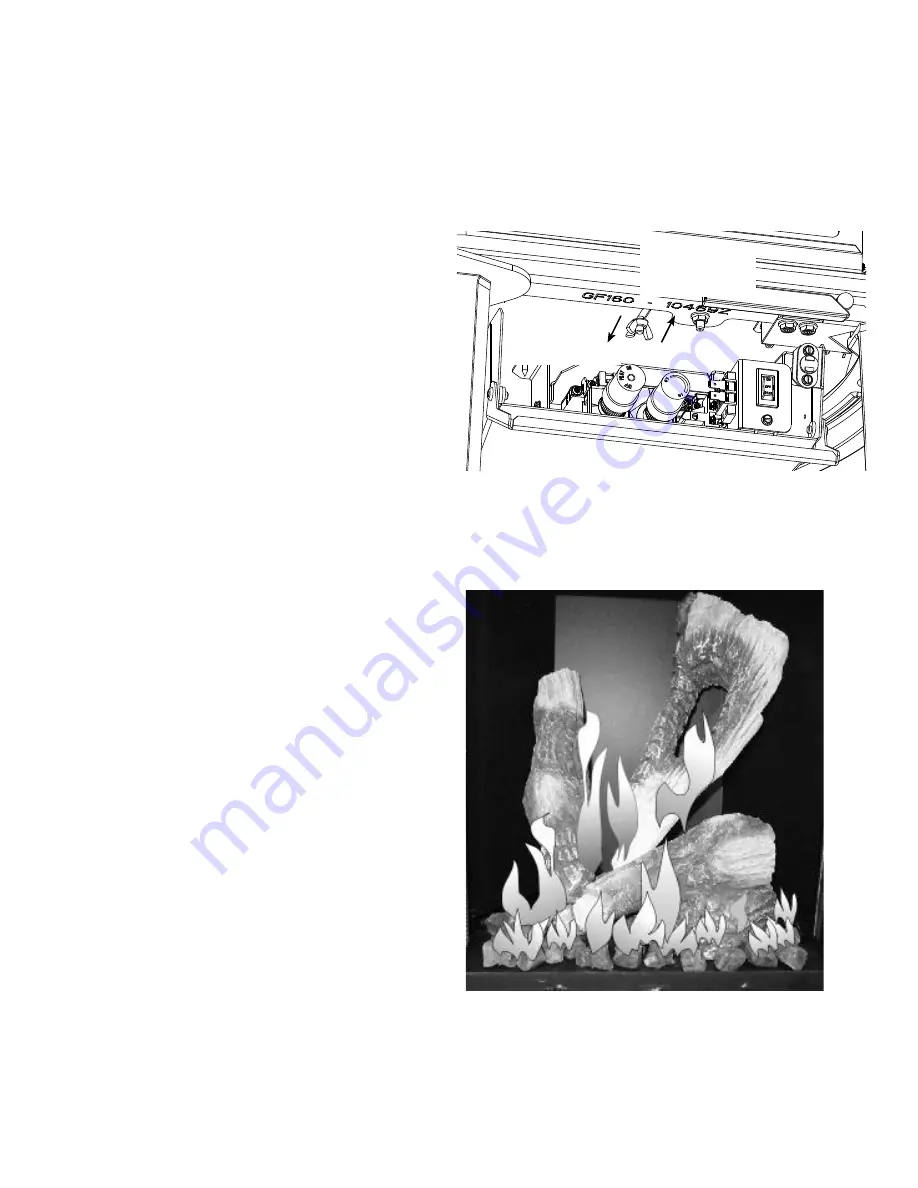
To adjust the air shutter:
1. Open the Controls Access Door and loosen the wing nut
shown in fig. 14.1. Slide the wing nut stud forward toward
yourself to open the air shutter and back to provide less air.
Before making any adjustments, start at the mid-point of the
total range of adjustment.
2. Allow the stove to burn for 20-30 minutes on the HIGH
setting, observing the flame continuously. If the flame
appears weak, slow, or sooty, increase the air shutter opening
in 1/16” - 1/8” increments until the desired flame picture is
achieved. Allow the flames a few minutes to “settle-in” after
each adjustment.
3. Tighten the wing nut to secure the shutter at the desired
setting.
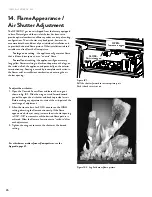
14. Flame Appearance /
Air Shutter Adjustment
The GF 160 DV gas stove is shipped from the factory equipped
to burn Natural gas and the air inlet shutter has been set to
provide optimal combustion efficiency under a variety of venting
configurations. The air shutter may be adjusted, however, to
accommodate the conditions of your individual installation and
to provide the desired flame picture. Other installation-related
variables can also affect the flame picture:
Too large an air setting
- the appliance will generate a flame
that is blue and transparent, or an “anemic” flame.
Too small an air setting
- the appliance will generate very
long yellow flames resulting in black soot deposits on the logs, on
the inside walls of the appliance, and potentially on the exterior
termination cap. Sooting is caused by incomplete combustion in
the flames and/ or insufficient combustion air entering the air
shutter opening.
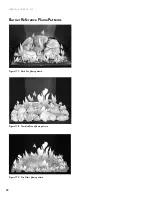
Figure 14.2. Log Set burner flame picture.
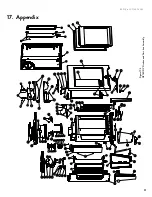
For other burner media reference flame patterns, see the
Appendix, page 41.
Figure 14.1.
Pull the shutter forward to increase primary air.
Push it back to restrict air.
CLOSE -
Restrict oxygen
OPEN -
Increase oxygen


