22
Locating the Unit
Step 2 – Install the AC Branch Circuit Junction Box
Risk of Electrical Shock.
• Be aware that installation of this equipment includes risk of electric shock. Do not
install the AC junction box without first removing AC power from the Enphase Sys-
tem.
• Use electrical system components approved for wet locations only.
• When stripping off the Engage Cable sheath, make sure that the conductors are not
damaged.
• Loose cables might become a tripping hazard. Dress the Engage Cable to minimize
this potential.
• Do NOT exceed the 17 Microinverters in an single phase AC branch circuit, and
protect each Microinverter AC branch circuit with a 20 A maximum breaker (or in
accordance with local installation code).
• Size the AC cable/wire size to account for voltage drop. Select conductor diameter
based on the distance from the beginning of the Microinverter AC branch circuit to
the breaker in the AC mains.
• All components of system wiring must be considered, including internal voltage
drop within the length of Engage Cable. Typically, three wire sections and several
wire terminations must be quantified. There is also some resistance associated
with each circuit breaker. As all of these resistances are in series, they add together.
Since the same current is flowing through each resistance, the total voltage drop is
total current times the total resistance.
• For a single-phase system, the total resistance is equal to two times the one-way
resistance. For a three-phase system, each of the three line currents and resist-
ances must be calculated.
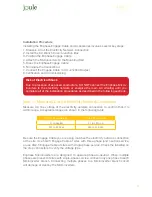
Standard guidelines for voltage drop on feeder and AC branch circuit conductors might
not be sufficient for Microinverter AC branch circuits that contain the maximum allowable
Microinverters. This is due to high inherent voltage rise on the AC branch circuit.
• Install an outdoor rated, weather-proof AC junction box at a suitable location on the
mounting rail (typically at the end of a row of PV modules).
• Provide an AC connection from the AC junction box back to the electrical utility
connection, using equipment and practice as required by local standards.
• Enphase Microinverters are designed to operate phase-to-neutral. When multi-
ple phases are present at sites with single phase 230V service, connect only one
phase to each Microinverter branch. Connecting multiple phases to a Microinverter
branch circuit will damage or destroy the Microinverters.
Step 3 – Position the Enphase Engage Cable
Electrical Installation
Summary of Contents for Pulsa PV
Page 1: ...PULSA PV joule pulsa pv solar high performance ac solar module installation guide...
Page 2: ......
Page 4: ......
Page 10: ...Maximising Performance 10 Locating the Unit...
Page 11: ...Transportation and Installation Notes 11 PULSA PV installation manual...
Page 15: ...15 PULSA PV installation manual...
Page 29: ...29 PULSA PV installation manual...
Page 32: ...32 Locating the Unit Electrical Installation Microinverter Technical Specification...
Page 33: ...33 PULSA PV installation manual...
Page 42: ......
Page 43: ......


