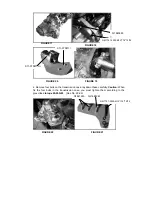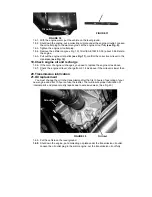
3. Remove upper steel cushions and lower steel cushion. (See Fig. 26-27)
4. Insert a spine-shaft into the hole of the Clutch assy , remove the six bolts on the Clutch
pressure plate, now It’s clear.
Caution
: When fix the six bolts in the Clutch pressure plate;
you must tighten them according to the prescribed
torque 28 N.M
. (
See Fig. 28-32
)
S11-17001031
372-10020301
S11-1601020CA
S11-1601030CA
Spline-shaft
FIGURE 26
FIGURE 25
FIGURE 24
FIGURE 23
FIGURE 28
FIGURE 27
Summary of Contents for JNSZ1100SVB
Page 6: ...Warranty policy...
Page 7: ......
Page 8: ......
Page 9: ......
Page 10: ......
Page 11: ......
Page 12: ......
Page 13: ......
Page 14: ......
Page 15: ......
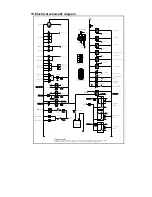
Page 41: ...13 ENGINE WIRING DIAGRAM...
Page 96: ...95 46 ELECTRIC INJECTION SYSTE...
Page 97: ...96...
Page 98: ...97...
Page 99: ...98...
Page 100: ...99...
Page 101: ...100...
Page 102: ...101...
Page 103: ...102...
Page 104: ...103...
Page 105: ...104...
Page 106: ...105...
Page 107: ...106...
Page 108: ...107...
Page 109: ...108...
Page 110: ...109...
Page 111: ...110...
Page 112: ...111...
Page 113: ...112...
Page 114: ...113...
Page 115: ...114...
Page 116: ...115...
Page 117: ...116...
Page 118: ...117...
Page 119: ...118...
Page 120: ...119...
Page 121: ...120...
Page 122: ...121...
Page 123: ...122...
Page 124: ...123...
Page 125: ...124...
Page 126: ...125...
Page 127: ...126...
Page 128: ...127...
Page 129: ...128...
Page 130: ...129...
Page 131: ...130...
Page 132: ...131...
Page 133: ...132...
Page 134: ...133...
Page 135: ...134...
Page 136: ...135...
Page 137: ...136...
Page 138: ...137...
Page 218: ...217 4 Attach tie rod and front wheel...
Page 225: ...224 DEALER PRE DELIVERY INSPECTION...


