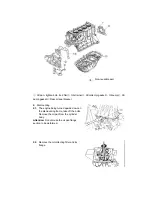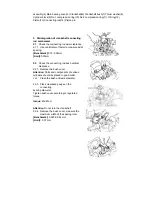
the pump body
[Benchmark]
0.10-0.181mm
[Limit]
0.25mm
4.3.2. Routine checks on the pressure
relief valve
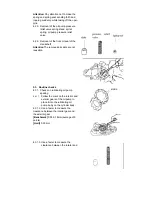
4.3.2.1. Remove the pressure relief valve,
there should be no visible tears,
wears and scrapes on the
pressure relief valve
4.4. Installation
4.4.1.
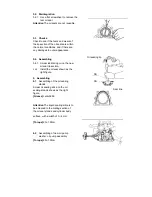
After smearing lubricating oil on the
lips of the new T-shaped oil seals,
use SST to make the assembly.
Attention
·
Use new oil seal..
·
The exposed part of the outer edge of the
oil seal after being pressed in should be
less than 0.5mm.
4.4.2. Assembling of the oil pump
pressure relief valve and split pins
Attention
The split pins are not reusable.
Summary of Contents for JNSZ1100SVB
Page 6: ...Warranty policy...
Page 7: ......
Page 8: ......
Page 9: ......
Page 10: ......
Page 11: ......
Page 12: ......
Page 13: ......
Page 14: ......
Page 15: ......
Page 41: ...13 ENGINE WIRING DIAGRAM...
Page 96: ...95 46 ELECTRIC INJECTION SYSTE...
Page 97: ...96...
Page 98: ...97...
Page 99: ...98...
Page 100: ...99...
Page 101: ...100...
Page 102: ...101...
Page 103: ...102...
Page 104: ...103...
Page 105: ...104...
Page 106: ...105...
Page 107: ...106...
Page 108: ...107...
Page 109: ...108...
Page 110: ...109...
Page 111: ...110...
Page 112: ...111...
Page 113: ...112...
Page 114: ...113...
Page 115: ...114...
Page 116: ...115...
Page 117: ...116...
Page 118: ...117...
Page 119: ...118...
Page 120: ...119...
Page 121: ...120...
Page 122: ...121...
Page 123: ...122...
Page 124: ...123...
Page 125: ...124...
Page 126: ...125...
Page 127: ...126...
Page 128: ...127...
Page 129: ...128...
Page 130: ...129...
Page 131: ...130...
Page 132: ...131...
Page 133: ...132...
Page 134: ...133...
Page 135: ...134...
Page 136: ...135...
Page 137: ...136...
Page 138: ...137...
Page 218: ...217 4 Attach tie rod and front wheel...
Page 225: ...224 DEALER PRE DELIVERY INSPECTION...


